IMAGE GALLERY - FIVE VERSIONS
Resources:
Version one of the image gallery is with the JavaScript embedding in the head element and it plays automatically. There is no navigation links and no CSS.
- Create a blank HTML page with a title element of Image Gallery - Beginner.
<!doctype html>
<html>
<head>
<meta charset="utf-8">
<title>Image Gallery - Beginner</title>
</head>
<body>
</body>
</html> - Add the following div and img element between the body tags.
<body>
<div>
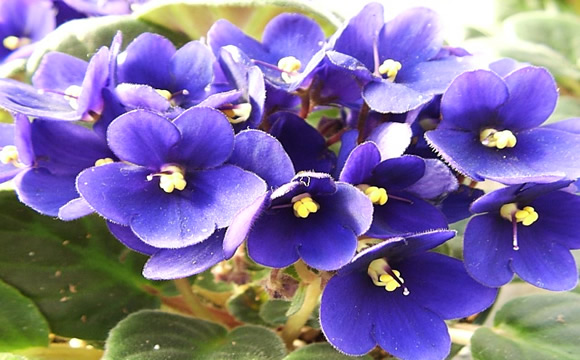
<img src="images/flowers/african_violets - Large.jpg" name="slideshow" alt=""/>
</div>
</body> - CHECK POINT: Save the file and preview it in a browser. You should see that the first image is HARD-WIRED into the page.
- Add the following JavaScript below the title element within a script element
<title>Image Gallery - Beginner</title>
NOTE: This is an array that have references to TEN flower images in the images/flowers folder.
<script>
var imageArray = new Array (
"images/flowers/african_violets - Large.jpg",
"images/flowers/Bird_Of_Paradise - Large.jpg",
"images/flowers/daffodils - Large.jpg",
"images/flowers/daisy flowers - Large.jpg",
"images/flowers/iris flowers - Large.jpg",
"images/flowers/lily flowers - Large.jpg",
"images/flowers/Lotus Flower - Large.jpg",
"images/flowers/rose-flower - Large.jpg",
"images/flowers/sun_flowers - Large.jpg",
"images/flowers/tulip flowers - Large.jpg"
);
</script> - Add the following code above the script element to see if the array is written correctly.
alert(imageArray);
</script> - CHECK POINT: Save the file and preview it in a browser. You should see that an alert dialog box pops up showing the whole array. However, it is difficult to read.

- Comment out the alert and then add the following code:
// alert(imageArray);
console.log(imageArray);
</script> - CHECK POINT: Save the file, preview it in a browser, press the F12 key, and than select the Console tab. Click the small triangle to expand the array. Notice that the console gives you a better view of the array as well as shows the array index values and the number of element in the array (10).
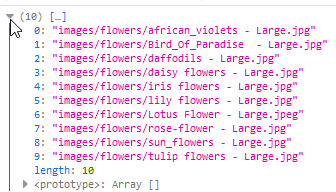
- CHECK POINT: Optionally, while still in the Console tab, type the following code (imageArray[2]) to get the index of third element in the array. You should see that that it returns the third element in the array (images/flowers/daffodils - Large.jpg). Close the browser and return to Dreamweaver.

- Comment out the console.log code and add the following three variables and comment.
// alert(imageArray);
NOTE: Variables are usually placed at the top of the code.
// console.log(imageArray);
var imageIndex = 0;
var numberOfImages = imageArray.length-1;
// Time delay between slides (milliseconds)
var delay = 3000;
</script>
- The imageIndex variable is used to set the initial Image Index value
- The numberOfImages variable is set to the total number of element in the array minus one.
- The delay variable is use to set the delay time in milliseconds (3000ms is 3 seconds)
- Add the following main function code and the timer code.
// Main function ------------
NOTE: The updateImage() function is used to check if an image exist in the document, index the imageIndex variable by 1, and then update the src attribute of the img element with an id of slideshow. The timer is used to run the updateImage() function every three seconds.
function updateImage() {
if (document.images) {
imageIndex++;
document.slideshow.src = imageArray[imageIndex];
}
}
//Timer --------------
setInterval("updateImage()", delay);
</script>
- CHECK POINT: Save the file and preview it in a browser. You should see that all ten images are displayed every three seconds and then the screen goes blank. This will be resolved in the next step.
- Nest the following "if" statement within the first "if" statement.
// Main function ------------
NOTE: This "if" statement checks to see if the imageIndex variable is greater than the total number of images and if so set the imageIndex to zero to start the slideshow over again.
function updateImage() {
if (document.images) {
imageIndex++;
if (imageIndex > numberOfImages) {
imageIndex = 0;
}
document.slideshow.src = imageArray[imageIndex];
}
}
//Timer --------------
setInterval("updateImage()", delay);
</script> - CHECK POINT: Save the file and then preview the page in the browser. You should see that when it reaches the last image (Tulip flower) the slideshow start over from the first image (African violent). This is because the "if" statement check to see if the last images was displayed and if so set the imageIndex back to zero so that the first image can be displayed again.
Version two of the image gallery is similar to the beginner version except navigation links (next, play/pause/ and previous) have been added with the necessary JavaScript code.
View ImageGallery_intermediate
- Create a blank HTML page with a title element of Image Gallery - Intermediate.
<!doctype html>
<html>
<head>
<meta charset="utf-8">
<title>Image Gallery - Intermediate</title>
</head>
<body>
</body>
</html> - Add the following div, img, and a elements between the body tags.
<body>
NOTE: Notice that the three links have an onclick event handler that are assigned to three functions.
<div>
<img src="images/flowers/african_violets - Large.jpg" name="slideshow" alt=""/>
</div>
<div>
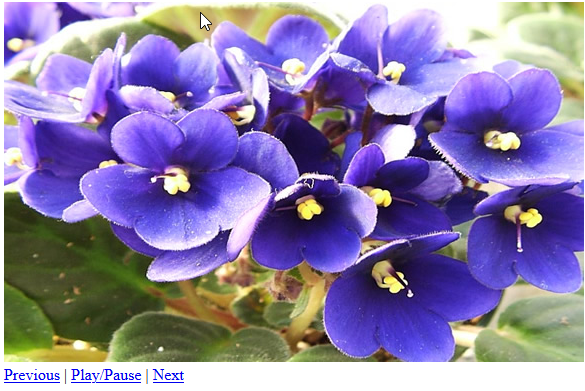
<a href="#" onclick="updateImage(-1)">Previous</a> |
<a href="#" onclick="playSlides()">Play/Pause</a> |
<a href="#" onclick="updateImage(1)">Next</a>
</div>
</body>
- CHECK POINT: Save the file and preview it in a browser. You should see that the first image is HARD-WIRED into the page. Also, notice there are three links at the bottom of the image.
- Add the following JavaScript BELOW the title element within a script element.
<title>Image Gallery - Intermedia</title>
NOTE: This is an array that have references to TEN flower images in the images/flowers folder.
<script>
var imageArray = new Array (
"images/flowers/african_violets - Large.jpg",
"images/flowers/Bird_Of_Paradise - Large.jpg",
"images/flowers/daffodils - Large.jpg",
"images/flowers/daisy flowers - Large.jpg",
"images/flowers/iris flowers - Large.jpg",
"images/flowers/lily flowers - Large.jpg",
"images/flowers/Lotus Flower - Large.jpg",
"images/flowers/rose-flower - Large.jpg",
"images/flowers/sun_flowers - Large.jpg",
"images/flowers/tulip flowers - Large.jpg"
);
</script> - Add the following variables and comments ABOVE the closing scrpt tag.
// Variables -----------------------------------
NOTE: Variables are usually placed at the top of the code.
var imageIndex = 0;
var numberOfImages = imageArray.length - 1;
var direction = 0;
var pause = false;
var play;
// Time delay between slides (milliseconds)
var delay = 3000;
</script>
- The imageIndex variable is used to set the initial imageIndex variable value.
- The numberOfImages variable is set to the total number of element in the array minus one.
- The direction variable is used to set which direction the slide will move.
- The pause variable will toggle the slideshow on and off.
- The play variable will play the slideshow.
- The delay variable is used to set the delay time in milliseconds (3000ms is 3s)
- Add the following two main functions and comments.
// Update Image Function -------------------------
NOTE: The updateImage() function is used to see if an image exist in the document, index the imageIndex variable by 1 and then update the src property of the img element with an id of slideshow. The timer is used to run the updateImage() function every three seconds.
function updateImage(direction) {
if (document.images) {
imageIndex = imageIndex + direction;
if (imageIndex > numberOfImages) {
imageIndex = 0;
}
if (imageIndex < 0) {
imageIndex = numberOfImages;
}
document.slideshow.src = imageArray[imageIndex];
}
}
// playSlides Function ---------------------------
function playSlides() {
if (pause == true) {
pause = false;
window.clearInterval(play);
}
else if (pause == false) {
pause = true;
play = setInterval("updateImage(1)", delay);
}
}
</script>
NOTE: The playSlides() function is used to toggle the play/pause functionality. - CHECK POINT: Save the file and preview it in a browser. Click the Play/Pause button. You should see that all ten images are displayed every three seconds and then the screen goes blank. If you click the Pause link the slideshow will stop. If you click the Previous or Next link it will go the the previous or next slide, respectively. Notice if you try to go pass the last image it wraps back to the first slide. If you try to go pass the first image it wraps back to the last slide.
There are two versions of the advanced Image Gallery. One with and array of objects and the other with two arrays. This one uses an Array of Objects.
View ImageGallery_advanced (With An Array of Objects)
- Create a blank HTML page with a title element of Image Gallery - Advanced Using An Array of Objects.
<!doctype html>
<html>
<head>
<meta charset="utf-8">
<title>Image Gallery - Advanced Using An Array of Objects</title>
</head>
<body>
</body>
</html> - Add the following code between the body tags.
<body>
NOTE: Notice that the three lines in the script element uses the getElementById method to ascertain the name of the three buttons to change their value.
<div id="gallery_container">
<img id="slideImage" src=" " alt=" " name="slideshow" width="580" height="360">
<p id = "captionName">...</p>
<p id = "pageStatus">...</p>
<button id="playPauseButton" href="#" onClick="playSlides()">Play</button>
<a id="previousPhotoButton" href="#" onClick="updateImage(-1)"><img src="previous_button.png" width="40" height="40" alt=""/></a>
<a id="nextPhotoButton" href="#" onClick="updateImage(1)"><img src="next_button.png" width="40" height="40" alt=""/></a>
</div>
<script>
// Set up first slide based on array of objects ----------------------------------
document.getElementById("slideImage").src = imageArray[0].FlowerImageName;
document.getElementById("captionName").innerHTML = imageArray[0].FlowerCaption;
document.getElementById("pageStatus").innerHTML = "Photo 1 of " + imageArray.length;
</script>>
</body>
- Add the following CSS below the title element:
<title>Image Gallery - Advanced Using An Arry of Objects</title> <style>
body{
font-family:Arial, Helvetica, sans-serif;
font-weight:bold;
}
#gallery_container{
margin: 0 auto;
width:580px;
height:360px;
text-align: center;
border: 8px double gray;
}
#previousPhotoButton {
width: 40px;
height: 40px;
position: relative;
left: -250px;
top: -290px;
}
#nextPhotoButton{
width: 40px;
height: 40px;
position: relative;
left: 200px;
top: -290px;
}
#playPauseButton{
text-align:center;
margin: 0 auto;
position: relative;
left:40px
} </style> - Add the following JavaScript BELOW the closing </style> tag.
</style>
NOTE: This is an ARRAY OF OBJECTS.
<script>
// Create an array of objects with properties =========================================================
var imageArray = [
{FlowerImageName:"images/flowers/african_violets - Large.jpg", FlowerCaption:"African Violets text goes here..."},
{FlowerImageName:"images/flowers/Bird_Of_Paradise - Large.jpg", FlowerCaption:"Bird Of Paradise text goes here..."},
{FlowerImageName:"images/flowers/daffodils - Large.jpg", FlowerCaption:"Daffodils text goes here..."},
{FlowerImageName:"images/flowers/daisy flowers - Large.jpg", FlowerCaption:"Daisy flowers text goes here..."},
{FlowerImageName:"images/flowers/iris flowers - Large.jpg", FlowerCaption:"Iris flowers text goes here..."},
{FlowerImageName:"images/flowers/lily flowers - Large.jpg", FlowerCaption:"Lily flowers text goes here..."},
{FlowerImageName:"images/flowers/Lotus Flower - Large.jpg", FlowerCaption:"Lotus flower text goes here..."},
{FlowerImageName:"images/flowers/rose-flower - Large.jpg", FlowerCaption:"Rose flower text goes here..."},
{FlowerImageName:"images/flowers/sun_flowers - Large.jpg", FlowerCaption:"Sun flowers text goes here..."},
{FlowerImageName:"images/flowers/tulip flowers - Large.jpg", FlowerCaption:"Tulip flowers text goes here..."}
];
</script> - Add the following variables and comments ABOVE the closing </script> tag:
// Time delay between slides (milliseconds)
NOTE: Variables are usually set at the top of the code.
var delay = 3000;
// Update image -------------------------------------------------
var imageIndex = 0;
var numberOfImages = imageArray.length - 1;
var firstImageName = imageArray[9].FlowerImageName;
</script>
- The delay variable is use to set the delay time in milliseconds (3000ms is 3 s)
- The imageIndex variable is used to set the initial imageIndex variable value
- The numberOfImages variable is set to the total number of element in the array minus one
- The firstImageName variable is used to set the first image name as the variabe name implies.
- Add the following two main functions and comments ABOVE the closing </script> tag.
// update Image Function --------------------------------------
NOTE: The updateImage() function is used to see if an image exist in the document, index the imageIndex variable by 1 and then update the src property of the img element with an id of slideshow. The timer is used to run the updateImage() function every three seconds.
function updateImage(direction) {
if (document.images) {
imageIndex = imageIndex + direction;
if (imageIndex > numberOfImages) {
imageIndex = 0;
}
if (imageIndex < 0) {
imageIndex = numberOfImages;
}
document.slideImage.src = imageArray[imageIndex].FlowerImageName;
document.getElementById("captionName").innerHTML = imageArray[imageIndex].FlowerCaption;
document.getElementById("pageStatus").innerHTML = "Photo " + (imageIndex+1) + " of " + imageArray.length;
}
}
// Play / Pause Slides ----------------------------------------
var play;
var pause = false; // This is called a flag
// Time delay between slides (milliseconds)
var delay = 3000;
function playSlides() {
// You could have used "!pause" instead of "pause == false"
if (pause == false)
{
pause = true;
play = setInterval("updateImage(1)", delay);
document.getElementById("playPauseButton").innerHTML = "Pause";
}
else if (pause == true)
{
// You could have simple used "pause" instead of "pause == true"
pause = false;
window.clearInterval(play);
document.getElementById("playPauseButton").innerHTML = "Play";
}
}
</script>
NOTE: The playSlides() function is used to toggle the play/pause functionality.
- CHECK POINT: Save the file and preview it in a browser. Click the Play/Pause button. You should see that all ten images are displayed every three seconds. If you click on the Pause button the slideshow will stop. If you click the previous and next button it will go the the previous or next slide. Notice also that when you go to last image it wraps back to the first slide. if you are on the first slide and then click the previous button, it will go to the last slide.
There are two versions of the advanced Image Gallery. One with and array of objects and the other with two arrays. This one uses two arrays.
View ImageGallery_advanced (With Two Arrays)
- Create a blank HTML page with a title element of Image Gallery - Advanced Using Two Arrays
<!doctype html>
<html>
<head>
<meta charset="utf-8">
<title>Image Gallery - Advanced Using Two Arrays</title>
</head>
<body>
</body>
</html> - Add the following code between the body tags.
<body>
NOTE: Notice that the three lines in the script element uses the getElementById method to ascertain the name of the three buttons to change their value.
<div id="gallery_container">
<img id="slideImage" src=" " alt=" " name="slideshow" width="580" height="360">
<p id = "captionName">...</p>
<p id= "pageStatus">...</p>
<button id="playPauseButton" href="#" onClick="playSlides()">Play</button>
<a id="previousPhotoButton" href="#" onClick="updateImage(-1)"><img src="previous_button.png" width="40" height="40" alt=""/></a>
<a id="nextPhotoButton" href="#" onClick="updateImage(1)"><img src="next_button.png" width="40" height="40" alt=""/></a>
</div>
<script>
// Set up first slide based on array ----------------------------------
document.getElementById("slideImage").src = imageArray[0];
document.getElementById("captionName").innerHTML = captionArray[0];
document.getElementById("pageStatus").innerHTML = "Photo 1 of " + imageArray.length;
</script>
</body>
- Add the following CSS BELOW the title element:
<title>Image Gallery - Advanced Using Two Arrays</title> <style>
body{
font-family:Arial, Helvetica, sans-serif;
font-weight:bold;
}
#gallery_container{
margin: 0 auto;
width:580px;
height:360px;
text-align: center;
border: 8px double gray;
}
#previousPhotoButton {
width: 40px;
height: 40px;
position: relative;
left: -250px;
top: -290px;
}
#nextPhotoButton{
width: 40px;
height: 40px;
position: relative;
left: 200px;
top: -290px;
}
#playPauseButton{
text-align:center;
margin: 0 auto;
position: relative;
left:40px
} </style> - Add the following JavaScript below the closing </style> tag
</style>
NAME: This version uses TWO ARRAYS instead of a SINGLE ARRAY OF OBJECTS.
<script>
// Create an array for images --------------------------
imageArray = new Array (
"images/flowers/african_violets - Large.jpg",
"images/flowers/Bird_Of_Paradise - Large.jpg",
"images/flowers/daffodils - Large.jpg",
"images/flowers/daisy flowers - Large.jpg",
"images/flowers/iris flowers - Large.jpg",
"images/flowers/lily flowers - Large.jpg",
"images/flowers/Lotus Flower - Large.jpg",
"images/flowers/rose-flower - Large.jpg",
"images/flowers/sun_flowers - Large.jpg",
"images/flowers/tulip flowers - Large.jpg"
);
// Create an array for captions --------------------------
captionArray = new Array (
"African Violets text goes here...",
"Bird Of Paradise text goes here...",
"Daffodils text goes here...",
"Daisy flowers text goes here...",
"Iris flowers text goes here...",
"Lily flowers text goes here...",
"Lotus flower text goes here...",
"Rose flower text goes here...",
"Sun flowers text goes here...",
"Tulip flowers text goes here..."
);
</script> - Add the following variables and comments ABOVE the closing </script> tag:
// Variables -----------------------------
NOTE: Variables are usually set at the top of the code.
var imageIndex = 0;
var numberOfImages = imageArray.length - 1;
var direction = 0;
var play;
var pause = false; // This is called a flag
// Time delay between slides (milliseconds)
var delay = 3000;
</script>
- The imageIndex variable is used to set the initial value
- The numberOfImages variable is set to the total number of element in the array minus one
- The direction variable is use to set which direction the slide will move
- the pause variable will toggle on and off.
- the play variable will toggle on and off.
- The delay variable is use to set the delay time in milliseconds (3000ms is 3 seconds)
- Add the following two main functions and comments ABOVE the closing </script> tag.
// Update Image Function -------------------
NOTE: The updateImage() function is used to see if an image exist in the document, index the imageIndex variable by 1 and then update the src property of the img element with an id of slideshow. The timer is used to run the updateImage() function every three seconds.
function updateImage(direction) {
if (document.images) {
imageIndex = imageIndex + direction;
if (imageIndex > numberOfImages) {
imageIndex = 0;
}
if (imageIndex < 0) {
imageIndex = numberOfImages;
}
document.slideImage.src = imageArray[imageIndex];
document.getElementById("captionName").innerHTML = captionArray[imageIndex];
document.getElementById("pageStatus").innerHTML = "Photo " + (imageIndex+1) + " of " + imageArray.length;
}
}
// Play / Pause Slides ---------------------------
function playSlides() {
// You could have used "!pause" instead of "pause == false"
if (pause == false)
{
pause = true;
play = setInterval("updateImage(1)", delay);
document.getElementById("playPauseButton").innerHTML = "Pause";
}
else if (pause == true)
// You could have simple used "pause" instead of "pause == true"
{
pause = false;
window.clearInterval(play);
document.getElementById("playPauseButton").innerHTML = "Play";
}
}
</script>
NOTE: The playSlides() function is used to toggle the play/pause functionality.
- CHECK POINT: Save the file and preview it in a browser. The slideshow plays the same as the previous version but it uses two arrays instead of a single array of objects.
This expert version uses third-party CSS files and JavaScript to create an interactive slide show.
Image Gallery Expert
- Download the Resource File and unzip it in a folder (e.g.,, Image Gallery Expert).
- CHECK POINT: Open the ImageGallery_Expert_Starter.html file and preview it. You should see that it is a boring file because there is no CSS applied.
- Add the following highlighted link element to the slideshow.css file.
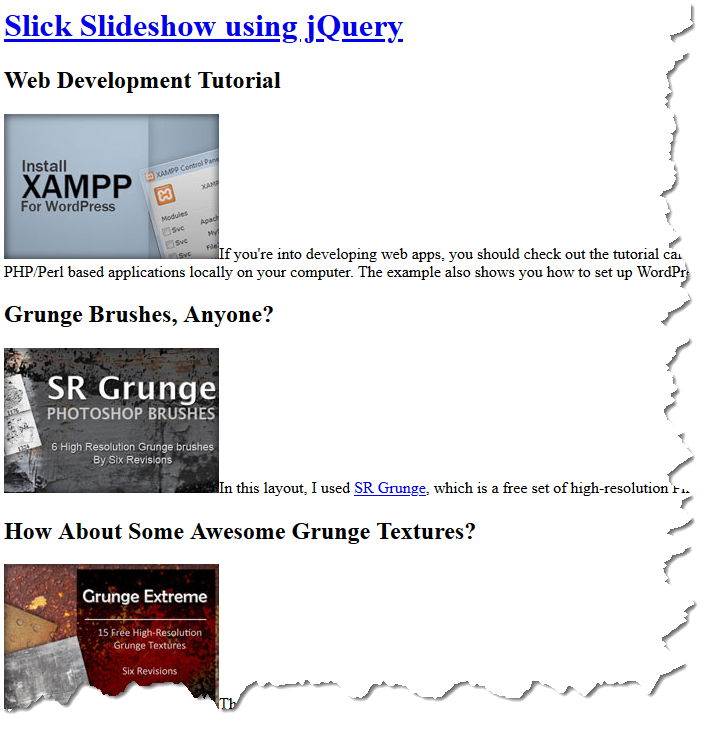
<title>Slick jQuery Sideshow: Demo</title>
<link rel="stylesheet" href="slideshow.css"> - CHECK POINT: Save the file and preview it in a browser. It looks a lot better with some CSS and background images applied. However, it is not interactive because the JavaScript file has not been applied to it yet. Notice how you have to SCROLL VERTICALLY using the SCROLL BAR to see all of the slides. We will add some JavaScript in the next step so that you will be able to navigate the slide from left-to-right or right-to-left with navigation buttons.

- Add the following two highlighted script files ABOVE the closing head tag (e.g., </head>).
<script type="text/javascript"
src="http://ajax.googleapis.com/ajax/libs/jquery/1.3.2/jquery.min.js"></script>
<script src="final.js" type="text/javascript"></script>
</head> - CHECK POINT: Save the file and preview it in a browser. Notice how you can navigate the slide show. with the navigation arrows in either direction.