DATE AND TIME
Instead of using a STATIC DATE for your website or application, it is better to use a DYNAMIC DATE with a little bit of JavaScript. For example, you could include a dynamic year in your copyright notice in your footer so that when another year rolls around, it gets updated automatically (e.g., © 2012-20XX where 20XX gets updated the first of ever year without you having to worry about it or forgetting to update it).
NOTE: This tutorial uses the same JavaScript that will be taught. So if you come back at another time or date, the content will be updated.
DynamicDateStamp_Beginner (FINAL)
- Create a blank HTML page with a title element of Dynamic Date Stamp - Beginner
<!doctype html>
<html>
<head>
<meta charset="utf-8">
<title>Dynamic Date Stamp - Beginner </title>
</head>
<body>
</body>
</html> - Add HTML element (Presentation Layer)
Add the following highlighted div element with an id selector (dataStamp) between the body tags.
NOTE: You can create the div container wherever you want in your web site or app (e.g., header, footer, sidebar).
<body>
<div id="dateStamp">

</div>
</body> - Add JavaScript (Behavior Layer)
Add the following highlighted script element in the div element created in the previous step.
<div id="dateStamp">
NOTE: The today variable has been assigned to the new instance of the Date class using the new constructor keyword. The document.write() method is used to "write" whatever is in the parenthesis (in this case, the date) to the page at the very spot the script is written.
<script>
var today = new Date();
document.write(today);
</script>
</div> - CHECK POINT: Save the file and preview it in a browser. You should see the COMPLETE date object showing the current date, time (military), GMT, etc. We will refine what we get back from the Date Object in the next step. If you click the REFRESH button, you will see the time gets updated.
- ADD the following highlighted period (.) and toDateString() method to the today object.
<div id="dateStamp">
NOTE: The toDateString() method returns the FIRST HALF of the Date Object (today). It is one of many methods available to the Date Object as will be seen in the Intermediate Version.
<script>
var today = new Date();
document.write(today.toDateString());
</script>
</div>
SPECIAL NOTE: When you assign an object to a variable that variable will behave in essence like an object. So you can assign properties or methods to the variable. today is a variable but it was given the method of .toDateString(). - CHECK POINT: Save the file and preview it in a browser. You should now see just the date (the first half of the today object shown above) and not the time, etc.
If you change .toDateString() to .toTimeString(), you will get the SECOND HALF of the today object:
- Add CSS (Style Layer)
Optionally, add whatever CSS style you like to "style" the <div id="dateStamp"> tag ABOVE the closing head tag (</head>).
<style>
	#dateStamp{
	border: 5px solid red;
	padding: 20px;
	display: inline;
	font-family: "Arial";
	font-weight: bold;
	font-size: 36px;
	color: chartreuse;
	background-color: black;
	border-radius: 20px;
	text-align: center;
	margin: 100px;
}
</style>
</head> - CHECK POINT: Save the file and preview it in a browser. You should see the newly styled Date Object:
In version one of the dynamic Date Stamp you are LIMITED to what format the object will give you. Version two is similar to the beginner version except the days of the week and months of the year are formatted better.
NOTE: This tutorial uses the same JavaScript that will be taught. So if you come back at another time or date, the content will be updated.
DynamicDateStamp_Intermediate (FINAL)
- Create a blank HTML page with a title element of Dynamic Date Stamp - Intermediate
<!doctype html>
<html>
<head>
<meta charset="utf-8">
<title>Dynamic Date Stamp - Intermediate</title>
</head>
<body>
</body>
</html> - Add HTML element (Presentation Layer)
Add the following highlighted div element with an id selector (dateStamp) between the body tags.
NOTE: You can create the div container wherever you want in your web site or app (e.g., header, footer, sidebar).
<body>
<div id="dateStamp">

</div>
</body> - Add JavaScript (Behavior Layer)
Add the following highlighted script element in the div element created in the previous step.
<div id="dateStamp">
<script>

</script>
</div> - Add the following JavaScript code between the script tags.
<script>
var today = new Date();
document.write(today);
</script> - CHECK POINT: Save the CSS file and return to the main document and preview it in a browser. You should see the COMPLETE DATE object display.
- Add the following highlighted period (.) and toDateString() method to the today object.
var today = new Date();
NOTE: The .toDateString(); method will return the date portion of the Date Object.
document.write(today.toDateString());
CAUTION: Be careful not to forget to include the parenthesis on the .toDateString() method; otherwise, you will get the following error: function toDateString() { [native code] } - CHECK POINT: Save the file and preview it in a browser. You should now see just the date portion and not the time portion of the Date Object.
- Change totDateString to getMonth
document.write(today.getMonth());
- CHECK POINT: Save the file and preview it in a browser. You should now see just the Month displayed as a number as well. But the number is not useful because it returns the month number one less than the current month. This is because the Date Object is based on an array and remember an array uses a zero-based index. So, January will return 0, February will return 1, March will return 2, etc.
- Change getMonth to getFullYear
document.write(today.getFullYear());
- CHECK POINT: Save the file and preview it in a browser. You should now see just the Year displayed as a number.
- Add the following highlighted variables BELOW the current variable:
var today = new Date();
var dayName = today.getDay();  // DAY of the week - Monday, Tuesday, etc.
var monthName = today.getMonth(); // MONTH of the year - January, February, etc. - Add the following highlighted two arrays above the other variables and change the document write argument to the dayOfWeek array with an index value of dayName.
var dayOfWeek = ["Sunday", "Monday","Tuesday", "Wednesday",
"Thursday", "Friday", "Saturday"];

var month = ["January", "February", "March", "April", "May","June",
"July", "August", "September", "October", "November", "December"];

var today = new Date();
var dayName = today.getDay();  // DAY of the week - Monday, Tuesday, etc.
var monthName = today.getMonth();  // MONTH of the year - January, February, etc.
document.write(dayOfWeek[dayName]); - CHECK POINT: Save the file and preview it in a browser. You should see the current DAY of the week now displayed as text instead of as a number.
- Change dayOfWeek[dayName] to month[monthName]
document.write(month[monthName]);
- CHECK POINT: Save the file and preview it in a browser. You should see the current MONTH now displayed as text instead of as a number.
- Replace the content of the document.write(...); statement with the following highlighted code:
document.write(dayOfWeek[dayName]+ ", " +
month[monthName] + " " + today.getDate() + ", "  + today.getFullYear());
</script>
NOTE: The highlighted code is a series of "strings" that are CONCATENATED TOGETHER::
- Array Strings (e.g., dayOfWeek[dayName] and month[monthName])
- Literal Strings (e.g., ", ", " ", ", ")
- Object Strings (e.g., today.getDate() and today.getFullYear()) - CHECK POINT: Save the file and preview it in a browser. You should see the complete date formatted.
OPTIONAL: Alternatively, you can replace the document.write(...) statement with the following code:
var FormattedDate = dayOfWeek[dayName]
NOTE: Some developers prefer to write code in this manner. Notice the code was assigned to a variable (FormattedDate) and then except for the FIRST LINE, the variable is the same but has "+=" instead of "=" and ends with a semi-colon (;).
FormattedDate += ", ";
FormattedDate += month[monthName];
FormattedDate += " ";
FormattedDate += today.getDate();
FormattedDate += ", ";
FormattedDate += today.getFullYear();
document.write(FormattedDate);
</script> - Add CSS (Style Layer)
Optionally, add whatever CSS style you like to "style" the <div id="dateStamp"> tag ABOVE the closing head tag (</head>).
<style>
font-size: 36px;
font-family: "Arial";
color: #0F0;
background-color: black;
border: 14px groove gray;
padding: 10px;
text-align:center;
margin: 15px;
width: 450px;
</style>
</head> - CHECK POINT: Save the file and preview it in a browser. You should see the newly styled date object:
- Optionally, add the following highlighted code ABOVE the document.write() method.
var day = today.getDay();
var suffix = "th";
if (day==1 || day==21 || day==31) {suffix = "st"};
if (day==2 || day==22) {suffix = "nd"};
if (day==3 || day==23) {suffix = "rd"};

document.write(dayOfWeek[dayName]+ ", " +
month[monthName] + " " + today.getDate() + "<sup>" + suffix + "</sup>" + ", "
+ today.getFullYear());
NOTE: A new variable (day) is create to ascertain the number for the day of the week. Three "if" statements are used to determine what suffix to add to the end of the day and the <sup> element is used to create a superscript.
- CHECK POINT: Save the file and preview it in a browser. You should see the date number has "th", "nd" or "st" as a superscript.
The third version is similar to the Intermediate version. However, the CSS and JavaScript code will be externalize and the script element that was embedded in the body of the page will be move to the head element.
DynamicDateStamp_Advanced (FINAL)
- Open the DynamicDateStamp_Advanced_Starter file which is a copy of the Intermediate version that we will modify.
- Take note of the number of lines of code that is included in
- Externalize JavaScript
Select all of the JavaScript code BETWEEN the script tags, CUT it to the clipboard, create a new JavaScript file, and PASTE the content of the clipboard into it. Save the file as DynamicDateStamp_Advanced.js in the same folder. - In the empty script tags, add the following src attribute to link to the externalize JavaScript file you created in the previous step.
<div id="dateStamp">
<script src="DynamicDateStamp_Advanced.js"></script>
</div> - CHECK POINT: Save the file and preview it in a browser. It should work the same way as before. However, the script element is still in the body of the page. This method is not good practice and we will resolve this issue in the upcoming steps.
- Cut out all of the content from the document.write() method between the two parenthesis and paste it below that line and then comment out or delete the document.write(); shell
// document.write();
dayOfWeek[dayName] + ", " +
month[monthName] + " " + today.getDate() + "<sup>" + suffix +
"</sup>" + ", " + today.getFullYear(); - Assign the previous code to a variable named formattedDateStamp and add a semicolon (;) at the end of the statement.
var formattedDateStamp = dayOfWeek[dayName]+ ", " +
month[monthName] + " " + today.getDate() + "<sup>" + suffix +
"</sup>" + ", "  + today.getFullYear();
- Write the following highlighted code below the existing code.
var formattedDateStamp = dayOfWeek[dayName]+ ", " +
month[monthName] + " " + today.getDate() + "<sup>" + suffix +
"</sup>" + ", "  + today.getFullYear();
document.getElementById("dateStamp").innerHTML = formattedDateStamp;
NOTE: This will get a reference to the div element with the id of dateStamp and write the result of the formattedDateStamp variable to it.
- CHECK POINT: Save the file and preview it in a browser. Notice that the Date DOES display. The reason for this is the JavaScript GETS a reference of the <div id="dateStamp></div> container BEFORE the code is executed. Many times this is not the case. Also, as mentioned earlier it is not best practice to have script elements in the body of the page.
- Move the script ABOVE the closing head tag (</head>).
<script src="DynamicDateStamp_Advanced.js"></script>
</head> - CHECK POINT: Save the file and preview it in a browser. Notice that the Date DOES NOT display this time. The reason for this is that the JavaScript code is EXECUTED but CANNOT GET a reference to the <div id="dateStamp></div> container because it does "see" it because the HTML element is not rendered until AFTER the code is executed.
- Go back to the DynamicDateStamp_Advanced.js file and write the code in following highlighted window.onload event shell with a space ABOVE all of the current code.
window.onload = function() {NOTE: This is a common "wrapper' that is used so that the HTML PAGE GETS LOADED FIRST SO THAT IT CAN GET REFERENCES TO ANY HTML ELEMENTS THAT IS NEEDS BEFORE ANY JAVASCRIPT CODE IS EXECUTED.
}; - Move ALL of the code BELOW the window.onload event to the blank line to wrap the function around ALL of the main code.
window.onload = function() {
	[MOVE ALL OF THE CODE HERE....]
}; - CHECK POINT: Save the file and preview it in a browser. Notice that the file works as before but the JavaScript code is in the head element and NOT in the body element.
The Date Object is choke full of time-related methods to create timers, clocks, etc. In this tutorial, we will create a Digital Clock using the Date Object along with a timer method called setInterval().
NOTE: This tutorial uses the same JavaScript that will be taught. So if you come back at another time, the content will be updated.
- Add HTML element (Presentation Layer)
Create a blank HTML page with a title element of Digital Clock - Expert and save it as DigitalClock_Expert.html.
<!doctype html>
<html>
<head>
<meta charset="utf-8">
<title>Digital Clock - Expert</title>
</head>
<body>
</body>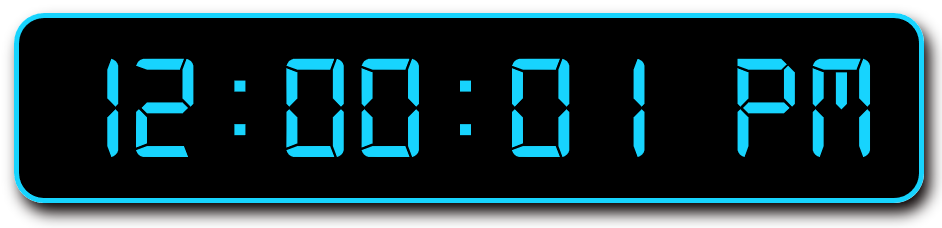
</html> - Add the following highlighted div element with an id selector named clock between the body tags. Then, add some placeholder text (12:00:01 PM).
NOTE: You can create the div container wherever you want in your web site or app (e.g., header, footer, sidebar).
<body>
<div id="clock">12:00:00 PM</div>
</body> - CHECK POINT: Save the file and preview it in a browser. You should simply see the default placeholder text displayed.
12:00:01 PM
- Add CSS Layer (Style Layer)
Download the digital font file and save it in the same folder as the HTML page. - Create a new CSS file and name it clock_style.css and add the following highlighted CSS in it.
@font-face
{
	font-family:digital;
	src:url("digital-7 (mono).ttf");
}

#clock {
	position: absolute;
	top: 50%;
	left: 50%;
	transform: translateX(-50%) translateY(-50%);
	color: #17D4FE;
	font-size: 150px;
	font-family:digital;
	background-color: black;
	letter-spacing: 7px;
	width:900px;
	text-align: center;
	border: 5px solid #17D4FE;
	border-radius: 30px;
	-webkit-box-shadow: 6px 10px 15px #070000;
	box-shadow: 6px 10px 15px #070000;
} - Create highlighted link element to the newly created CSS file BELOW the title element:
<title>Digital Click - Expert</title>
<link rel="stylesheet" href="clock_styles.css"> - CHECK POINT: Save the file and preview it in a browser. You should see the clock displayed with the placeholder text. This is only STATIC text that will be made DYNAMIC in the upcoming steps.
- Add JavaScript (Behavior Layer)
Add the following highlighted script element ABOVE the closing body tag (</body>).
<script src="DigitalClock_Expert.js"></script>
</body> - Create a new JavaScript file and name it DigtalClock.js and save it in the same folder as the HTML file.
- In the newly created JavaScript file, add the following highlighted code:
function updateClock() {
// Create a new instance (object) of the Date Class and store a reference in the  currentTime variable
var currentTime = new Date();

// Get current  Hours, Minutes, and Seconds ----------------------------------------------
var currentHours = currentTime.getHours(); // 0 - 23
var currentMinutes = currentTime.getMinutes(); // 0 - 59
var currentSeconds = currentTime.getSeconds(); // 0 - 59

// Concatenate strings to format time  -------------------------------------------------------
var currentTimeFormat = currentHours + ":" + currentMinutes + ":" + currentSeconds;

// Update the clock  -------------------------------------------------------------
document.getElementById("clock").innerHTML = currentTimeFormat;
}

updateClock();
NOTE: The updateClock(); statement is used to INVOKE the updateClock() function above.it.
- CHECK POINT: Save the file and preview it in a browser. You should see the clock MAY display the CURRENT time depending upon the time of the day. However, the clock is not updating because we have not yet added code for it to update. It may even show a zero instead of a 12.
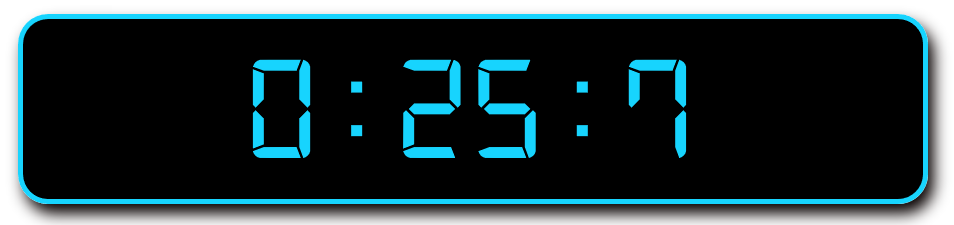
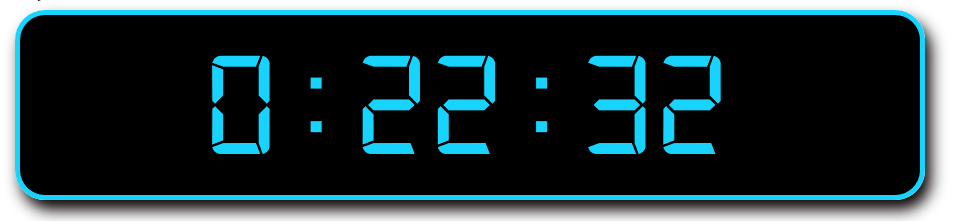 If you click the refresh button in the browser, the clock with update. Notice also when the time is a single digit, the number is displayed as a single digit. In the example below, 7 is shown instead of 07. The Date Object displays in a 24 hour military time format and will display zero for mid-night or noon. These problems will be resolved in the upcoming steps.
 NOTE: Currently, the clock MAY only display the correct time if you refresh the browser. This is because the updateClock() function only executes ONCE when a page loads. We need a way to execute this function every second so that it can UPDATE the HOURS, MINUTES, and SECONDS.
- Add the following highlighted code to get the clock "ticking."
// Update the clock -----------------------------------------------------------
NOTE: The setTimeout() method is a JavaScript built-in method that requires two arguments--a function and a interval time. It will execute any function a infinite number of times based on the second argument. In this case, 1000ms or 1 second. Any built-in function is global and can be used anywhere in your code and does not have to be assigned to a variable. (e.g., var myVar = setTimeout(function, time); ). Also, notice the updateClock function in the setTimeout method DOES NOT have parenthesis.
document.getElementById("clock").innerHTML = currentTimeFormat;
setTimeout(updateClock, 1000);
}
updateClock();
SPECIAL NOTE: It is important to note that the updateClock(); function call is STILL needed to "jump start" the clock and then the setTimeout(updateClock, 1000); method is used to execute the same function every second. This is akin to a grand father clock that does work unless the pendulum is started and that it swing left and right repeatedly.
- CHECK POINT: Save the file and preview it in a browser. You should see the clock updating every second. However, it still has some issues that we need to resolve.
ADD CLOCK HERE WITH CODE: - Add the following highlighted code BELOW the variables to change the clock from a 24 hour to a 12-hour format.
// Get current Hours, Minutes, and Seconds ----------------------------------------------
		var currentHours = currentTime.getHours(); // 0 - 23
		var currentMinutes = currentTime.getMinutes(); // 0 - 59
		var currentSeconds = currentTime.getSeconds(); // 0 - 59

// Convert to 12-hour format by subtracting 12 ----------------------------------
		if (currentHours > 12)
		{
			currentHours = currentHours - 12; // (e.g., 20 = 20-12 = 8)
			// You could write the above line like this: currenntHours -= 12
		}

		// Alternatively, you can write the code like this:
		// currentHours = (currentHours > 12) ? currentHours - 12 : currentHours;
NOTE: This "if" statement checks to see if the hour is greater than 12 and if so SUBSTRACT 12 from the hour.
- Add the following highlighted code BELOW the previous "if" statement to change zero to twelve.
// Convert to 12-hour format by subtracting 12 ----------------------------------
NOTE: This 'if" statement checks to see if the mid-hour is zero. If so CHANGE it to 12.
if (currentHours > 12) {
currentHours = currentHours - 12; // (e.g., 20 = 20-12 = 8)
// You could write the above line like this: currenntHours -= 12
}
// Alternatively, you can write the code like this:
// currentHours = (currentHours > 12) ? currentHours - 12 : currentHours;
// Convert mid-hours from "0" to "12" ---------------------------------------------------------------------------------
if (currentHours == 0) {
currentHours = 12;
}
// Alternatively, you can write the code like this:
// currentHours = (currentHours == 0) ? 12 : currentHours; - CHECK POINT: Save the file and preview it in a browser. You MAY see at 12:00 it is 12 instead of 0.
ADD CLOCK HERE...
- Add the following highlighted code BELOW the previous "if" statement to add a "leading" zero to single digit numbers.
// Convert mid-hours from "0" to "12" ----------------------------------------------
	if (currentHours == 0) {
		currentHours = 12;
	}
// Alternatively, you can write the code like this:
// currentHours = (currentHours == 0) ? 12 : currentHours;

// Add leading zero to hours, minutes, and seconds when they are less than ten  -----
currentHours   = (currentHours < 10 ? "0" : "") + currentHours;
currentMinutes = (currentMinutes < 10 ? "0" : "") + currentMinutes;
currentSeconds = (currentSeconds < 10 ? "0" : "") + currentSeconds;
NOTE: This "if" statement checks to see if a number is single digit and if so ADD a leading zero to it. You can comment out the currentHours line if you prefer.
ADD CLOCK HERE... - CHECK POINT: Save the file and preview it in a browser. You should now see the single digital with a leading zero added to them.
ADD CLOCK HERE...
- ADD AM or PM Session
Add another variable called AMorPM below the previous variables and assign it a default value of " AM" and then add the following highlight code to the first "if" statement.
// Get current Hours, Minutes, and Seconds ----------------------------------------------
NOTE: Because the 24 hours format is the default, any thing over 12 (13-24) will be convert to the PM format.
var currentHours = currentTime.getHours(); // 0 - 23
var currentMinutes = currentTime.getMinutes(); // 0 - 59
var currentSeconds = currentTime.getSeconds(); // 0 - 59
var AMorPM = " AM";
// Convert to 12-hour format by subtracting 12 -----------------------------------------
if (currentHours > 12) {
currentHours = currentHours - 12; // (e.g., 20 = 20-12 = 8)
AMorPM = " PM";
// You could write the above line like this: currenntHours -= 12
} - Add "+ AMorPM" to the currentTimeFormat variable string.
// Concatenate strings to format time  ------------------------------------------
var currentTimeFormat = currentHours + ":" + currentMinutes + ":" + currentSeconds + AMorPM; - CHECK POINT: Save the file and preview it in a browser. You should now see AM or PM depending on the time of day or night.
ADD CLOCK HERE...
- OPTIONAL FORMATTING
In the clock_styles.css file add the following element selector.
}
sup{color:white;
	font-size:50px;
}
NOTE: sup is short of superscript.
- Concatenate and wrap a sup element string around AMorPM in the
// Concatenate strings to format time  ------------------------------------------
var currentTimeFormat = currentHours + ":" + currentMinutes + ":" + currentSeconds + "<sup>" + AMorPM + "</sup>"; - CHECK POINT: Save the file and preview it in a browser. You should see the AM or PM is in white, superscript, and a smaller font size.