CSS STYLE PROPERTIES IN DREAMWEAVER
You can set a host of CSS style properties using the CSS Designer Panel. They fall under the following four major categories:
 Layout
 Text
Text Border
- Background
Layout
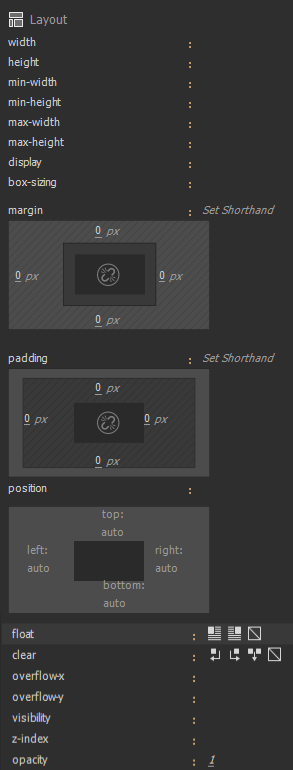 Below are some of the major properties:
(See The Box Model)
- width and height – specify width and height of an element – (values: auto, (value))
- min-width and min-height – (values: (value))
- max-width and max-height – (values: none, (value))
- display – controls how the browser renders an element. (See Block-Level vs Inline Elements in the XHTML Manual for details). While there are many values, there are only three that are used most often:
- block – displays element as a block-level element
EXCEPTION: The text-align property can only be applied to paragraphs and other block-level elements.(VERIFY) - inline – displays element as an inline element
- none – turns off the display of an element. You can use JavaScript or CSS to switch this property on and off. (See http://www.webreference.com/ for examples)
- block – displays element as a block-level element
- box-sizing – (values: content-box, border-box, inherit)
- margin and padding – add margin outside of element box or border or add padding inside element box or border and – (values: top, right, bottom, left, and auto)
- absolute, fixed, relative, and static (position) – (values: top, right, bottom, left, and auto) – (See CSS Positions)
- float – move element to the left or right of page and float other objects around it or wrap text around it – (values: left, right, and none)
- clear – prevent an element from floating or wrapping around another element that has a right of left float. For example, you can have all <h1> be on their own line and not wrap around an image with a float of right. Clear will "clear" the bottom columns of floated elements. – (values: left, right, both, and none)
- overflow-x – (values: visible, hidden, scroll, auto, no-content, and no-display)
- overflow-y – (values: visible, hidden, scroll, auto, no-content, and no-display)
- visibility – (values: inherit, visible, hidden, and collapse)
- z-index – (values: auto, (value))
- opacity – (values: 0-1)
EXAMPLES:
Below are examples of some of the most common properties used in the Layout section:
Width, Height, Margin, and Padding
- Create a new HTML file in Dreamweaver.
- Between the body element, create two div elements with the following IDs:
<body>
<div id="myBox1">Austin, Texas</div>
<div id="myBox2">Dallas, Texas</div>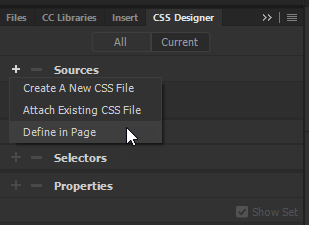
</body> - Open the CSS Designer panel (Window>CSS Designer or Shift+F11), click the plus sign next to the Sources tab and the select Define in Page option:
- CHECK POINT: Open up the Code View to see that Dreamweaver automatically added the style element.
<style type="text/css">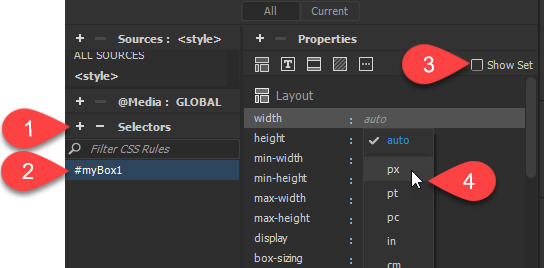
</style> - In the CSS Designer panel:
- click the plus sign next to the Selectors tab to add the #myBox1 ID selector in the text field below it
- click the Show Set checkbox to deselect it
- double-click the word auto next to the width property text field
- type 400px:
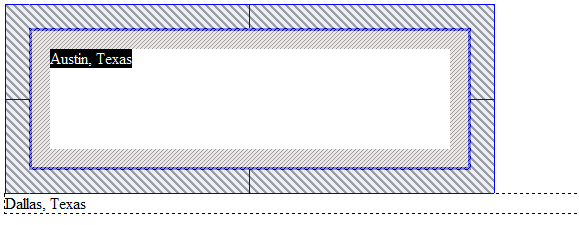
- Type 100px in the height property text field.
- Next to the margin text field, click the Set Shorthand and type 25px. Repeat for padding but type 20px.
- CHECK POINT: In Design View, click the first div to select it. You should see the margin and padding being highlighted with diagonal lines:
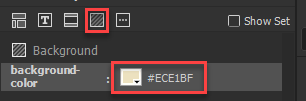
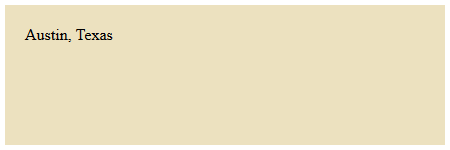
- In the CSS Designer panel, temporarily select the Background icon () and set a light background color from the color picker:
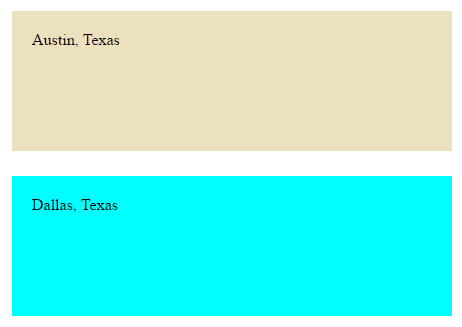
- In Design View, select the second div and repeat steps 5 to 9 but select the second div and change the background color to another light color.
- CHECK POINT: Save the file and preview it in a browser. You should see both div elements have been styled with CSS using the CSS Designer panel.
Position, Visibility, Z-index, and Opacity
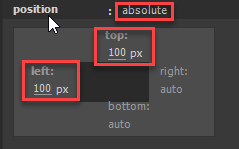
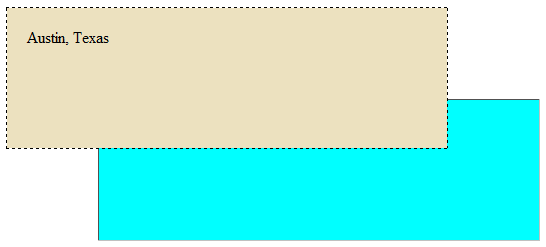
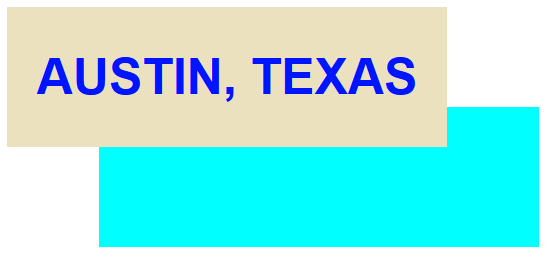
- In the Design View, click to select the second div and then in the CSS Designer panel, click in the Position text field and select absolute. Then, click the top and left offset values and type 100px for both:
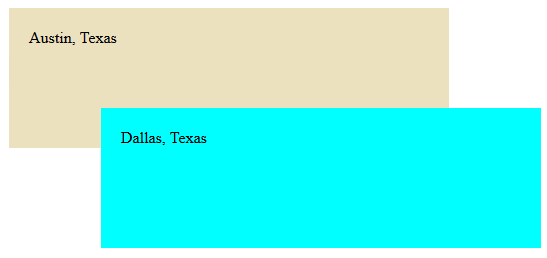
- CHECK POINT: Save the file and preview it in a browser. You should see the two divs element overlapping one another:
- With the second div still selected in the Design View, in the CSS Designer panel, next to the visibility property, click and select hidden value from the drop-down menu.
- CHECK POINT: Click in the Design View and you should see the second div disappear. Then, click on the Remove CSS Property trash can icon to delete this property to show the div again:
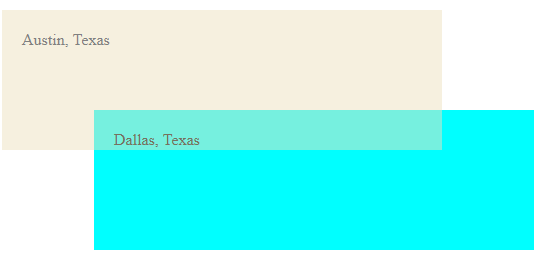
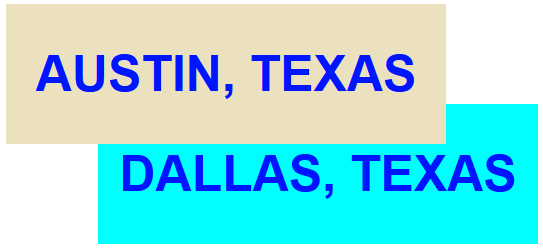
- With the second div still selected in the Design View, in the CSS Designer panel, next to the z-index property, click and type -1 in the text field.
- CHECK POINT: Click in the Design View and you should see the second div move BELOW the first div:
- Select the first div in the Design View, in the CSS Designer panel, next to the opacity property, click and select hidden value from the drop-down menu.
- CHECK POINT: Save the file and preview it in a browser. You should see the first div has a 50% opacity applied to it. Then, click on the Remove CSS Property trash can icon to delete this property to show the div again:
- CHECK POINT: Open the Code View and view the style element. Notice that Dreamweaver wrote ALL of the CSS code. YOU DID NOT HAVE TO WRITE A SINGLE LINE OF CSS.
<style type="text/css">
#myBox1 {
    width: 400px;
    padding: 20px;
    min-width: 0px;
    margin: 25px;
    height: 100px;
    background-color: #ECE1BF;
}
#myBox2 {
    width: 400px;
    padding: 20px;
    min-width: 0px;
    margin: 25px;
    height: 100px;
    background-color: aqua;
    position: absolute;
    left: 100px;
    top: 100px;
    z-index: -1;
    visibility: hidden;
}
</style>
Text
 Below are some of the major properties:
Font properties are used to enhance the font which is in a form of text
- font-family – specify a family of fonts (e.g., font-family: Arial, Helvetica, san-serif)
- font-style – set the font style (values: italic, oblique, or normal). Oblique is a computerized rendering of a normal font in which each letter is inclined a certain number of degrees to the right similar to italic. Example: h1 {font-style:italic;}
- font-variant – set normal or small-caps. (values: small-caps, normal) Example: h1 {font-variant:small-caps;}
- font-weight – refer to the font thickness that make text bold in varying degrees. (values: 100-900, lighter, normal, bold and bolder). (e.g., a {font-weight:bold;} ).
- font-size – specify the type size (e.g., font-size: 24px)
CAUTION: Do not add a space between the number and the unit of measurement. (e.g., font-size: 24 px will NOT work) - line-height – specify space between adjacent lines of text in a paragraph. Known as leading in the print community. (values: any numerical value).
NOTE: Line height greater than the text height is shared both below and above text. For line-height (1.4) select multiple as the unit of measurement to avoid bugs in some browsers when certain units of measurements are set on line height. When the value multiple is used, notice there is no unit of measurement because it is a multiplier of the current font size (e.g., 1.5 x current font size).
Text properties are used to enhance the readability and appearance of text on a page.
- color – set the font text color (e.g., any hexadecimal or named value) Example: p {color: #FF0000;} or p { color: red;}
- text-align – control horizontal alignment of text content (values: left, right, center and justify). Example p {text-align:left;}(left, right, center, and justify)
- text-decoration – creates underline, over-line, and line-through effects on text element. (values: underline, overline, line-through)
- text-indent – applies indent to the first line of text in a paragraph or other text elements. (values: any negative/positive value). Example: p {text-indent:5em;} Using a negative value will create a hanging indent. It is best practice to set indents and related margins in ems so that the indent remains proportional.
- text-transform – set the case of the text (values: uppercase, lowercase, capitalize, none) Example: p {text-transform:uppercase;}
NOTE: The uppercase option is useful to ensure that the text is ALWAYS in ALL CAPS even though it may not have been written in all caps. For example, the title Welcome to my website will always be rendered as WELCOME TO MY WEBSITE even though the HTML code is not in all caps.
TIP: It is best practice to have links INSIDE a page to have underline and to remove the underline when the mouse hover over it for better readability.
- underline
- line-through
- overline (need to be viewed in a browser)
- blink (need to be viewed in a browser)
- letter-spacing – add or remove space between LETTERS of any text element. (values: any negative/positive value) Example: p {letter-spacing:.3em;} Known as kerning in the print community). It is best practice to set indents and related margins in ems so that the indent remains proportional. A positive value will add spaces (e.g., T h i s i s a s e n t e n c e.)
TIP: Best used for short headlines and movie titles. - word-spacing – add or remove space between WORDS. (values: any negative/positive value) Example: p {word-spacing:.2em;} A positive value will add spaces (e.g., This is a sentence.) and a negative value will remove spaces (e.g. Thisisasentence.)
- vertical-align – control the vertical alignment of an element. (values: value, sub, sup, top, middle, bottom, etc.). Typically used to create subscript (sub) and superscript (super) which is typically used for copyright, trademark symbols, etc. (e.g., © ® ™) Examples: H20 , 52nd Street
TIP: It is best practice to use text-size and vertical-align together using descendant selectors that will be discussed later to create super/subscripts for better results:
p.custom sub {vertical-align: -.25em; font-size:65%;}
p.custom sup {vertical-align:.6em;font-size:65%;}
p.customsmall {vertical-align:1em; font-size:.8em;}
TIP: The <sub> and <sup> tags don't change the size of the text. Changing the size to 75% is a good start for these properties. - list:
- list-style-type – select bullet type (values: disc, circle, square, decimal [1,2,3], lower-roman [i, ii, iii], upper-roman [I,II, III], lower-alpha [a,b,c], upper-alpha [A,B,C] and none)
- list-style-position – control placement relative to <li> tags (values: inside or outside)
- list-style-image – select a small image that can be used as bullets instead of the default bullets (listed above)
- whitespace – control how the browser displays extra white space (e.g., spaces, tabs, returns, etc.). (values: normal, pre and nowrap). The pre property works like the <pre> tag. The nowrap property prevents line breaking.
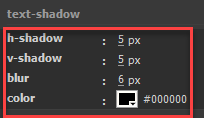
Text-shadow: (Similar to text shadow)
- h-shadow
- v-shadow
- blur
- color
EXAMPLES:
Below are examples of some of the most common properties used in the Text section:
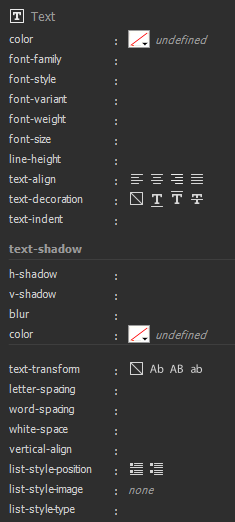
- In Design View, select the first div and then in the CSS Designer panel, select the Text icon () at the top of the panel.
- Set the following highlighted values:
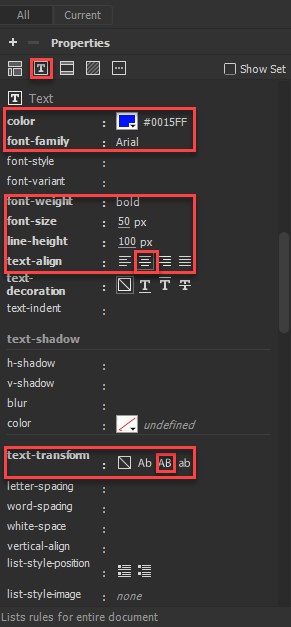
- CHECK POINT: Save the file and preview it in a browser. You should see the text has been formatted with the highlighted styles:
- Repeat the previous three steps for the second div:
TIP: You could COPY the specified properties from the #myBox2 and paste into #myBox1 or you could CUT the specified properties out of #myBox2 and create a new group selector for by with those selectors (e.g., #myBox1, #myBox2 {paste specified properties here}):
- In Design View, select the first div and then in the CSS Designer panel, select the Text icon () at the top of the panel.
- Set the following highlighted values:
- CHECK POINT: Save the file and preview it in a browser. You should see the text has been formatted with the highlighted styles:

- Repeat the previous three steps for the second div:

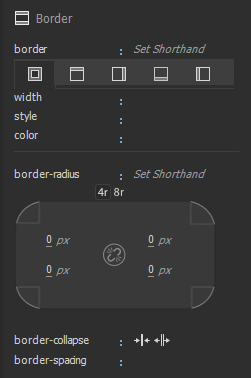
Border
(See The Box Model)
 Below are some of the major properties:
NOTE: Unlike HTML which can add border(s) to certain HTML elements (tables, images, and cells), CSS allows you to add borders to any element.
- border-width – specify the border's width(s)
- border-style – specify the type of line(s) (values: dotted, dashed, solid, double, groove, ridge, inset and outset)
- border-color – specify the border's color(s). If you don't specify a color, the browser will render the color black
NOTE: You can specify any of the border with different style, width, color and no border
NOTE: You can specify these multiple values in any order. Later you will see that you can have multiple properties–these need to be in the correct order - border-radius – self-explanatory
- border-collapse – collapse border (values: collapse, separate)
- border-spacing – self-explanatory (values: (value)
EXAMPLES:
Below are examples of some of the most common properties used in the Border section:
- In Design View, select the first div and then in the CSS Designer panel, select the Text icon () at the top of the panel.
- Set the following highlighted values:
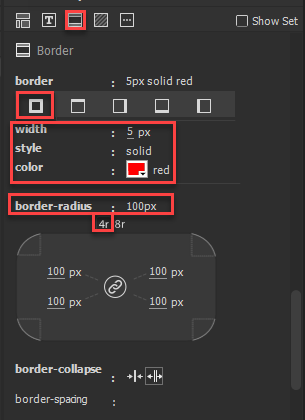
- CHECK POINT: Save the file and preview it in a browser. You should see the div has been formatted with the highlighted styles:
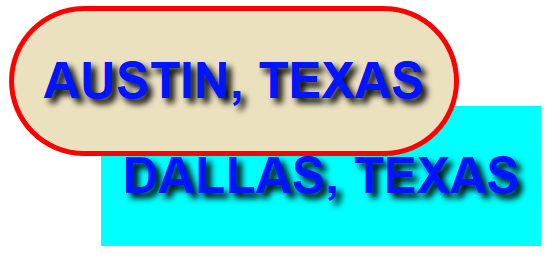
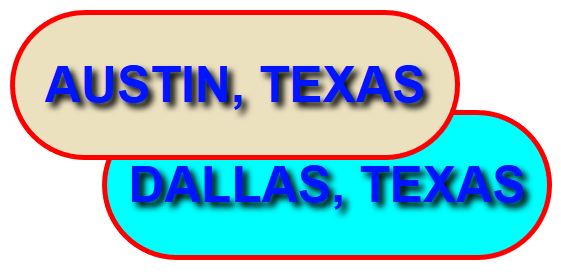
- Repeat the previous steps for the second div:
Background
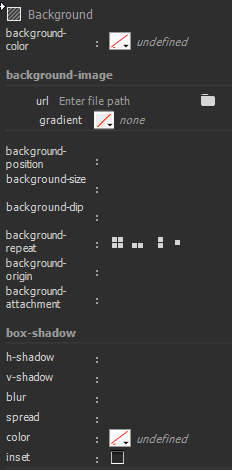 Below are some of the major properties:
- background-color – set background color of an element
- background-image – set background image of an element
- background-position (x or y) – set horizontal (values: left, center, right or (value)) and vertical (values: top, center, bottom, or (value)) positions. NOTE: These positioning options refer to the position of the object that is being styled. If you apply a class to a paragraph with this technique, the background image will appear in the center of the paragraph, not the center of the browser window. Typically, the horizontal and vertical position are given. (e.g., top left or bottom right). If only one value is given, the other is implied to be center (e.g., top is the same as top center and bottom is the same as bottom center.)
- background-size – (values: auto, cover, contain, etc.)
- background-clip – (values: padding-box, border-box, and content-box)
- background-repeat – specify how the image is tiled (values: repeat, repeat-x, repeat-y or no-repeat) when using a background image
- background-attachment – scroll or fixed a background image within a page
-
Box shadow: (Similar to text shadow)
- h-shadow
- v-shadow
- blur
- spread
- color
- inset
EXAMPLES:
Below are examples of some of the most common properties used in the Background section:
- In Design View, select the first div and then in the CSS Designer panel, select the Text icon () at the top of the panel.
- Set the following highlighted values:
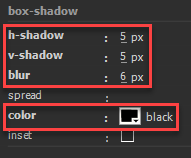
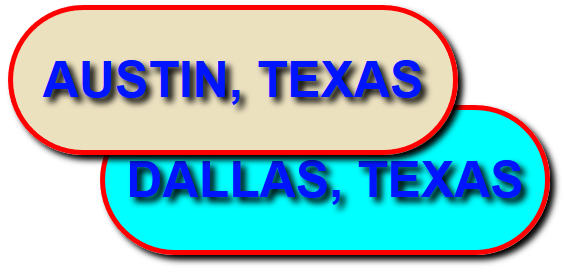
- CHECK POINT: Save the file and preview it in a browser. You should see the div has been formatted with the highlighted styles:
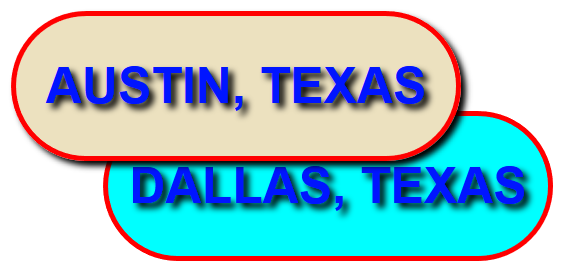
- Repeat the previous steps for the second div:
More...
Add some examples here later...