Classical Effects In A Few Steps
The goal of the tutorial is to showcase some of the most popular effects that have withstood the test of time. It assumed you are familiar with basic Photoshop techniques. For example, if you are told to resize (transform) an image, steps on how to do this will not be given (e.g., Press CMD/CTRL+T, select one of the handle, scale the image, and then press the OK button to commit the transformation). Below are some additional things you want to consider before getting started:
- Once an image (e.g., *.jpg) is open, save the file as a *.PSD file.
WHY: So that you don't accidentally replace it with the original image file. - While not a requirement, you may want to make a copy of the ORIGINAL image by pressing CMD/CTRL+J as soon as you open each of the *.before file
WHY: So that you have a backup version just in case you mess up. Also, be sure to turn off this layer so that it does not interfere with your creation. - Once an image (e.g., *.jpg) is open, duplicate the layer (CMD/CTRL+J) and turn it off.
WHY: So that you have a backup image is case you corrupt the duplicated layer. Also, by turning off the layer will prevent you from not seeing a hole that you cut into the duplicated layer. - If you are going to use a Filter, convert the Layer to Smart Object by right-clicking the layer and selecting Convert to Smart Object. There are a few exceptions when you don't want to convert to a smart object (e.g., If you need to use the Image > Adjustment > Desaturate object).
- Create a new layer for each effect that you create if the layer is not automatically created by certain processes (e.g., Type Tool, Shape Tool, or Adjustment Layer)
- Start most of your effects with an implicit selection.
- Press CMD/CTRL+Thumbnail in the Layers, Channels, or Paths panels to get a selection from the thumbnail.
- You may want use Quick Mask (Q) to check intricate selections to see if you have any area of a selection that you need to modify.
- To open multiple images at ONE time, CMC/CTRL + click all of the images you want to open at the same time.
- After you finish the effects, save the file as a *.jpg, *.png, or *.gif.
- It is best practice to name each layer you create. However, to save time in this tutorial none of the layers are named.
After doing a few of these effects, you will begin to notice a pattern of similar steps are taken for most effects. Most effects require only several of the seven techniques below:
- A background layer with an image or a fill color is created
- A selection is done
- An object is cut, paste, or paste into another layer or another file as a foreground image
- A transformation is done - usually to scale or rotate
- A mask is applied (e.g., layer mask, layer style, clipping mask)
- A filter or gradient is applied to a layer or layer mask
- A blend mode is applied
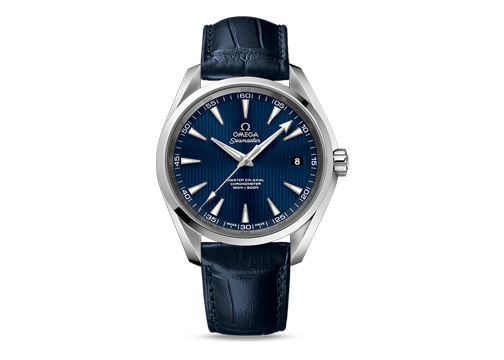
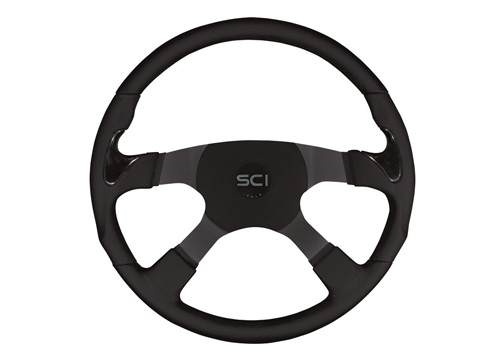
Backscreening/Watermark
Backscreening/watermark is a long-time classic effect used by Photoshop users for many years.
BEFORE:
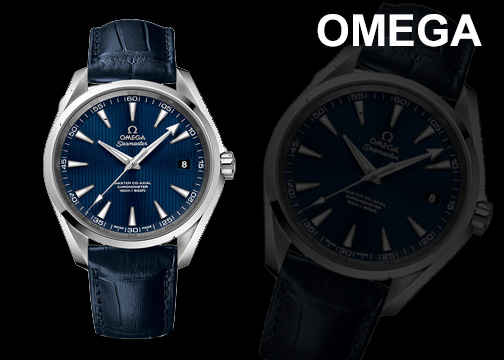
AFTER:
STEPS:
- Open an image with an object that you would like to make a backscreen of. (e.g., an image of a watch).
- Make a selection around the object in the image using any selection tools and duplicate it to a layer above (CTRL/CMD+J).
- Scale the object (CTRL/CMD+T) in the image larger or smaller, if necessary, and move it to the one side of the canvas.
- Fill Layer 1 with black (ALT+Backspace/Delete with the Foreground color swatch set to black).
- Duplicate the object (CTRL/CMD+J) again onto another layer, scale it (CTRL/CMD+T) larger than the canvas and rotate it slightly.
- Adjust the Opacity of the duplicated layer until the image appears as a watermark in the background.
- BONUS: Using the Type Tool to add some text if you want to.
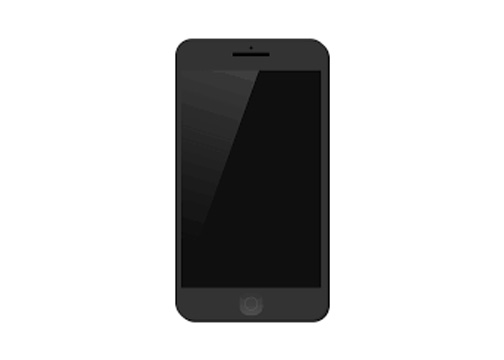
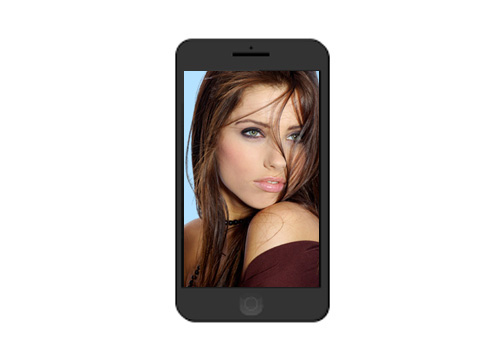
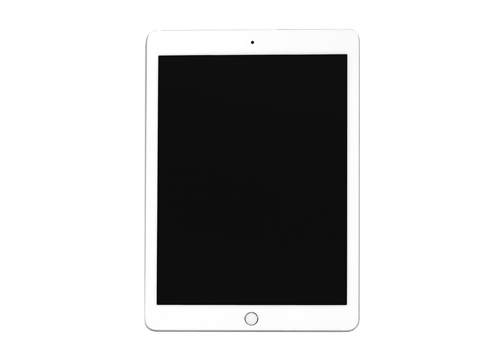
Paste Into
Paste Into is used for so many objects (especially objects with rectangle viewports).
BEFORE:
AFTER:
STEPS:
- Open an image that has a viewport that another image can be "paste into" it (e.g., a smart phone, TV, picture frame, etc.)
NOTE: The viewport does not have to be rectangular. - Zoom in if necessary and make a selection of the viewport.
- Make a selection of an image from another file and choose Copy.
- Switch back to the original file and with viewport still selected, select Edit > Paste Special > Paste Into... to paste the image as a layer mask using the selection.
CAUTION: Ensure you are on the correct layer or the Paste Into command will be dimmed out. - Scale the image (CTRL/CMD+T) to fit the object within the viewport.
TIP: Choose fit to screen (CTRL+0, this is a zero and not an O) if necessary to see transformation handlers if you paste a large image. Hold the SHIFT key while scaling to scale the image proportionally. - BONUS: On the same layer add a screen Blend mode to enhance the phone glare.
- BONUS: On the same layer, create an Inner Shadow Layer Style. Adjust Distance, Size, etc. to your liking, if necessary.
NOTE: Using Paste Into instead of Paste does three operations at one time. It create a new layer, paste the image into the selection and automatically create a Layer Mask.
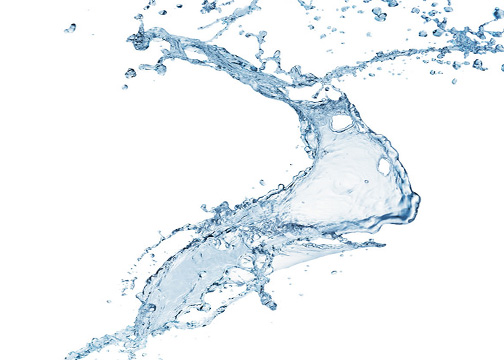
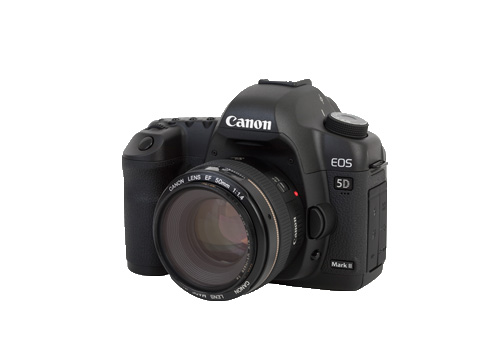
Using Layer Mask to Blend
The Layer Mask is used to show/hide a portion of a layer so that another layer beneath it can be shown or hidden.
BEFORE:
AFTER:
STEPS:
- Open an image that can be used as an object you want to blend with another object (erg, water splash on camera)
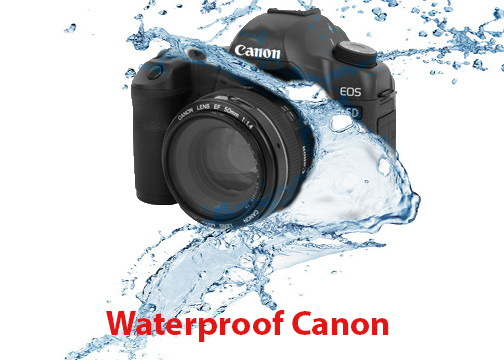
- Make a selection of another object (e.g., camera) and invert it. Then, copy and paste it into the original image.
- Move or scale it if necessary and then create a Layer Mask for that layer and lower its opacity to about 50% so that you can see the object that you are working with.
- Select object (CTRL/CMD+click thumbnail) to limit where you will be painting.
- Zoom in if necessary and select a Brush or Eraser tool with a hard-edge with foreground color set to black and paint on the Layer Mask where you want the background image (e.g., water splash) to appear on "top" of the object in the foreground image.
- Zoom back out and change opacity back to 100%.
- BONUS: Add text to complete the effect.
NOTE: Lowering the opacity to about 50% helps so that you can see the image below so you know where to paint on the Layer Mask. Remember, black will conceal pixel in an image and white will reveal pixels in an image.
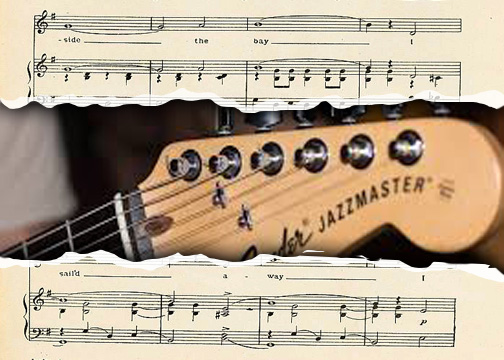
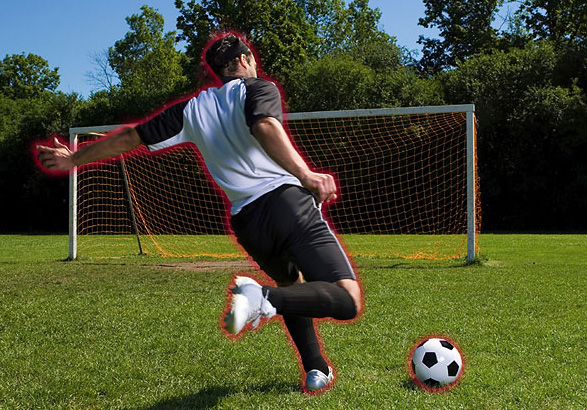
Ripped Edge Effect
Layer styles get applied to a selection or the whole canvas.
BEFORE:

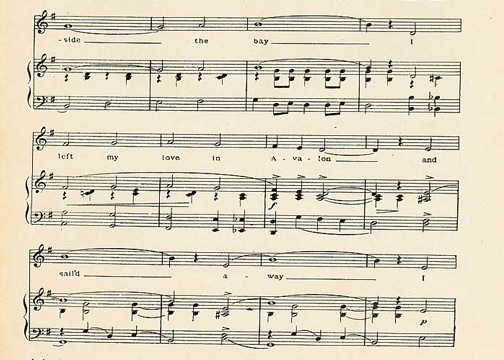
AFTER:
STEPS:
- Open a background image (e.g., guitar).
- Select a foreground image (CTRL+A) from another file and choose Copy.
- Paste the image into the background image file.
- Scale the image (CTRL+T) to fit object into scene, if necessary.
- Use the Lasso Tool to draw a freehand ripped edge selection in the middle of the foreground image and press the Delete button to see underlying background image. Deselect the selection. Add a Outer Glow Layer Style and change Blend Mode to Normal, glow color to black and Size to about 10-20 and Opacity to 75-100.
- Using Lasso tool again, make a rough selection around the upper torn edge. Open the Levels (CTRL/CMD + L) and drag the black marker slider of the Output Levels near the white marker to lighten the edge of the "ripped" paper. Repeat this step at the lower torn edge.
NOTE: An Outer Glow Layer style was used instead of a Drop Shadow Layer Style because a drop shadow offsets are from two adjacent sides; whereas, an Outer Glow offsets are around the whole image. However, since the foreground image is the same size as the canvas, you don't see the glow effect except at the top and bottom of the selection. To proof this, temporarily turn of background image and use Move tool to move image further onto the canvas.
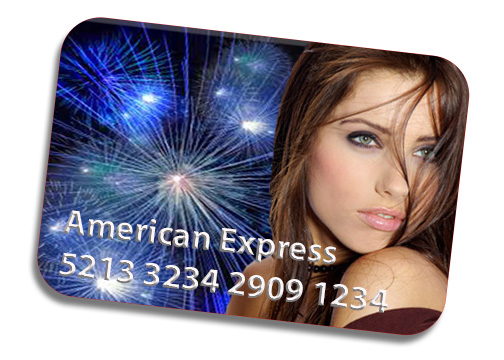
Clipping Images In A Shape
Clipping Masks work similar to layer masks. However, you can "clip" multiple images into a single shape. Whereas, layer masks only work with a single layer.
NOTE: It is important to note that the image(s) goes on TOP of the shape. Otherwise, technique will not work.
BEFORE:
AFTER:
STEPS:
- Create a new file and create a shape using any vector shape (path) tools including the Type Tool or bitmap tools (e.g., a credit card)
- Add several images ABOVE the Shape Layer from other files.
- ALT+click BETWEEN the Shape Layer and the first image layer ABOVE the Shape Layer to "clip" the image into the shape.
ALTERNATIVE: You can press CTRL/CMD+ALT/OPTION+G or choose Layer > Create Clipping Mask from menu or right-click on a the layer and select Create Clipping Mask
- Repeat the previous step for each image that has a transparent background above first clipped layer. Use the Move Tool to move the images in place inside the shape, if necessary.
- BONUS: Add layer effects (drop shadow, bevel, etc.) to the Shape Layer.
- BONUS: If you want to rotate the shape, you need to select all of the layers that are affected by the clipping mask and then use the transform tool (CTRL/CMD+T) to rotate the shape and its corresponding images that are clipped.
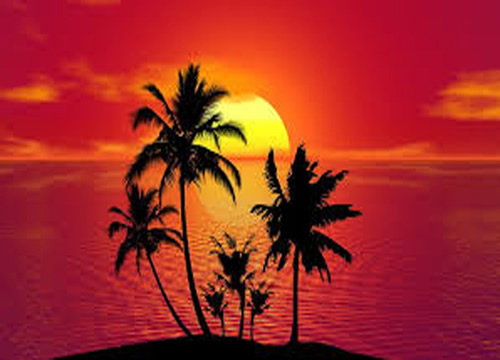
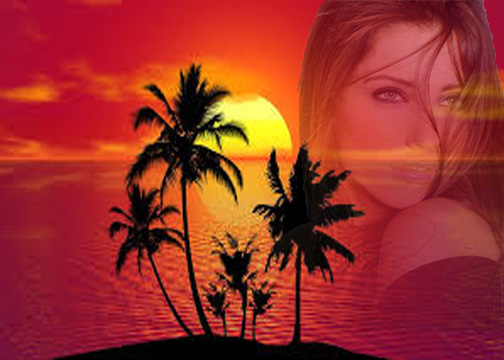
Add gradient mask to layer mask
Gradient mask can be used in conjunction with a layer mask to show/how portion of an image.
BEFORE:
AFTER:
STEPS:
- Open a background image.
- Select an image and copy and paste it into this scene to create another layer.
- Click on the Layer Mask thumbnail and then add a black/white gradient to it by clicking and dragging across image. Use undo (CTRL/CMD+Z) if necessary and reapply gradient until you get your desired effect.
- Optionally, paint with black or white to add or remove any additional portion of the image.
- BONUS: Add text if you like.
NOTE: Gradient masks are typically used to create montage and collage images.
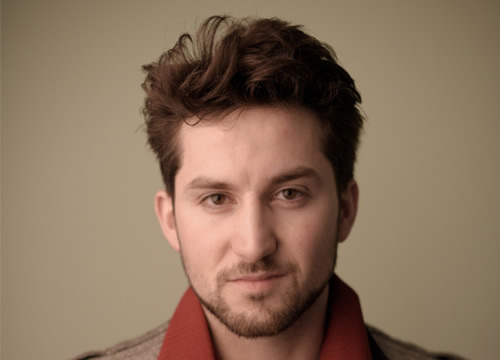
Toupee Effect: Magazine Cover
This is a very popular effect that is used my many magazine companies. It can also be used whenever you need to place part of an object BEHIND another object (e.g., person or thing).
BEFORE:
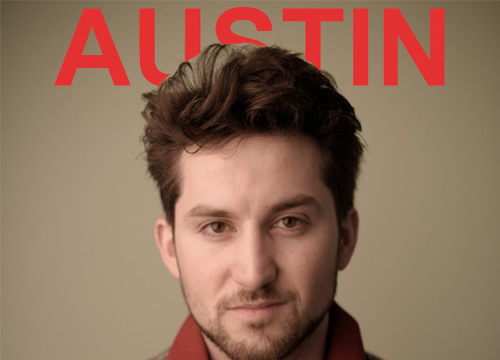
AFTER:
STEPS:
- Open an image with a head shot of a person as the background image.
- Using the Type Tool, type the desired text at top of the head in bold large letters as the foreground text and style it to your liking.
- Create a Layer Mask on the Text Layer and than use the Eraser Tool with the Black foreground color selected to erase the text where the head and text overlap.
ALTERNATIVE: Select a portion of the image (e.g., head shot) that overlap the text and copy it (CTRL+J) and move it to the top of the layer stack so that the text is "sandwich" between the two layers.
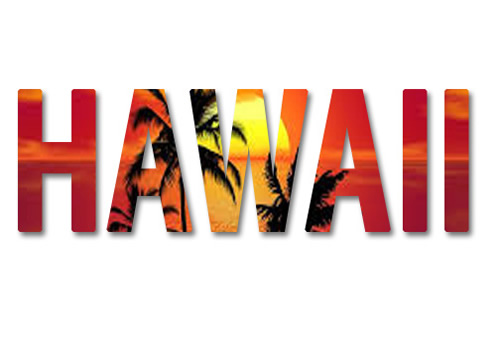
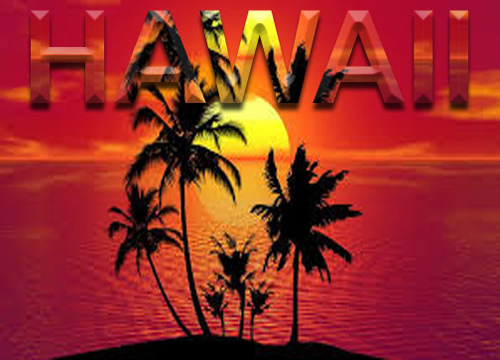
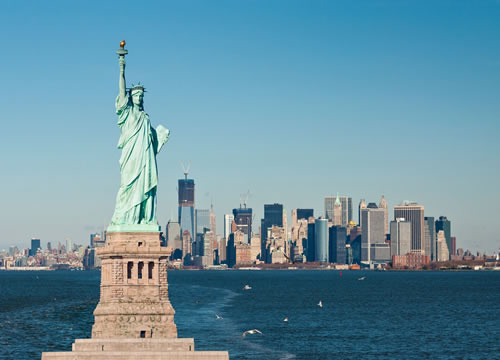
Image In Text
This is one of the first effect that most Photoshop user learn when they start.
BEFORE:
AFTER:
STEPS:
- Open an image as the background image and then duplicate it and turn of the bottom layer.
- Using the Type Tool, type the desired text in a large bold font. Press CTRL+click the thumbnail to create a selection of the text.
- Select the Background Layer, add a Layer Mask, and then Delete or turn off the Text Layer.
- Create a new layer below the current selected layer and fill it with white.
- BONUS: Add a Bevel and Drop Shadow Layer Style to the layer with the Layer Mask.
- Optionally, turn the bottom background layer back on to see the effect against the same background and use the Move Tool to move the Text to the top of the canvas or wherever you want.
- Optionally, you may want to turn down the Fill value to see just the styles (e.g., Drop Shadow and Bevel).
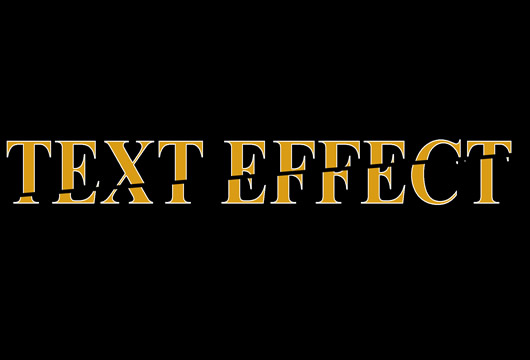
Slice Text
This text effect is flexible becasue it used a Smart Object.
BEFORE:
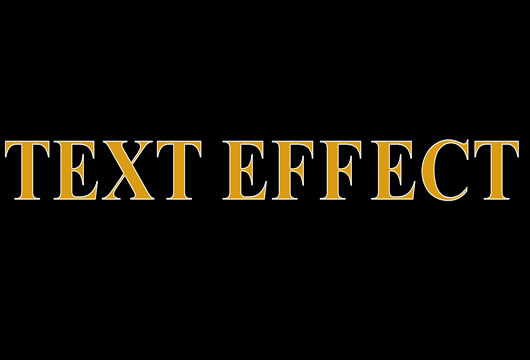
AFTER:
STEPS:
- Create a new Photoshop file and type some text (e.g., Text Effect) against a color bakground . Add a stroke to the text if you desired.
- Convert the text layer to a Smart Object.
NOTE: Converting the layer to a Smart Object will make it possible to change the text later without having to redo the effect. - With the Rectangle Tool selected and the Path option selected, draw a rectangle along the bottom half of the text.
- WIth the Direct Selection Tool selected, move the top-left anchor down and the top-right anchor up.

- With the text layer selected, either hold down the CMD/CTRL key and then press the Add Layer Mask icon at the bottom of the Layer panel OR right-click inside of the path and select Create Vector Mask.
NOTE: This wil create a Vector Mask for the bottom half of the text that will hide the first half of the text. - Duplicate the text layer with the Vector Mask and then with the Path still selected, select Substract Front Shape from the menu in the Option bar.
IMPORTANT NOTE: This will create another Vector Mask that will show the top half of the text. The Substract Front Shape in essence creates an INVERTED VERSION of the other Vector Mask. The Substract Front Shape is not visible so it is not obvious what is being substracted. - Use the DOWN and LEFT ARROW KEYS to nudge the top of the text slightly as though it was sliding down a cliff.
BONUS: CHANGE TEXT
- Double-click either of the two text layers (smart objects) to open one of them in a new tab and then change the text.
NOTE: If the text you added is cut off because it is larger than the original text, either use the Crop Tool to extend the width of the canvas or select Image > Reveal All from the main menu. - CHECK POINT: Close and save the Smart Object. You should see the new text with the same effect applied.
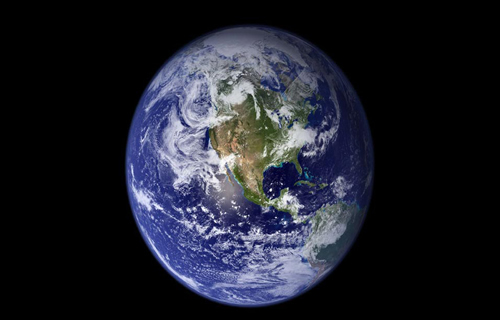
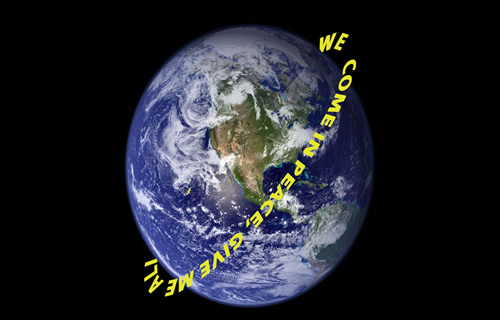
3D Text
This is one of the first 3D effect that most Photoshop user learn when they start.
BEFORE:
AFTER:
STEPS:
- Open file that you like to use as a background for this effect (e.g., earth)
- Use the Ellipse tool to draw circle around it that is slightly larger that the object (e.g., earth).
- Use the Horizontal Type Tool and click near the path to type text in all caps on the circle path.
- Double-click on Text and change color to Yellow.
- Press CTRL+T to enter Free Transformation. Press CTRL+ALT and move the top-left point of the transformation handle down to create an oval perspective around the earth and then double-click to commit the transformation.
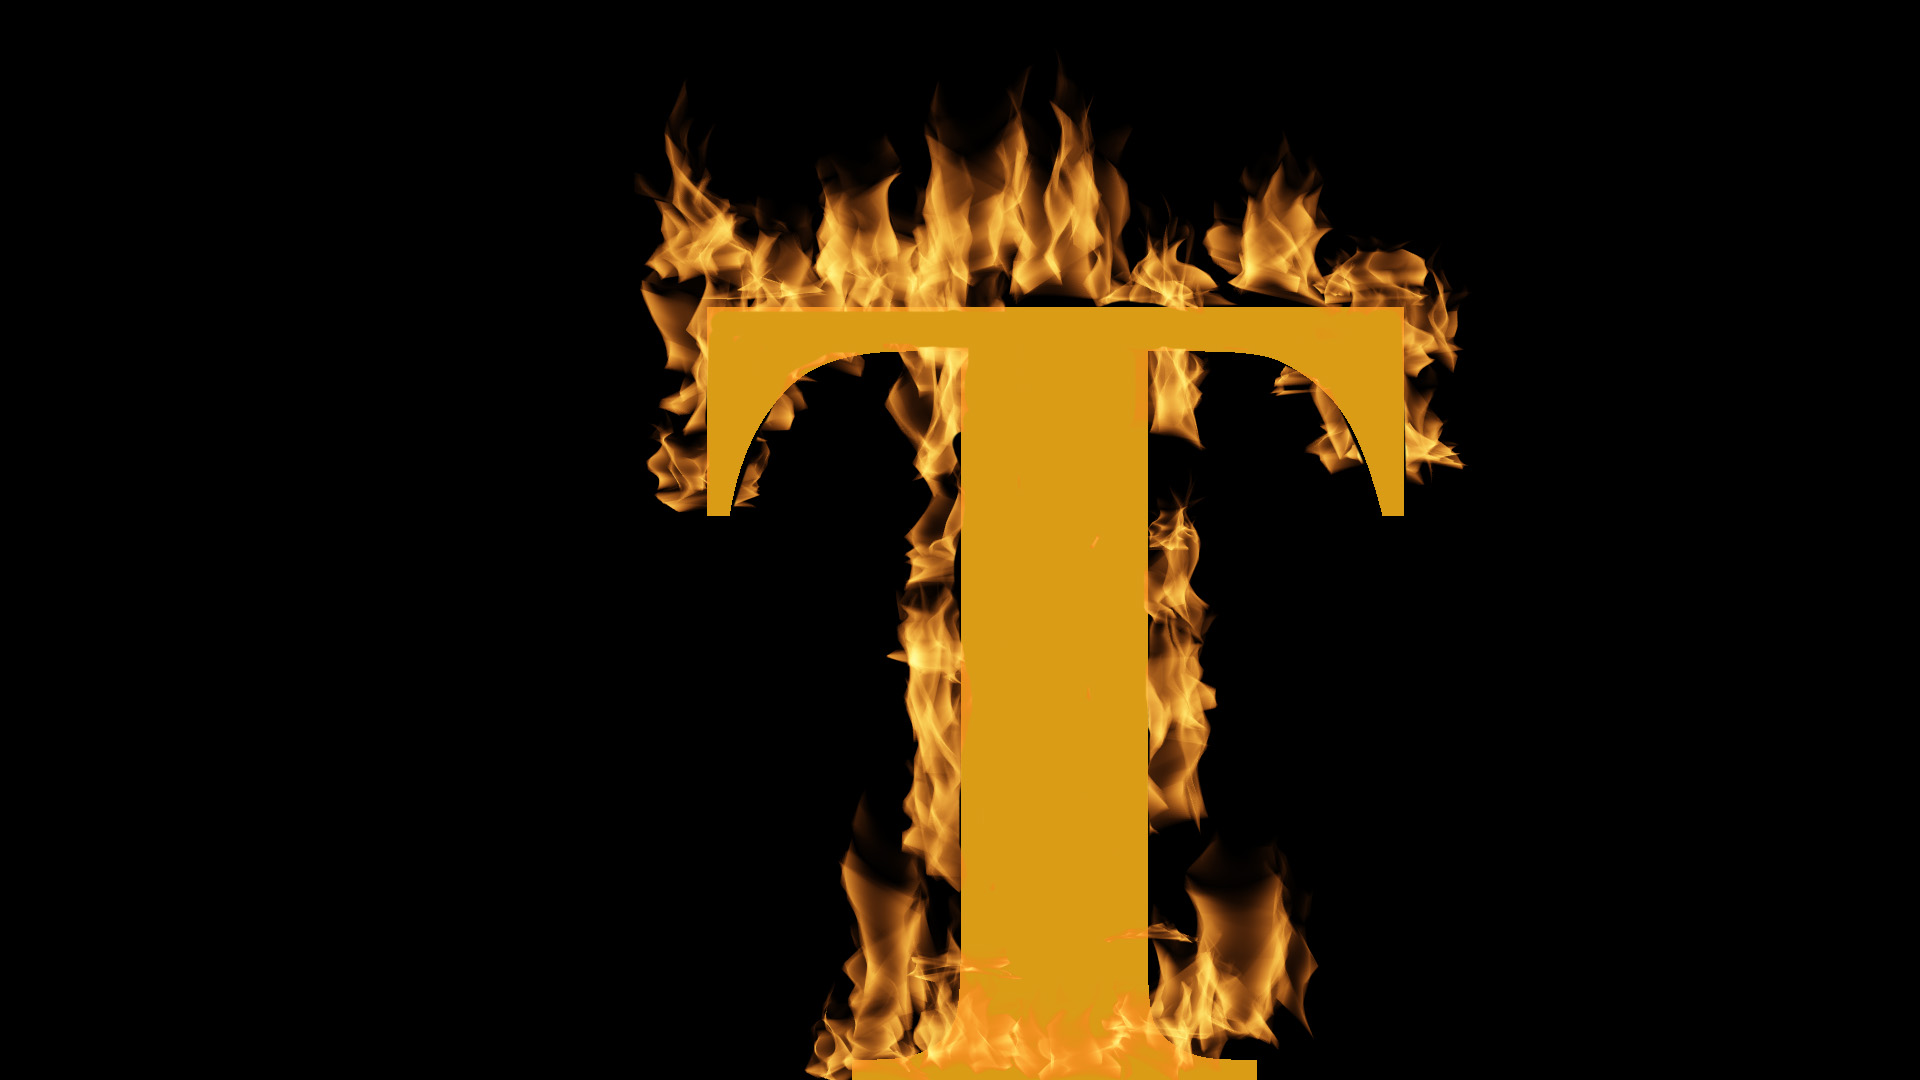
Text On Fire
While this effect is used on text in this example, it can be using with any path (vector).
BEFORE:

AFTER:
STEPS:
- Open a new Photoshop file and type some text using a black background.
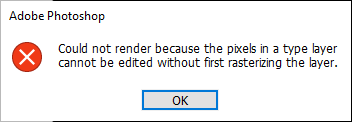
NOTE: Becasue a fire effect will be used, a solid black background will "showcase" the fire effect better. However, any background could be used. - Right-click the text layer and select Convert to Work Path.
NOTE: The fire effect only works with a path (vector) only. If you try to use the filter on a text layer, you will see the following error:
- With the path still selected, create a new blank layer and then select Filter > Render > Flames....
NOTE: If you get the following warning, click the OK button.
- In the Flame dialog box that appears, adjust the settings to your liking and then click the OK button.
- Optionally, use the Eraser Tool to erase areas of the flame that you don't need.
3D Text Wrap
This is one of the another common Photoshop Text Effect.
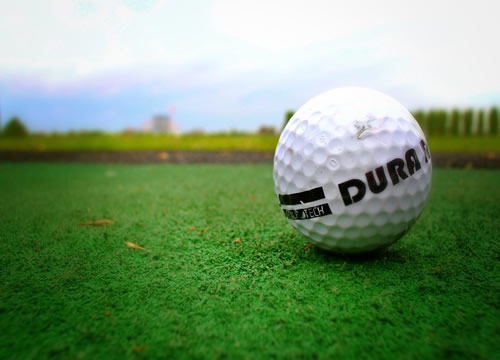
BEFORE:
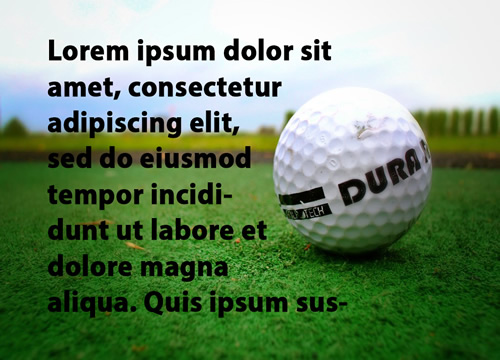
AFTER:
STEPS:
- Open file that you like to use as a background for this effect.
- Use Vector tools to create the shape you want. In this case, we use used the rectangle tool to draw a rectangle that overlap half way over the golf ball. Then, hold down the ALT key and with the Ellipse tool draw a circle around the golf ball to subtract the two paths.
NOTE: It may not appear that the two paths are subtracted. You will see in the next step that they are indeed subtracted. - Use the Horizontal Type Tool and click inside of the rectangle to place some dummy text and then replace it with whatever you want.
BONUS: Add a transparent overlay
- Create a new layer and then ALT + Click the thumbnail in the Paths panel to get a selection from the path.
- Fill the selection with a light color and then adjust the opacity so that you can see the background layer through it. Move text to create margin between text and background.
Multiple Images in Text
This is one of the first effect that most Photoshop user learn when they start.
BEFORE:
AFTER:
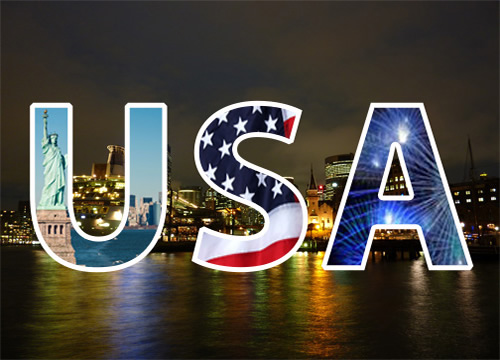
STEPS:
- Open file that you like to use as a background and other images you like to clip into it.
- With the Text Tool, type some text and size it to fit almost the width of the canvas. Ensure that you use a font that is Bold.
- Press CTRL + click on Text Layer to create a selection of the text and then turn it off.
- Create a new layer, select it, fill the selected text with any color, and then deselect it.
- Drag-and-drop the shapes from other open files into main file and then resize them a little large than the current font size, if necessary.
- ALT+Click between the first image and the shape to clip it into it. Use the Move the Move Tool to move it if necessary. Repeat for the other images.
- BONUS: Resize, move images to make them fit better.
- BONUS: Add light stroke to Text Layer.
Gel Text
The gel effect is used typically for icons, etc. You can adjust the setting to your liking as you experiment with them.
BEFORE:

AFTER:

STEPS:
- Create new file with white background and type the text you want to use with this effect.
- Using the Type Tool, select a large, bold and heavy weight font with curves instead of corners to get a better gel effect and choose a light color of your preference. Scale the font to a larger size using the Transformation Tool (CTRL+T), if necessary.
- Apply a Inner Shadow Layer Style and select a slightly darker color than the text itself by using the color picker and then selecting a darker color and adjust the Size so that the text edges looks curved.
- Apply a Inner Glow Layer Style and select a slightly lighter color that the text itself by using the color picker and then selecting a lighter color and adjust the size, set the opacity to 50, and a blend mode of Multiply.
- Apply a Bevel and Emboss Style, an Altitude of 75%, and a Hard Chisel as Technique.
- BONUS: Experiment with the Layer Style settings to get to desired effect you want.
Gold Effect
The Gold Effect is a specialize effect that has been use in movie posters, etc.
BEFORE:

AFTER:

STEPS:
- Create a new file with a Black background and type some large serif text that you would like to apply the gold effect to. Use the Free Transformation Tool to enlarge the text if necessary.
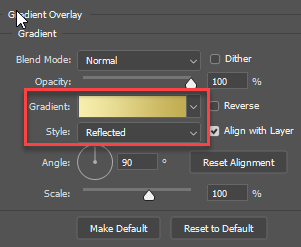
TIP: it is best to use a serif font so that you can see the highlights better. In this example the Century TrueType font is used. - Apply a Gradient Overlay effect on it. In the Layer Style click the Gradient swatch and in the Gradient Editor dialog box that appears:
- Double-click on the first color stop and then in the In the Color Picker, set the R to 247, the G to 238, and B to 173. Then, click the OK button.
- Double-click the last color stop and then set R to 193, G to 172 and B to 81. Then, click the OK button.
- While still in the Layer Style panel, for the Gradient Overlay effect, change the Style to Reflected,
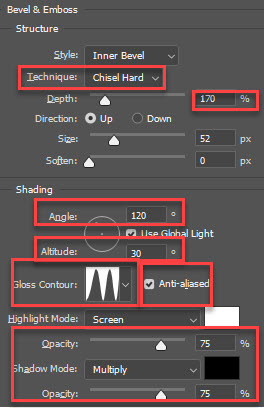
- While still in the Layer Style panel, ADD a Bevel and Emboss effect and set:
- Technique to Chisel Hard
- Gloss Contour to Double - Ring
- Angle to 120
- Select Anti-alias check box - WHY: To smooth jagged edges
- Highlight and Shadow Opacity both to 75% - WHY: To increase contrast
- Size value by clicking inside the field and then pressing the arrow key repeatedly: WHY: To close the "gaps" inside the letters
- Depth to 170% - WHY: To enhance the reflection
- BONUS: Add sparkles: (NEED UPDATING)
- Add a new layer above the Text Layer.
- Click the Brush Tool, click the drop-down combo box, click the gear icon, and then select Legacy Brushes
- In the Assorted Brushes folder, double-click the Cross-hair 4 brush.
- Use the eye-drop tool to sample the light gold color of the text, click the Brush Tool again, and then click several times on the image to apply the sparkle effect to create several highlights.
Multiple Strokes
This is an easy effect to create.
BEFORE:

AFTER:

STEPS:
- Create new file with a black background and type the text you want to use with this effect.
- Add a Stroke Layer Style and adjust the Stroke size and color to your liking. Set the Position to Outside so that the stroke does not cut into the shape of the text.
- Click the plus sign next to the Stroke command to add another stroke and then click to select that second stroke
- Change the Stroke color and change the Stroke Size to be as least twice the size of the previous stroke. Ensure that the Position is set to Outside so that the stroke does not cut into the shape of the text.
- BONUS: Add a background layer or background image below the text. You can also add a drop shadow Layer Style to the text.
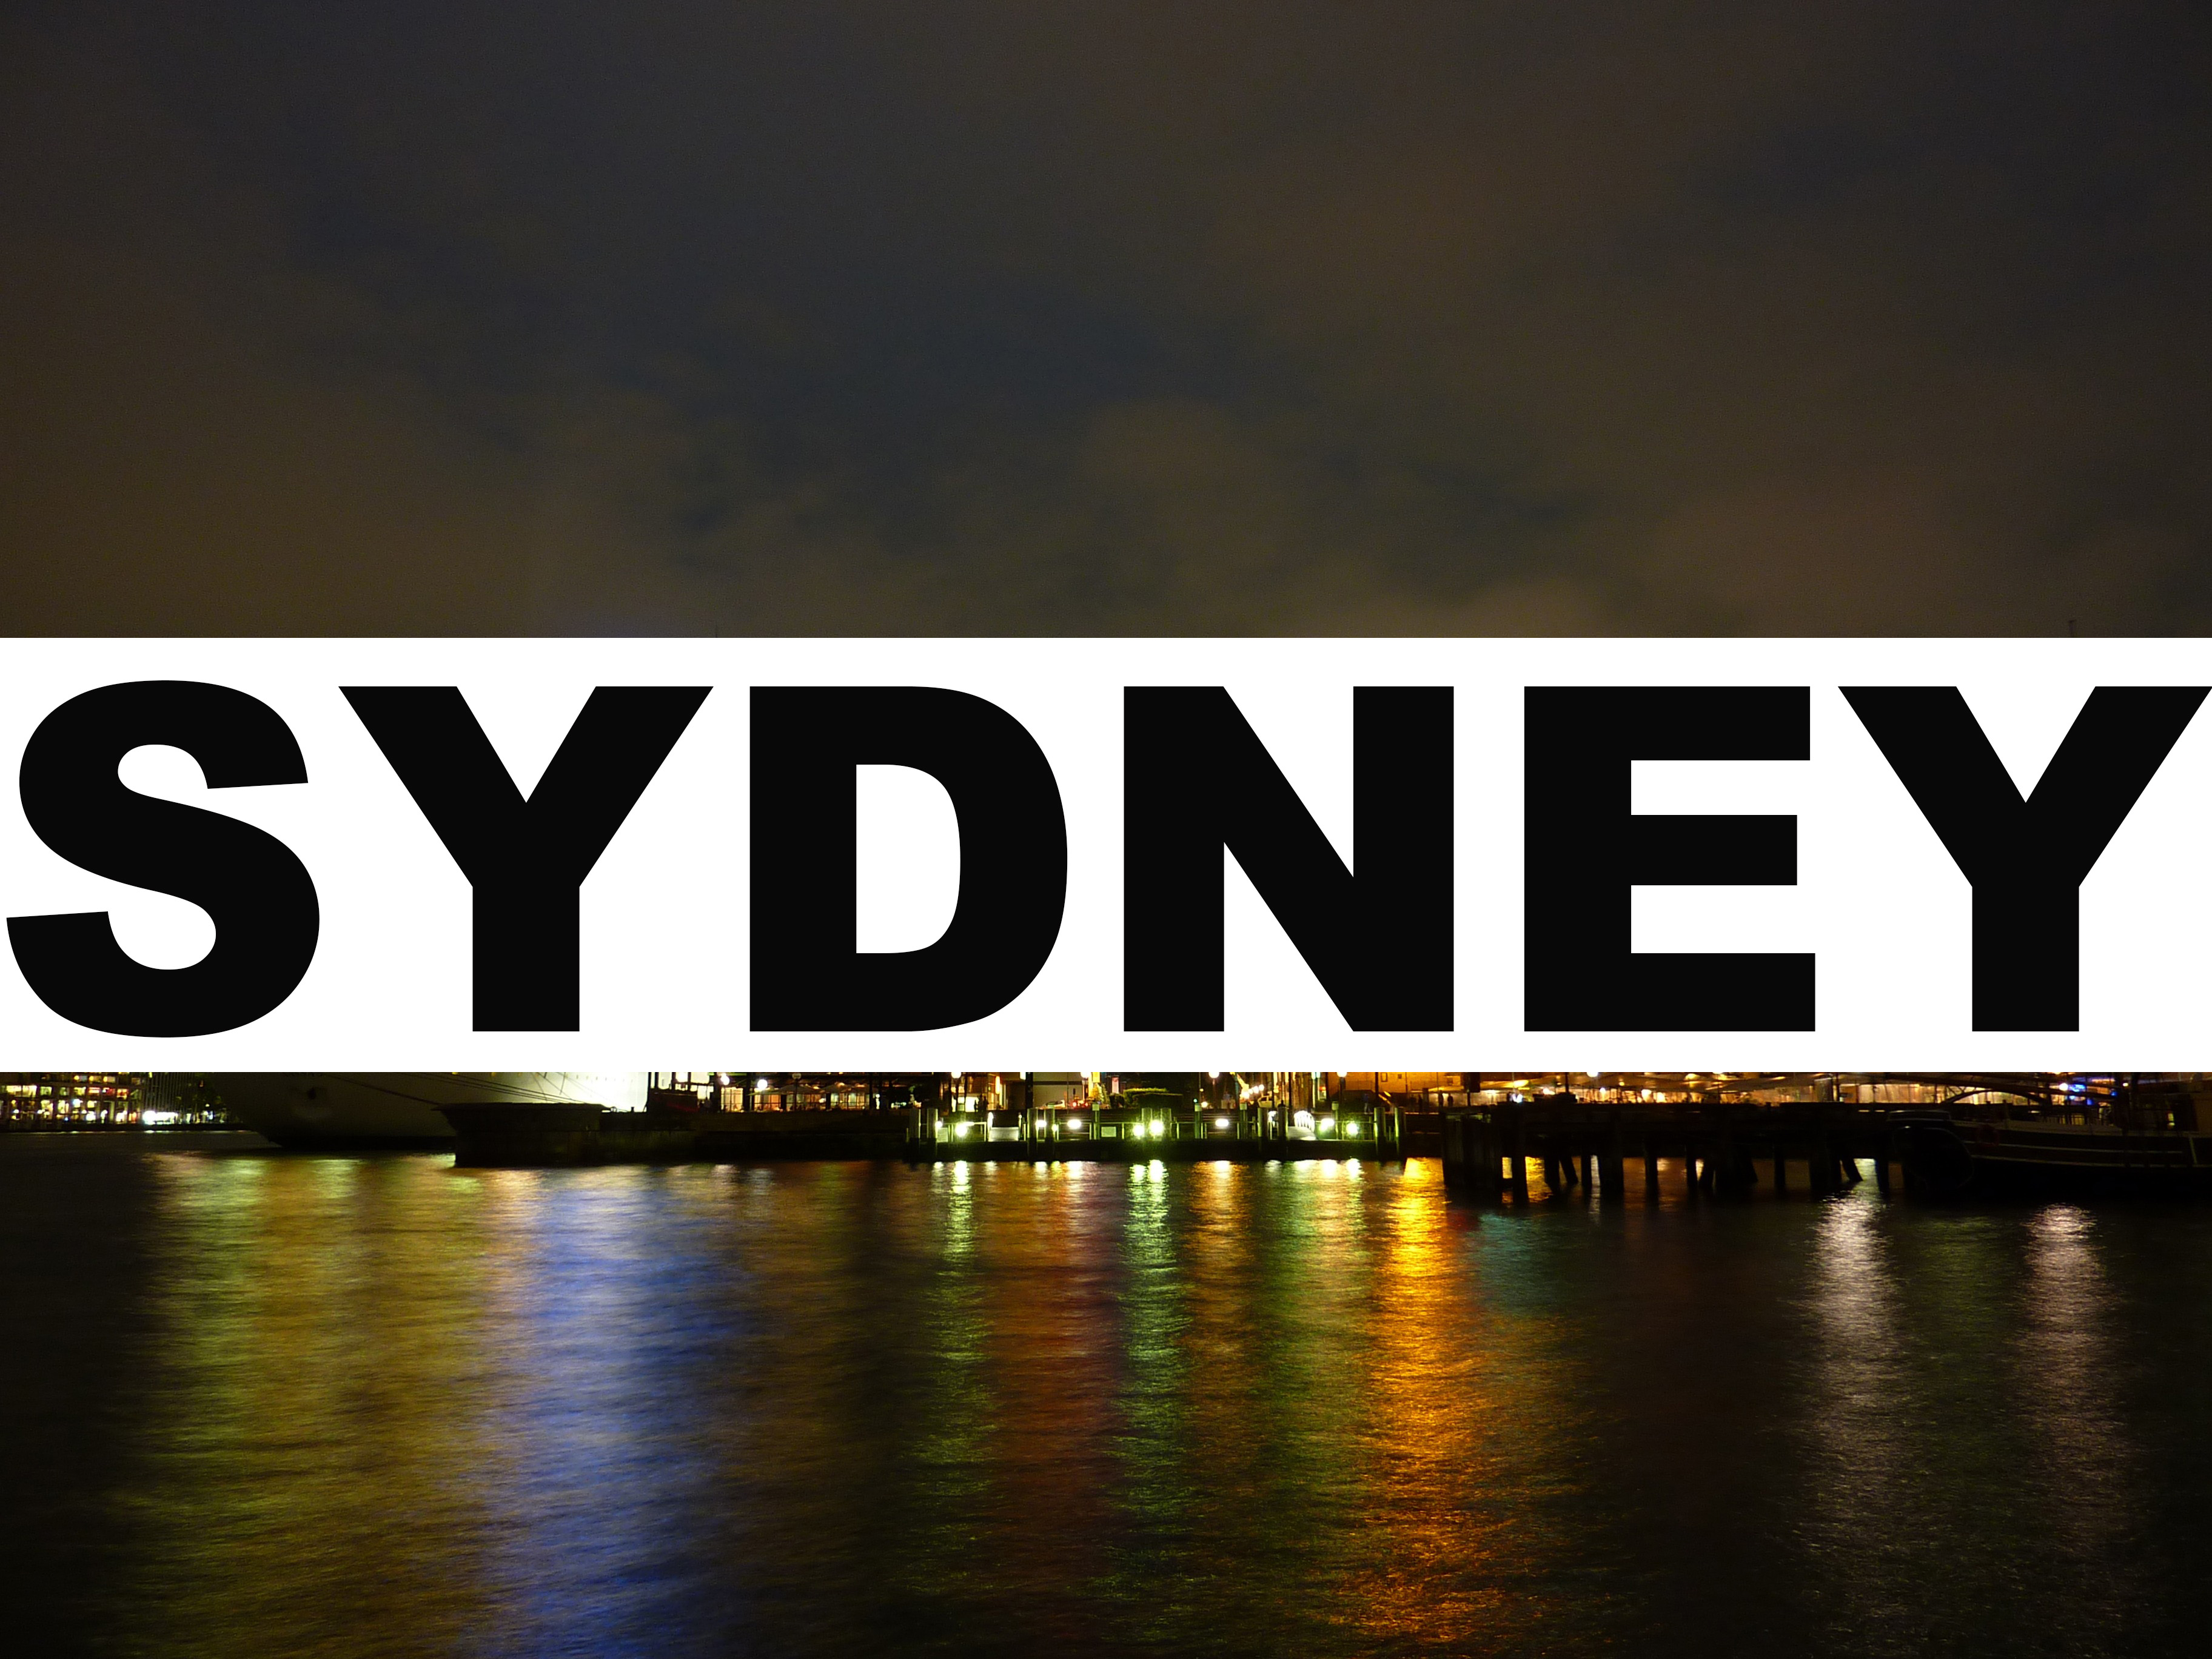
CUTOUT TEXT EFFECT
This is a more advanced text effects that uses Advanced Blending to make the text flexible. While you could do this effect by manually cutting the text out of the white background using the text selection, you would have to redo the effect everytime you wanted to change the text. Using the Advanced Blend method makes the effect more flexible. This effect is similar to creating a mask (or matte) that is used to show, hide or protect the content under it.
BEFORE:
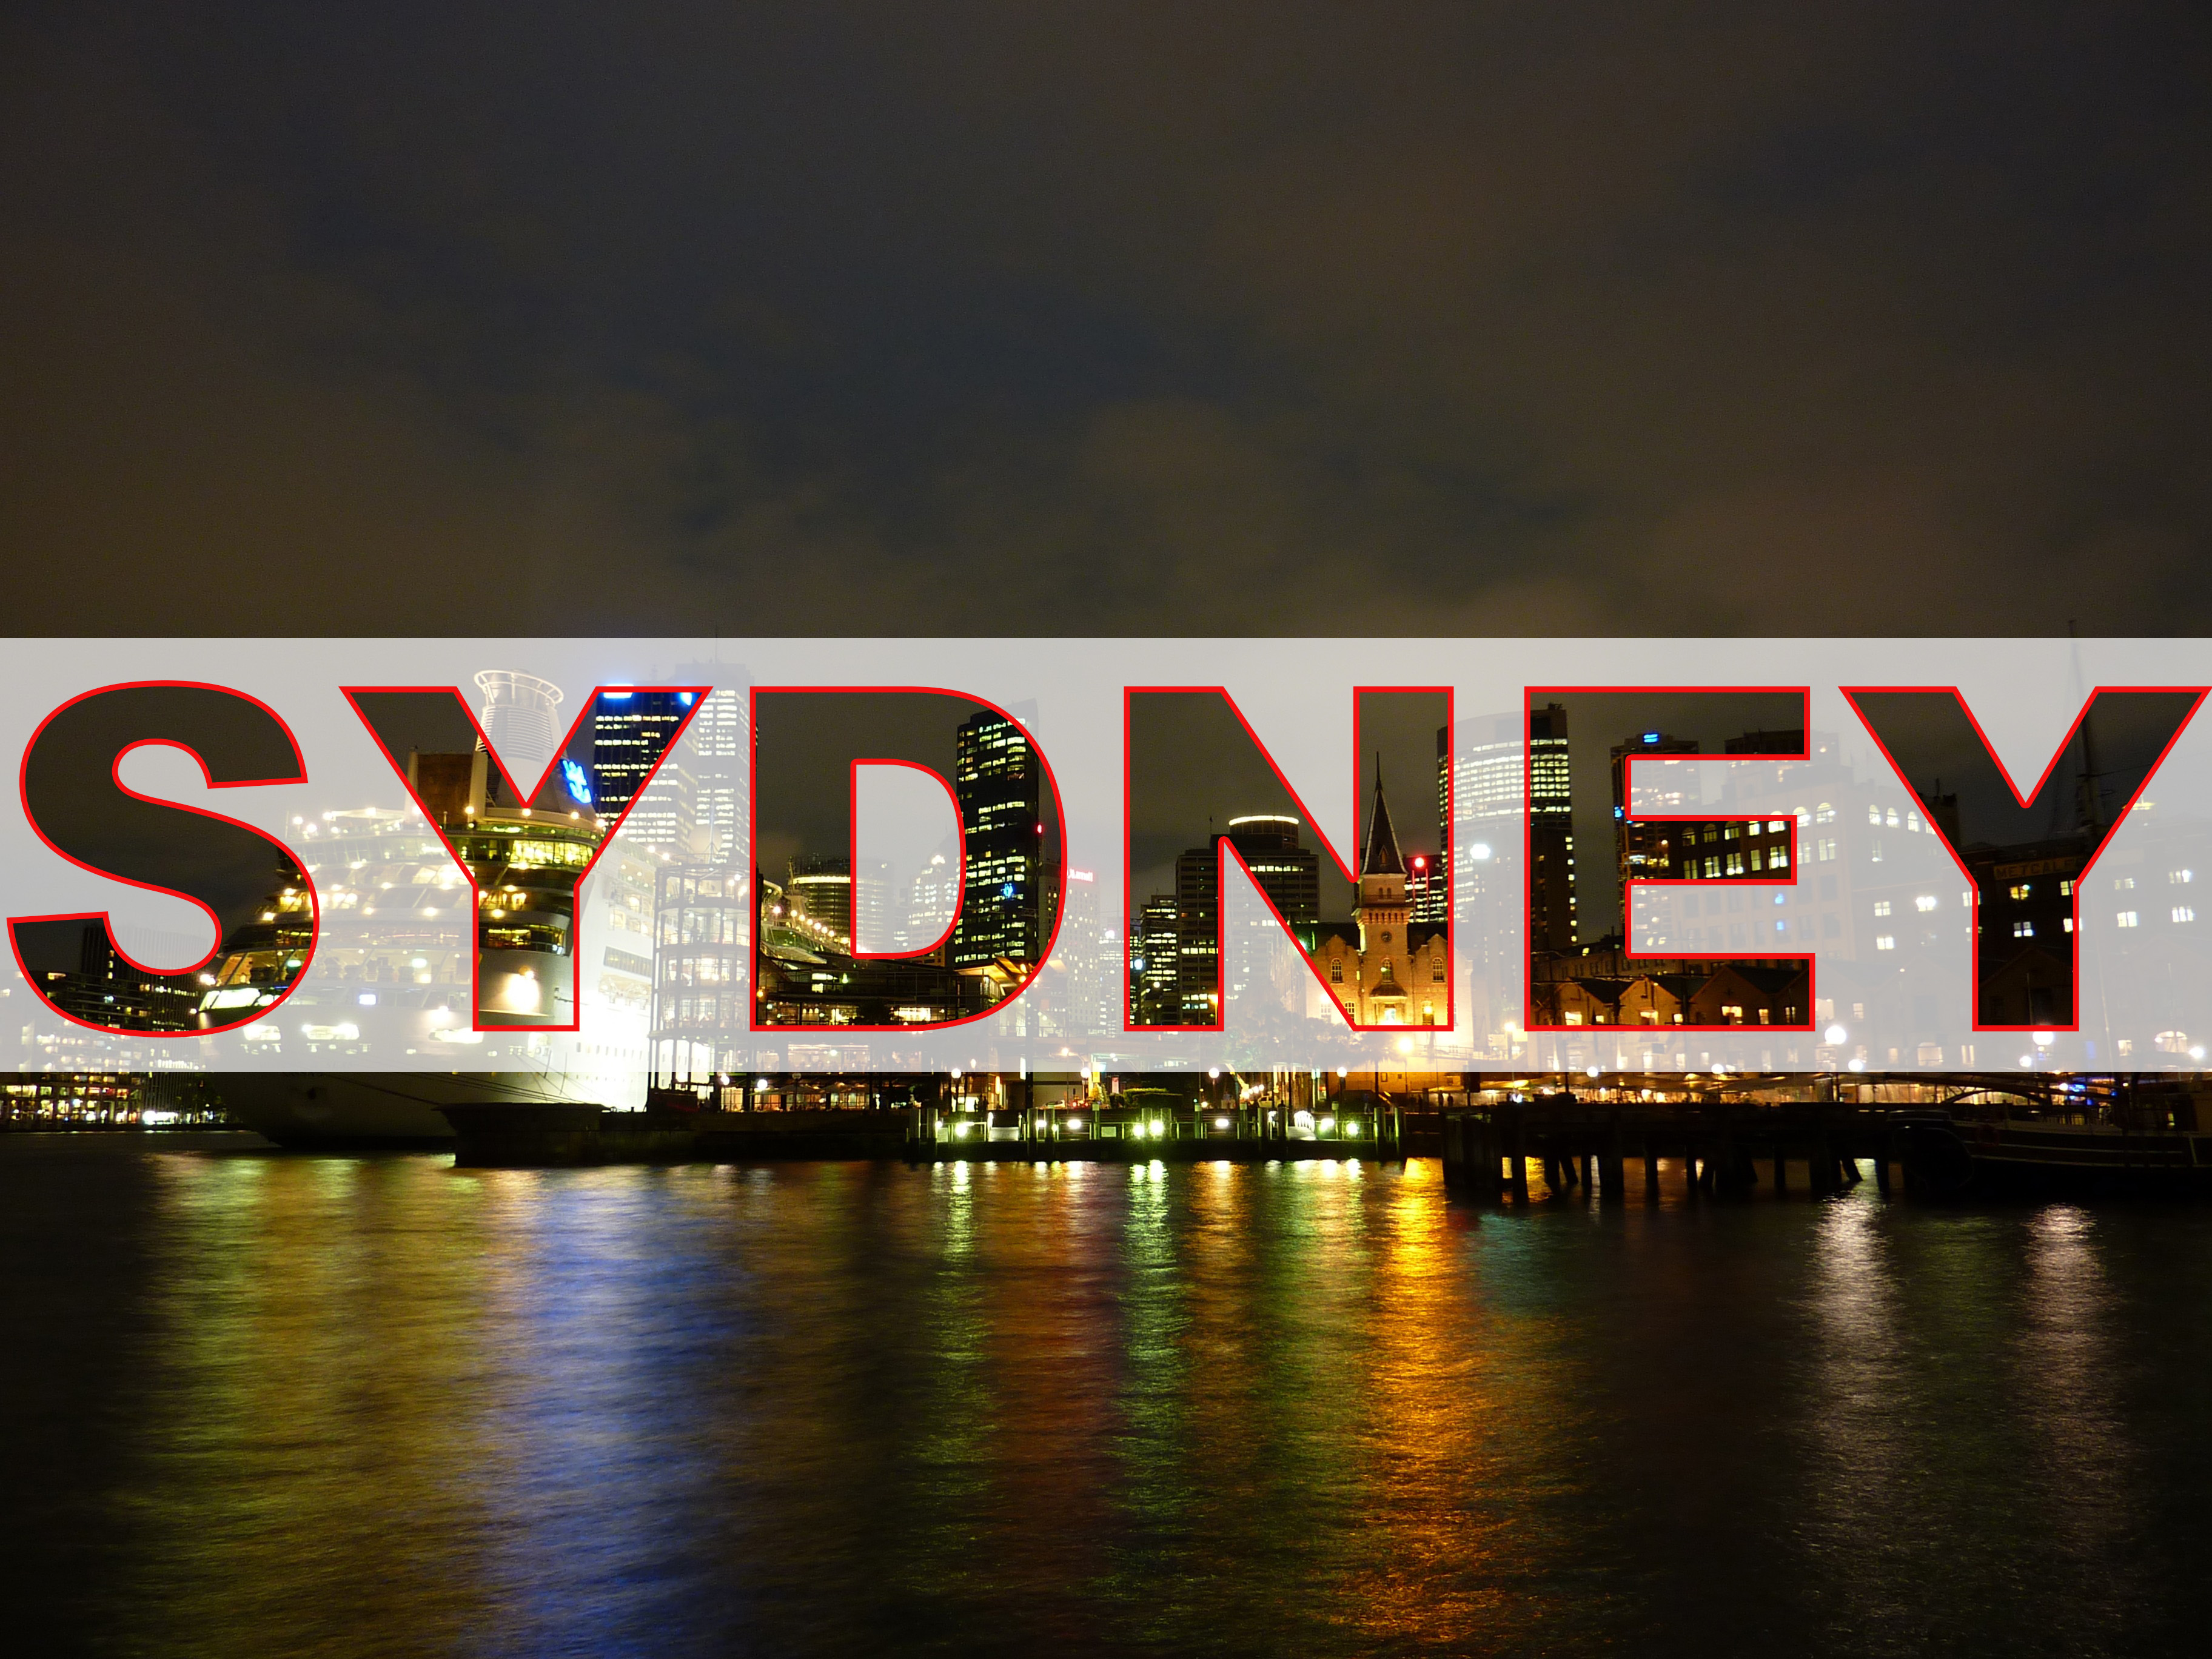
AFTER:
STEPS:
- Open an image that will be used as a background layer (e.g., Sydney skyline).
CAUTION: DO NOT DUPLICATE the Background layer or CONVERT the Background to a regular layer; otherwise, this effect will not work. The reason for this will become apparent later. - Add a large bold text to the center of the canvas.
- Create a blank layer below the text layer and then with the Rectangle Tool and the option set to Pixel, draw a white rectangle the width of the canvas and a little bit larger than the text. (See BEFORE screenshot above).
- Double-click the text layer to open the Layer Style panel and change the Knockout type to Shallow and the Fill Opacity to 0 and then click the OK button.
NOTE: The Shallow Knockout type uses the character shapes to "punch" holes through the white background layer. However, the effect is not obvious because the text is still opaque and is covering up the effect. This is the reason why the Fill Opacity was set to zero so that you can "see" the knockout effect. - CHECKPOINT: You should see the background through the text letters.
BONUS: Change the text
- Double-click the text layer and then change the text.
- CHECKPOINT: You will see the knockout effect still works.
BONUS: Add additional styles
- With the white background layer selected, change the Opacity to about 70.
- Optionally, with the text layer selected, add a color stroke.
IMPORTANT NOTE:
This effect only works with a Background layer unless you group the text and white background layer together.
- Double-clcik on the Background layer, give it a new name, and then click the OK button to convert the Background layer to a regular layer.
- CHECKPOINT: You should see that the knockout effect no longer works.
- Select both the text layer and the white background layer and press CMD/CTRL + G to group the two layers.
- CHECKPOINT: Notice that the effect has been added back.
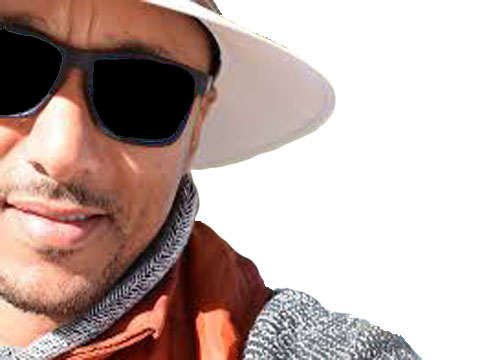
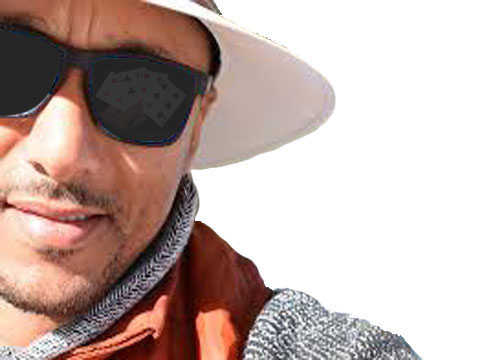
Reflection out another object
Reflecting an image in a sunglasses is a common effect that is easy to create.
BEFORE:
AFTER:
STEPS:
- Open an image with a person wearing sunglasses as the background image and make a selection of one of the lens.
- Open another image with the image that will be used for the reflection and make a copy and the select Edit > Paste Special > Paste Into... the selection of the background image. Scale image (CTRL+T) to fit within selection. Optionally, add a Inner Shadow from Style Layer and adjust Distance, Size and Angle to make them look more natural.
- Lower Opacity to about 10-20%. Repeat step for other lens, if necessary.
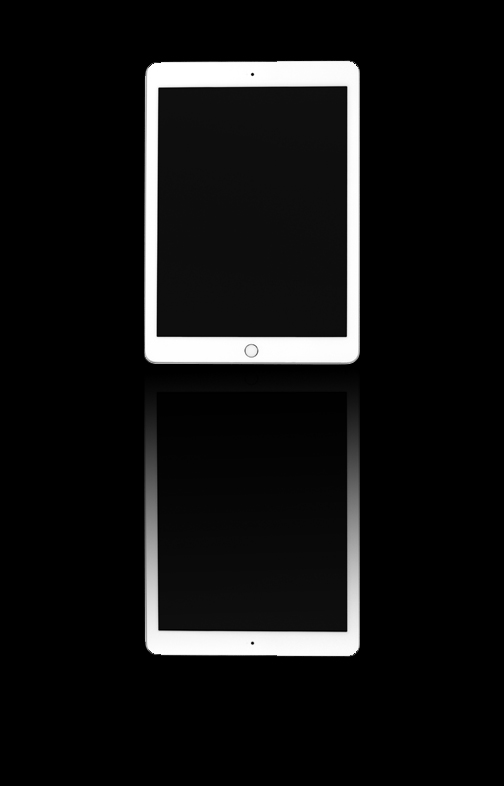
Reflection With Fade
Reflecting an image that is on a shiny surface is the hallmark of all reflections.
BEFORE:
AFTER:
STEPS:
- Create a file and fill the Background with black.
- Open another image and make a selection of the object that will be used and copy and paste it into the original file.
- Scale (CTRL+T) object and move it upward to allow room for the reflection, if necessary, or use the Crop Tool to increase the canvas height.
- Copy this layer again (CTRL/CMD+J) and flip the object vertically (CTRL/CMD+T and right-click and select Flip Vertical) and move the flipped object directly below the base of the original object.
- Add a Layer Mask to this layer and then click on the Layer Mask and apply a black-to-white gradient to it by dragging from the bottom to the top of the object to apply the gradient to create a fade reflection. Apply gradient repeatedly, if necessary, to get desired effect.
- BONUS: Add text and Layer Effect.
NOTE: This is another really popular effect that are used by beginners and advanced users alike.
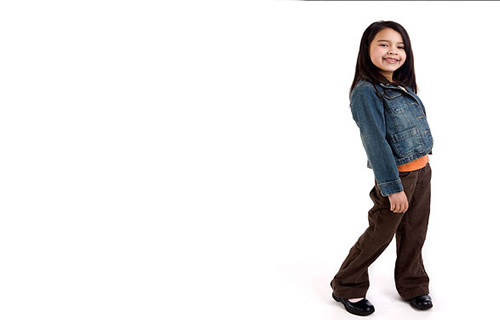
Cast Shadow
Unlike a drop shadow which is usually shown against a "wall" type surface, a cast shadow is shown usually against a "floor" type surface.
BEFORE:
AFTER:
STEPS:
- Open an image that you would like to have a cast shadow.
- Create a selection of the object in the image and then duplicate it to a new layer (CMD/CTRL+ J).
- Resize the object (CMD/CTRL + T) and move it to the right side of the canvas, if necessary.
- Add a background layer below the layer just created.
- Apply a Drop Shadow layer style to top layer and move it on canvas while the Layer Style dialog box is opened.
- Right click on the word Drop Shadow effect, select Create Layer and then click the OK button to render the drop shadow effect as a bitmap image.
- Select the layer with the drop shadow and press CMD/CTRL + T to view the transformation handles.
- While holding down the CTRL key, click and drag on the corner handles to transform the shadow so that it appear almost flat on a surface. Move the shadow where it will align with the base of the object, if necessary.
Brush Metal Effect
Of all of the metal effect, the brush metal effect has been used for years and can be created by using multiple filters.
BEFORE:
AFTER:

STEPS:
- Open any image with an object that you like to apply a brush metal effect to.
- Make a selection of the area you want to apply the effect to and then duplicate it (CTRL/CMD + J) to another layer.
- Apply a black&white gradient to the selection.
- Choose the Add Noise filter with an Amount of 20%, Distribution of Gaussian and Monochromatic.
- Add a Motion Blur filter and set Angle and Distant to get brush metal effect you desire.
- BONUS: Add text and layer effect if needed.
NOTE: Filters have been around for a long time. However, what new is the fact that you can add a Convert a Layer for Smart Filters so that the result is non-destructive.
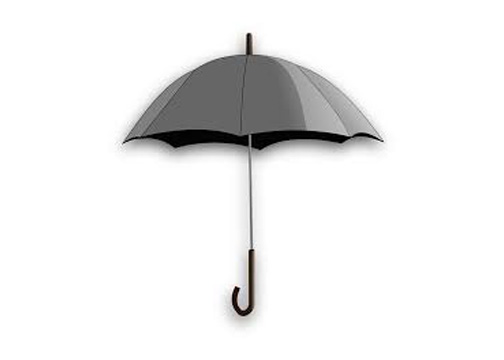
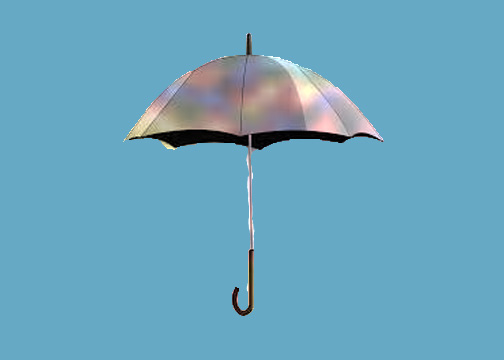
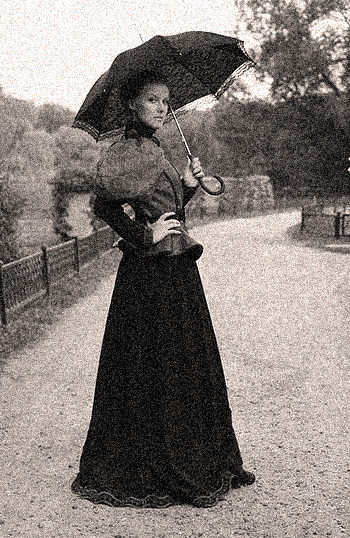
Change the Pattern on an object
This technique is useful when you need to change the "fabric" on a piece of furniture.
BEFORE:
AFTER:
STEPS:
- Open an image and create a selection of the object (e.g., only the top portion of the umbrella above) and duplicate it (CMD/CTRL + T) onto a new layer.
- Apply a Pattern Overlay Layer Style and select a Pattern from the list (or create your own).
- Change the Blend Mode to Color Dodge to blend the pattern into the image. Also, lower the Opacity to about 50-65% and then click the OK button.
- Deselect the selection (CMD/CTRL + D)
- Optionally, create a new layer below that layer and fill it was a color or another image.
Black & White With a Splash of Color
This is another popular effect that has withstood the test of time.
BEFORE:
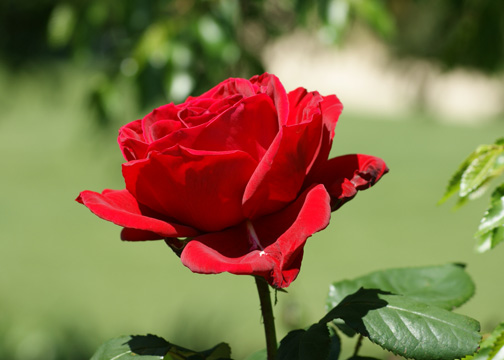
AFTER:
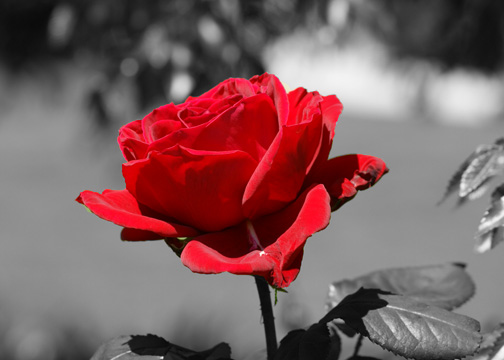
STEPS:
- Open an image and create a selection on what you want to remain in color.
- Invert the selection (CTRL/CMD + SHIFT +I).
- Apply a Black and White Adjustment Layer to the inverted selection. Deselect the selection.
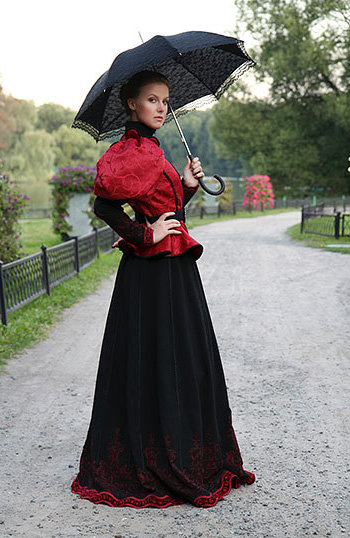
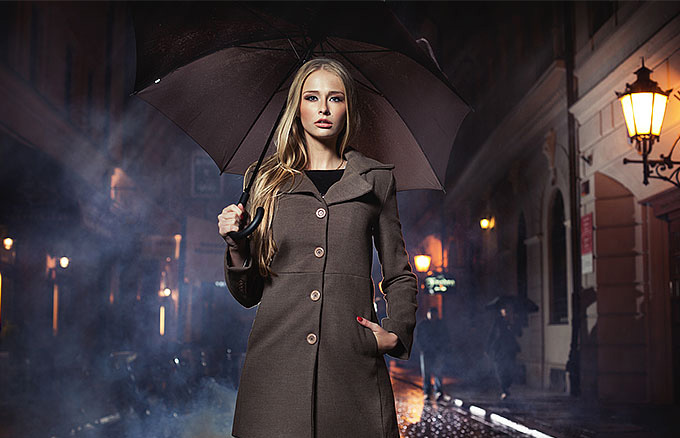
Change Color But Not Texture
You can change an object color without changing its texture.
BEFORE:
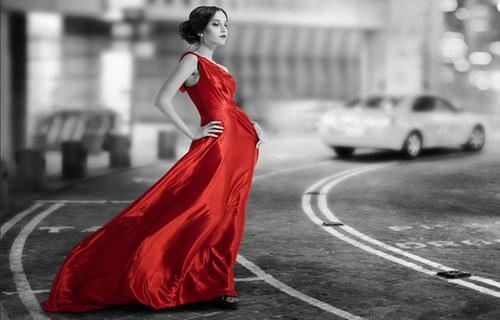
AFTER:
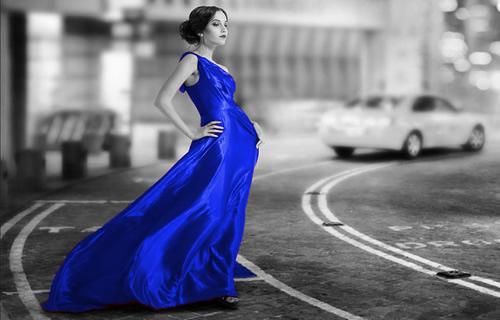
STEPS:
- Open an image and make a selection of what you want to change color (e.g., dress color).
- Apply a Hue/Saturation Adjustment Layer to the selection. Select the colorize check box and then change the other settings to your liking/
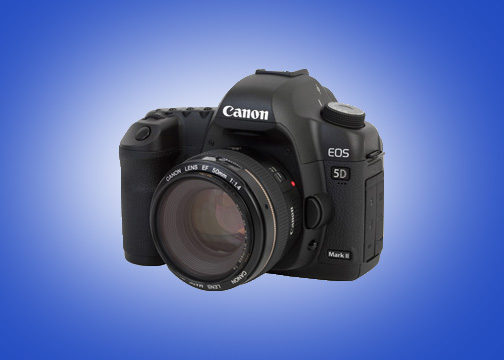
Spotlight
When you need to showcase a product, the spotlight is a great effect to use to have the image "pop."
BEFORE:
AFTER:
STEPS:
- Open a new file with a solid background fill color.
- Select an object (e.g., a product to showcase like a camera) from another file and cut and paste it into to a new layer. Scale and move object, if needed.
- Create a new layer below product object layer and use the Lasso Tool to draw a rough selection around object and fill selection with white (ALT/OPTION+Backspace/Delete) and then deselect the selection.
- Apply a Smart Filter and a Gaussian Blur filter to that layer using a high Radius setting.
- BONUS: Add text and other effects if you like.
NOTE: The reason for the layer being deselected in step three is so that when filter is applied it will be applied to the entire layer and not just the selection.
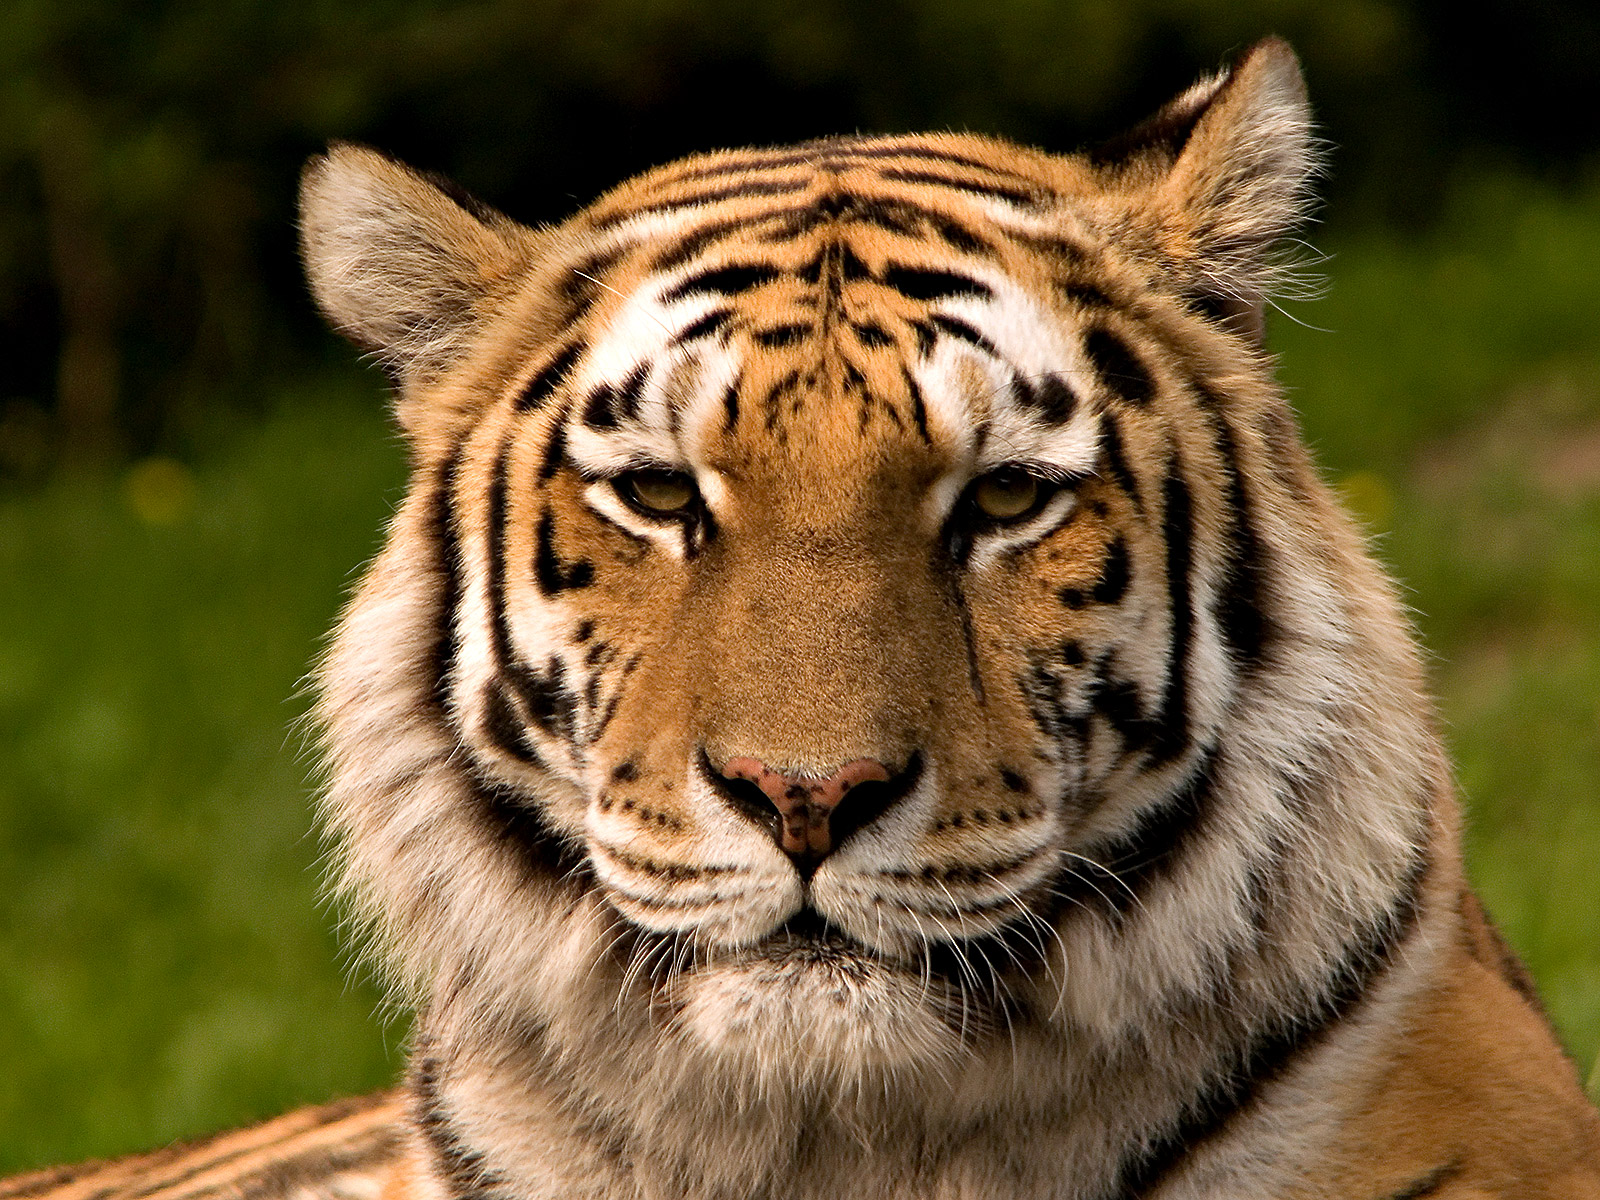
Grid Effect #1
This is a common grid effect that is used often.
BEFORE:
AFTER:
STEPS:
- Create a new file that has to same height and width (e.g., 1000x1000) with the Background Contents color set to white.
NOTE: The canvas can be any size but this features works best with a square image. - Create a new layer and then select View > New Guide Layout... and set both the row and column to 3 and all margins and gutters to 20, and then click the OK button.
- Using the Rectangular marquee tool, drag to draw a selection at the top left corner within the margin and gutter. Hold down the SHIFT key and add selections to the other squares.
- Press CMD/CTRL+D to remove the selections and then select View > Clear Guides.
TIP: You can save this as a template and use it for any image later. - Open the image that you would like to use in the Grid and press CMD/CTRL+A and then Edit > Copy.
- Click back on the original image and the select Edit > Paste Special > Paste In Place.
NOTE: This step will paste and center the image and create a layer mask all in one step. - Hold down the ALT/OPTION key and click between the two layers to create a clipping mask.
- If necessary, press CMD/CTRL+T to resize the image and use the Move Tool to move the image.
- BONUS: Click the grid layer, add a drop shadow filter, and move it to offset it.
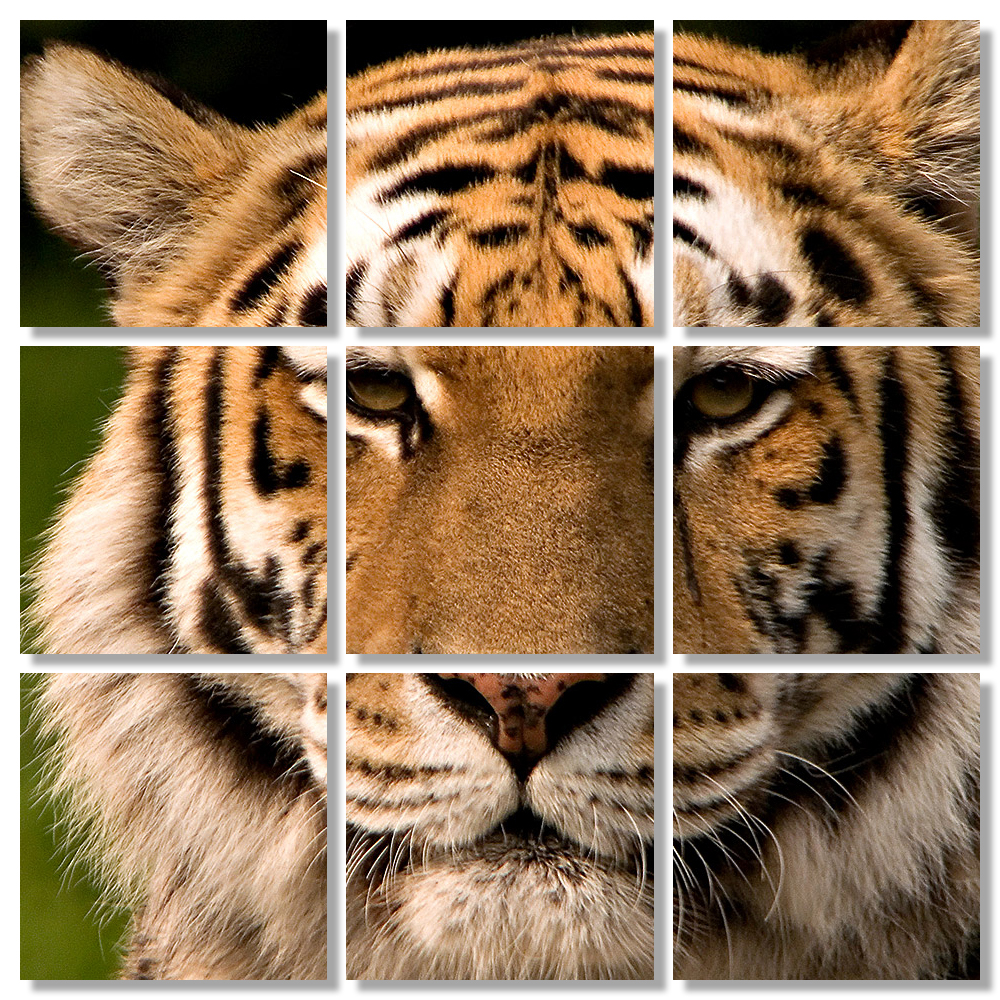
Grid Effect #2
This is another common grid effect that is used often.
BEFORE:
AFTER:
STEPS:
- Open an image that you would like to create a grid on and the select the Crop tool (C) and set the preset aspect ratio of 1x1 (square). Double-click the image to commit the crop.
- Create a new layer and then select View > New Guide Layout... and set both the row and column to 3 and all margins and gutters to 0, and then click the OK button.
- Using the Rectangular Marquee Tool, drag to draw a selection at the top left corner to select the first grid and then press CMD/CTRL+J to copy the selection to another layer.
- Select the next square and then select the main layer again and press CMD/CTRL+J again. Repeat for all squares.
- Select View > Clear Guides.
- Using the Crop tool, increase the size of the canvas about 20 to 30 pixels.
- Click the first square and add a 10 pixels stroke and a drop shadow effect to it.
- Press CMD/CTRL+T and move and rotate the first square as you see fit. Repeat for the other squares.
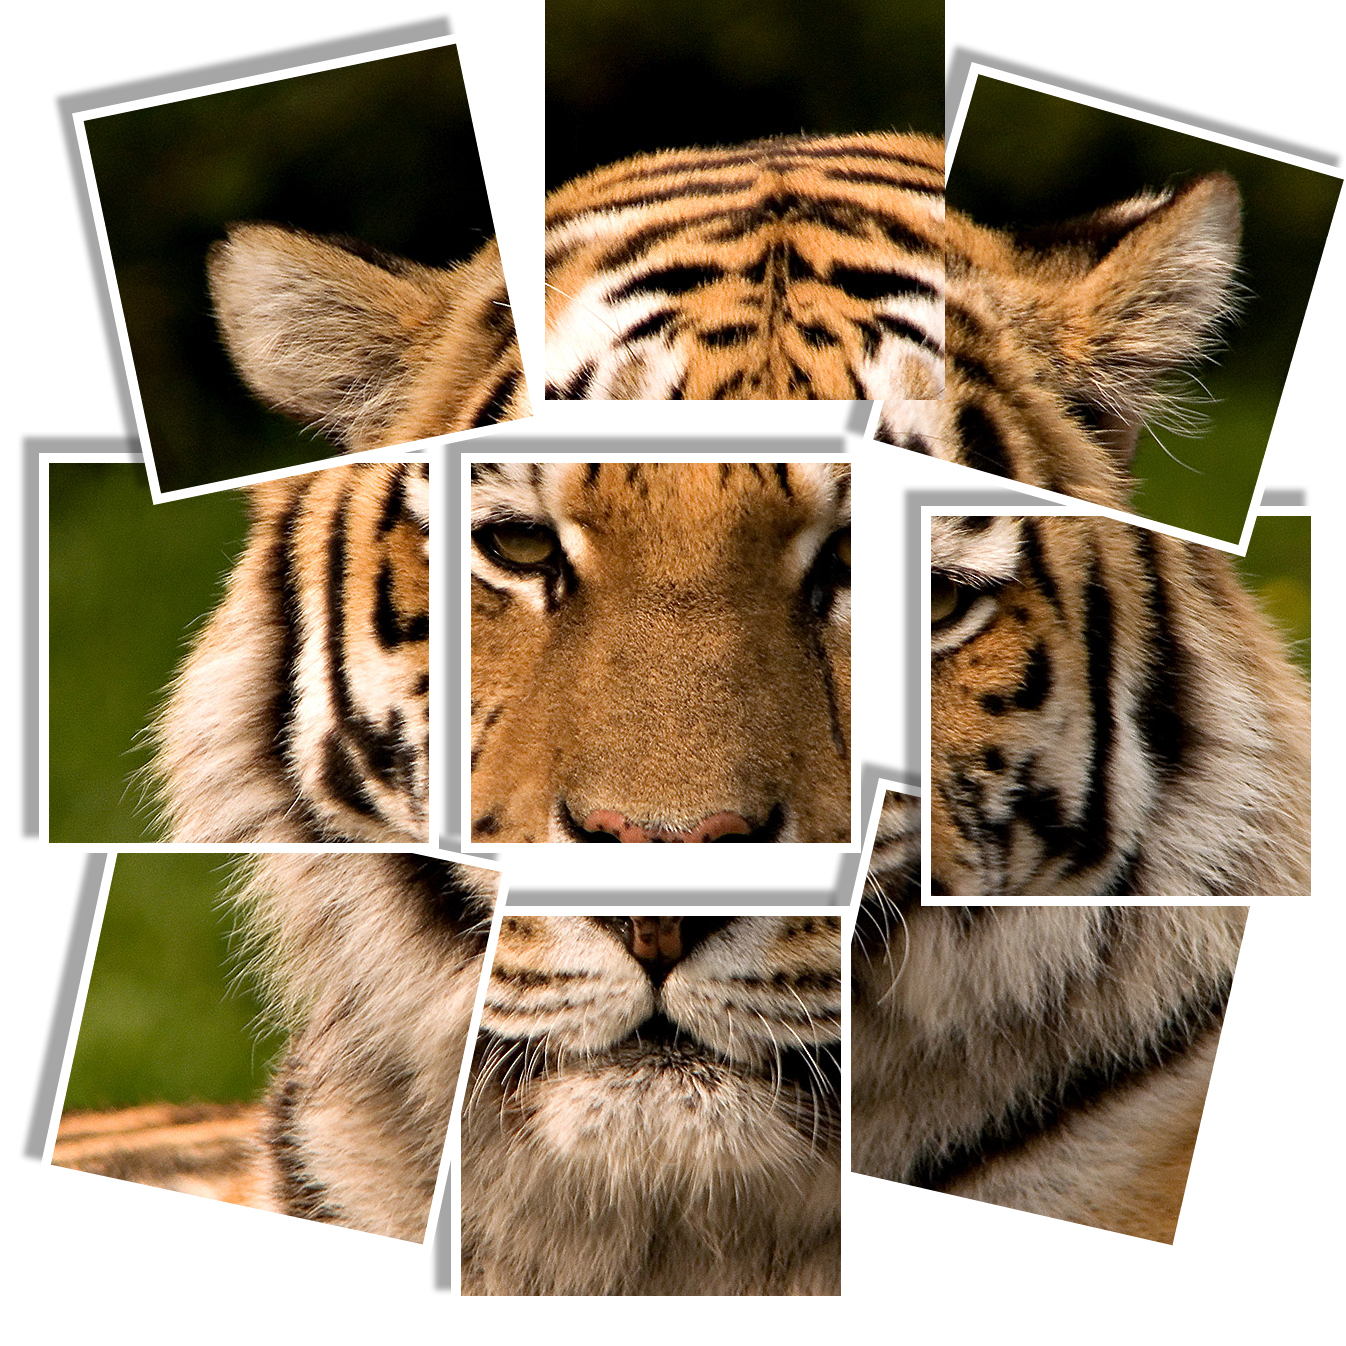
Grid Effect #3
This is another common grid effect that is used often.
BEFORE:
AFTER:

STEPS:
- Open an image that you would like to create a grid on and the select the Crop tool and set the preset aspect ratio of 1x1 (square). Double-click the image to commit the crop. Then, create a new layer.
- Create a new layer and then select View > New Guide Layout... and set both the row and column to 5 and all margins and gutters to 0, and then click the OK button.
- Using the Single Row Marquee Tool Rectangular, click near the first row of the grid to create a selection. Hold down the SHIFT key and add the remainder horizontal row selections. Switch to the Single Column Marquee Tool and the SHIFT tool still depressed, add the vertical selections to complete the grid.
- Select View > Clear Guides.
- Fill the selection with white or black depending on the image. (e.g., ALT+Backspace) and then deselect the selection (CMD/CTRL + D).
- Optionally, Add a Stroke Adjustment layer and set the stroke size to 2, the color to white, and Position to Outside to the Grid layer to increase the thickness of the grid lines.
- Press CMD/CTRL+T and move and rotate the first square as you see fit. Repeat for the other squares.
Grid Effect #4
This is another common grid effect that is used often.
BEFORE:
AFTER:
STEPS:
- Open an image that you would like to create a grid on and the select the Crop tool and set the preset aspect ratio of 1x1 (square). Double-click the image to commit the crop. Then, create a new layer.
- Create a new layer and then select View > New Guide Layout... and set both the row and column to 5 and all margins and gutters to 0, and then click the OK button.
- Using the Single Row Marquee Tool Rectangular, click near the first row of the grid to create a selection. Hold down the SHIFT key and add the remainder horizontal row selections. Switch to the Single Column Marquee Tool and the SHIFT tool still depressed, add the vertical selections to complete the grid.
- Select View > Clear Guides.
- Fill the selection with white or black depending on the image. (e.g., ALT+Backspace)
- With the Single Row Marquee Tool selected, click near the FIRST HORIZONTAL grid line to create a single row horizontal selection. Now, hold down the SHIFT key and click near the remaining. horizontal grid lines to create the other horizontal selection.
- With the Single Column Marquee Tool selected AND with the SHIFT KEY still held down, click near the FIRST VERTICAL grid line to create a single column horizontal selection. Now, click near the remaining. vertical grid lines to create the other vertical selection.
- Fill the selection with white or black depending on the image. (e.g., ALT+Backspace) and then deselect the selection (CMD/CTRL + D).
- Optionally, add a Stroke Adjustment Layer and set the stroke size to 2, the color to another color, and Position to Outside or Center to the Grid layer to increase the thickness of the grid lines.
- Select View > Clear Guides.
BONUS: Colorize Several Grids
- Create a new blank layer and select several of the corner grid boxes and fill them with white (or whatever color you need to)
- Select several grid squares and thene apply a Gradient Adjustment Layer to several of grid square with a color.
- Repeat previous step several times for other grid squares.
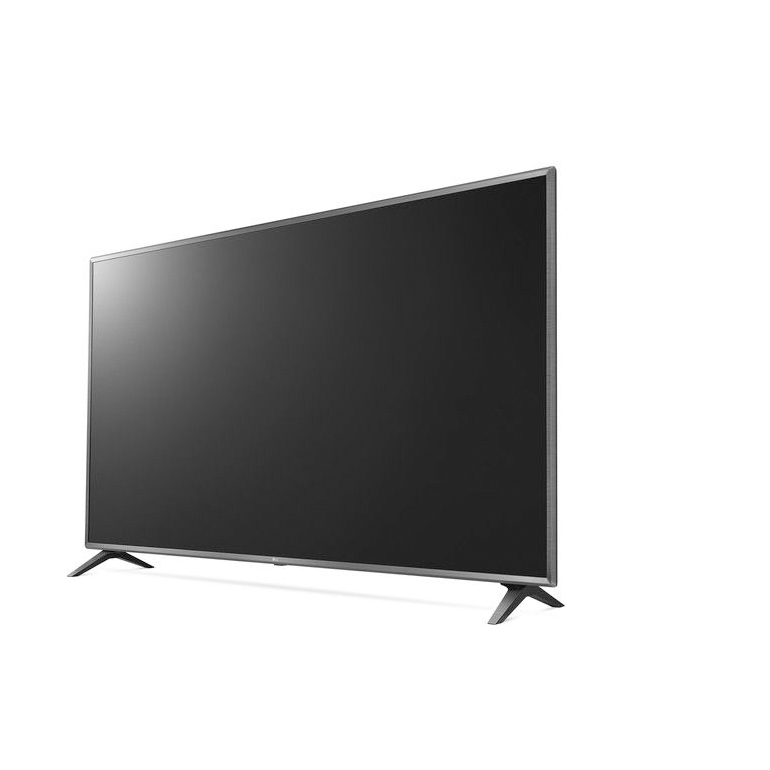
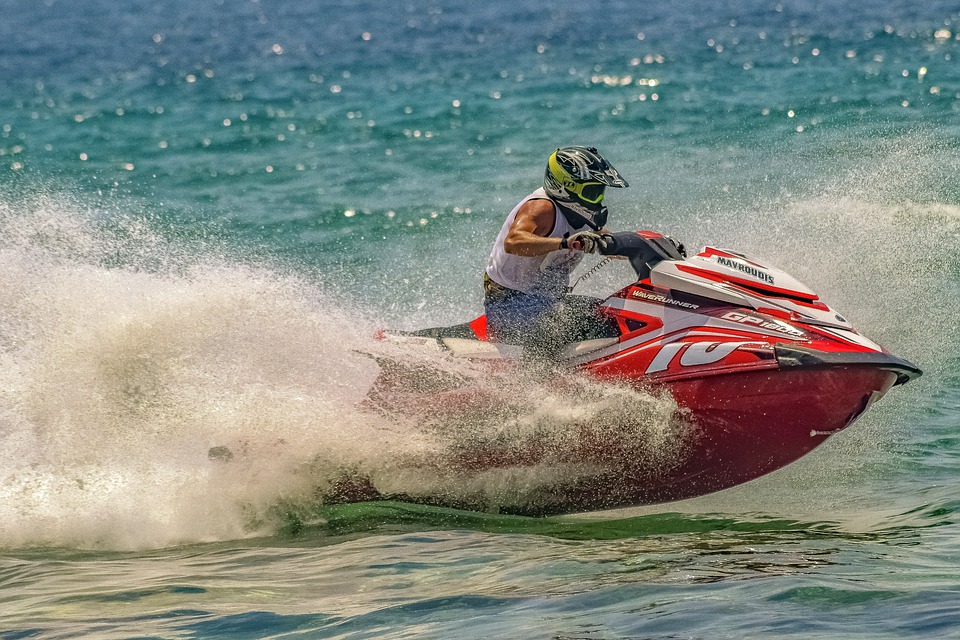
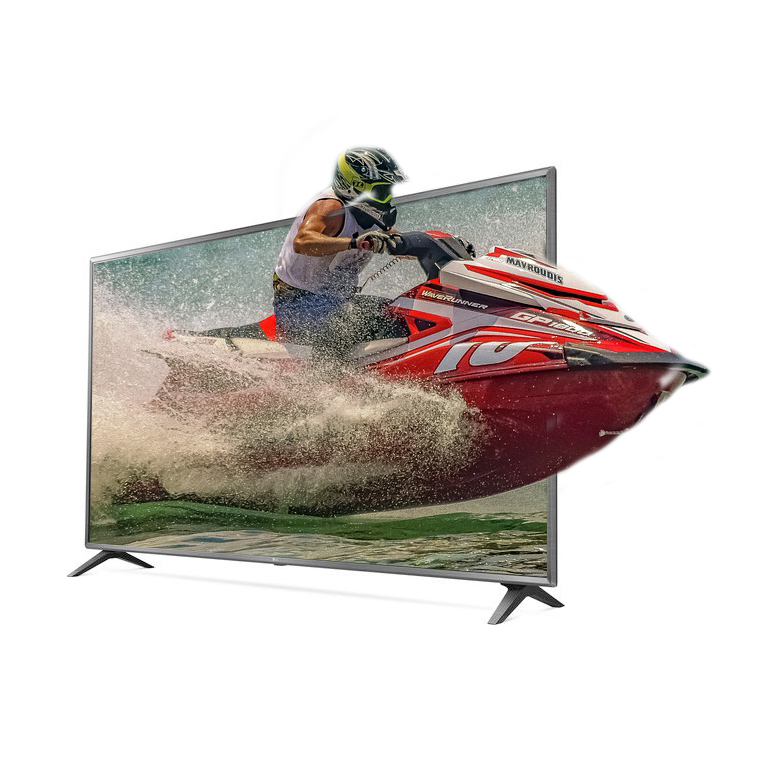
Outside The Box
This is common 3D effect:
BEFORE:
AFTER:
STEPS:
- Open the two images that you would like to use for this effect. (e.g., TV and Water Skiing)
- Using the Rectangular Marquee Tool or the Pen Tool to draw a path and then make a selection from it.
- Open the other image that you like to use (e.g., Water Skiing) and select CTRL+A and then File > Copy.
- Switch to the other image and select File > Paste Special > Paste Into.
- Use the Move Tool to move the image to the desire location so that the main object (e.g., ski boat) protrude "outside of the box" of the other image.
- Click the thumbnail mask in the Layer panel to select the mask and not the image
- Click D to set the default foreground Black and White and then use the Paint brush to add or subtract from the mask by pressing the X key to toggle the brush color as you paint to add and move what is needed or not needed.
TIP: It is OK to overpaint and then remove what is not needed.
Vignette
This is another effect the is used (or overused).
BEFORE:
AFTER:
STEPS:
- Open any photo as a background.
- Make a rectangular or circular selection and then right-click into it and select Feather..., set the Feather Radius and the click the OK button.
CAUTION: With a selection tool active, you can also set the feather size (e.g.,10 pixels) in the Option panel and make an oval or rectangular selection around image border. However, once the Feather option is made, if you make another selection later, you have to remember to reset the feather option back to zero. - Inverse selection (CTRL+SHIFT+I) and press Delete key to reveal Vignette effect. Deselect the selection (CTRL+D).
- BONUS: Add text, etc.
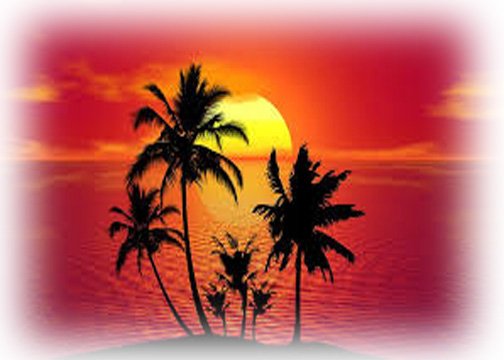
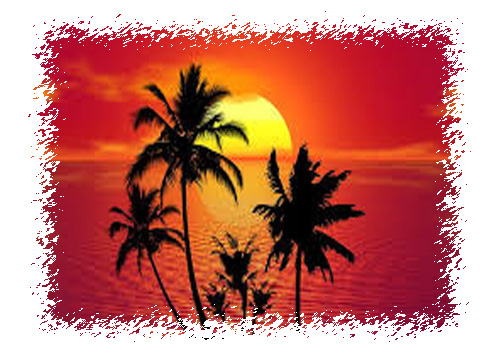
Frame Edge
The Frame Edge Effect is similar to the Vignette Effect but it is like working backward and applying the effect to the QuickMask and not the image.
BEFORE:
AFTER:
STEPS:
- Open any photo as a background.
- Create a rectangular or ellipse selection (or any custom selection) around an image border and and then invert it. Ensure that Feather is set to zero.
- Click the Quick Mask icon (Q) to enter the Quick Mask mode.
- Select Filter > Filter Gallery... , select the Brush Strokes Category, select Sprayed Strokes, adjust the slider to you liking and then click the OK button to commit the changes.
NOTE: The Filter Gallery does not work with Smart Objects. - Revert back to standard mode (Q) and invert the selection. Press the Delete key and deselect the selection.
- BONUS: Add text, etc.
Depth of Field
Depth of Field simulated the effect that you would get from a high-end camera.
BEFORE:
AFTER:
STEPS:
- Open an image and make a selection of the object you want to have in focus and then invert the selection.
- Select Filter > Convert for Smart Filters and then select Filter > Gaussian Blur... Adjust the blur to your liking and then click the OK button to apply the filter
- Deselect the selection (CMD/CTRL+D).
- If necessary, use a soft-edge brush or the Eraser Tool with the foreground color set to black, paint/erase to bring back additional areas of the photo that you want to be in focus.
- BONUS: Add text to layer
Unlike an IMAGE 's layer mask where you paint with white and black to show or hide PIXELs, painting on an Adjustment Layer with black and white will show or hide the EFFECT (not the pixels). The WHOLE image will still be VISIBLE at all times.
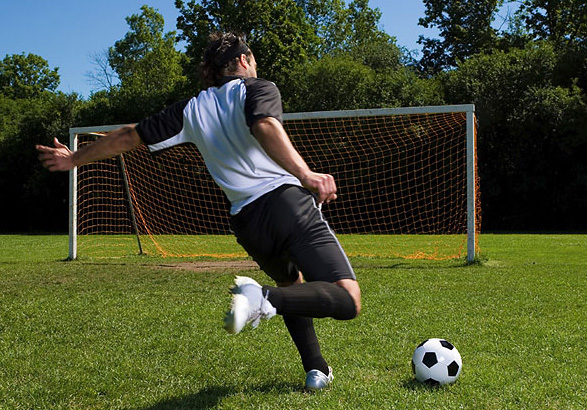
Motion Blur
Motion Blur is often used to simulate movement. Is it similar to the Depth of Field explained earlier.
BEFORE:
AFTER:
STEPS:
- Open an image and make a selection of the object you DO NOT want to have a motion blur applied to it and then invert the selection.
- Select Filter > Convert for Smart Filters and then select Filter > Motion Blur... Adjust blur to your liking and then click the OK button to apply the filter.
- Deselect the selection (CMD/CTRL+D).
- If necessary, use a soft-edge brush or the Eraser Tool with the foreground color set to black, paint/erase to bring back additional areas of the photo that you want to be in focus.
- BONUS: Add text to layer
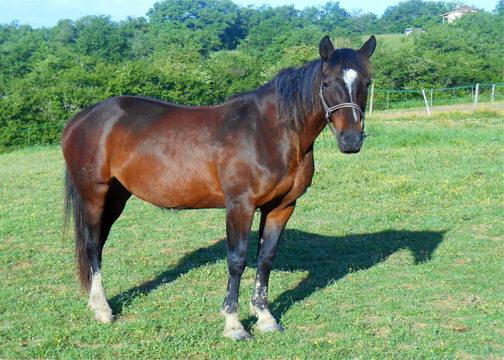
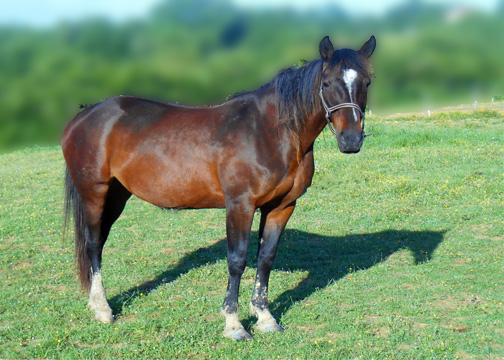
Displacement Map
A displacement map is typically used to "map" or "wrap" text to the surface of an object.
BEFORE:
![]()
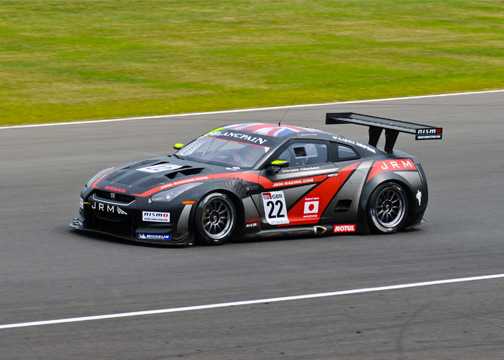
AFTER:
![]()
STEPS:
- Open a background image you would like to use a a displacement map and click Filter > Blur > Gaussian Blur and set the Radius to 1 pixels.
- Click Image > Adjustments > Desaturate and save the file (e.g., displacement_map.psd) to be used in the upcoming step.
NOTE: This will make the image black and white so that it can be used as a displacement map. - Open the original image again and type some Text on it using the Type tool.
- Right-click the text layer in the Layers panel and select Convert to Smart Object.
NOTE: Displacement Maps can only be applied to rasterized layers or to Smart Objects. - Click Filter > Distort > Displace and set the Horizontal and Vertical Scale (e.g., 10) and click OK.
NOTE: The other setting only need to be changed in the background size is different from the displacement size. - In the windows that opens, navigate to the displacement map and double-click it to apply it to the text.
- Set the Fill of the text layer in the Layers panel (0%) - The text will disappear. Double-click the text layer in the Layers panel to open the Layer Style dialog and apply the following Layer Style setting to your liking: Color Overlay (e.g., red), Blend mode (e.g. Liner Burn), Bevel and Emboss, Highlight (Linear Dodge), Shadow (e.g., Linear Burn) with Opacity turned down to about 15%.
NOTE: Since your text is a Smart Object, you can double click the Displace filter and change the intensity, or double click the layer thumbnail to open and edit the text. You may also want to change to lighting to fit the image.
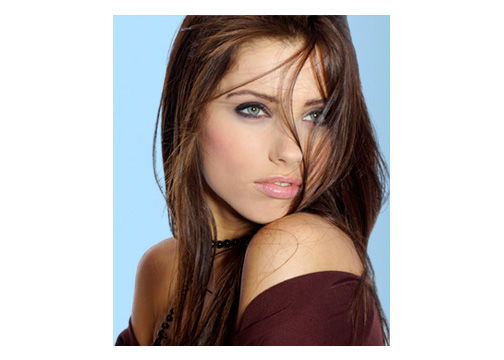
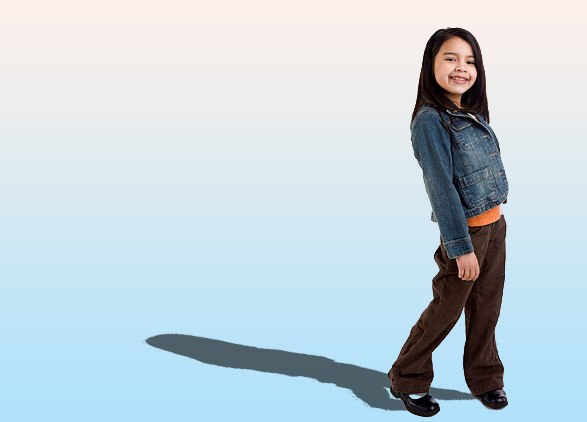
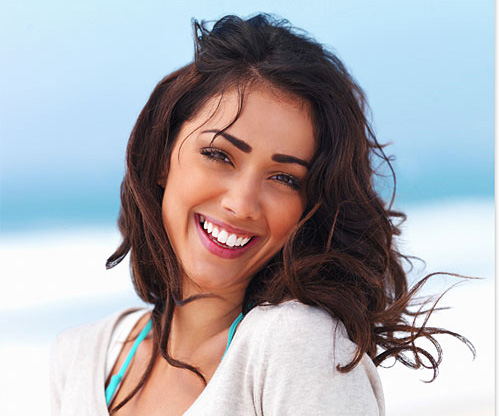
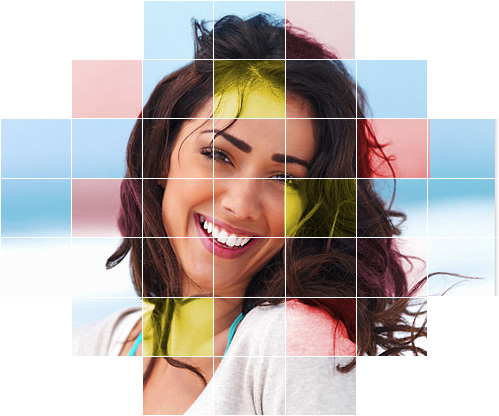
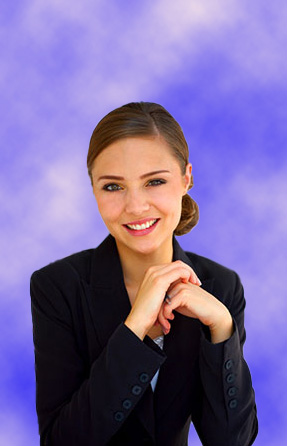
Portrait Effect
This is one of the first effect that most Photoshop user learn when they start.
BEFORE:
AFTER:
STEPS:
- Open an image you want to convert to a portrait image.
- Select the subject and duplicate to new layer.
- Reselect the original layer, set the background and foreground colors (blue and white) that you would like to use for the background effect.
- Apply a Cloud Filter to the original layer and crop or move the subject if necessary.
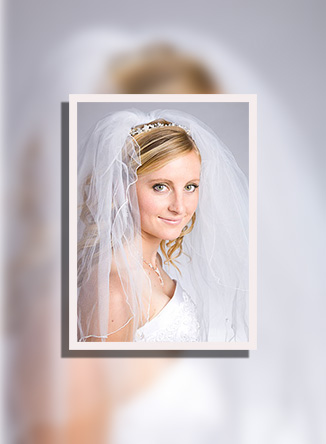
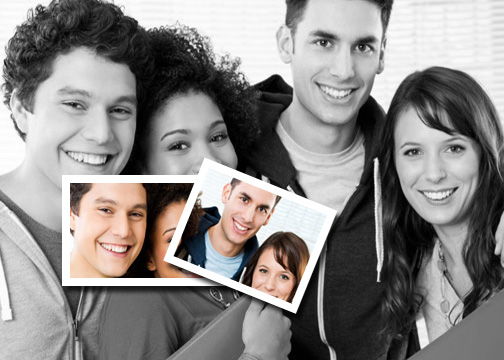
Picture In A Picture (PIP)
This is a common effect that is used with a Smart Object to change both pictures without having to redo the effect.
BEFORE:
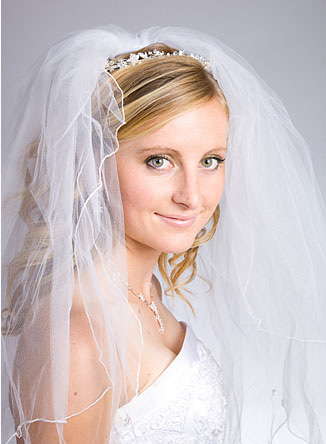
AFTER:
STEPS:
- Open an image you want to a insert a picture in a picture.
- Convert the image to a Smart Object and then duplicate it.
- Reselect the original layer and apply a Gaussian Blur with a 3.0 Radius.
- Select the duplicated layer, press CMD/CTRL + T to scale the image, hold down the ALT/OPTION key and then pull on one of the edge handle to scale the image smaller from its center.
- Add a white stroke and a drop shadow.
BONUS: REPLACE IMAGES WITH ANOTHER IMAGE
- Right-click on either of the Smart Object layer and select Replace Contents... and then navigate to a new image to replace the original two images.
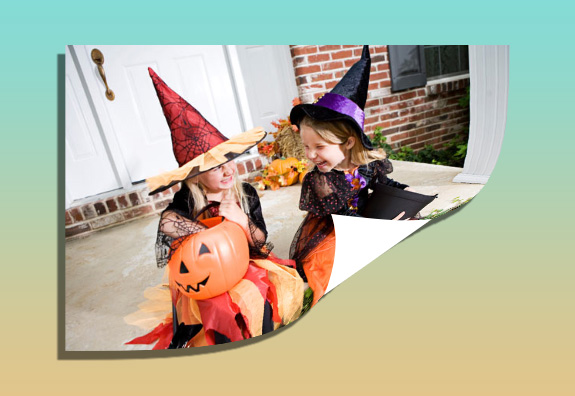
Picute Curl
This is an old effect that is still occasionally used.
BEFORE:
AFTER:
STEPS:
- Open an image you want to add a curl effect.
- Convert the image to a Smart Object.
- Press CMD/CTRL + T to scale the image, hold down the ALT/OPTION key and then pull on one of the edge handle to scale the image smaller from its center.
- Hold down the CMD/CTRL key and the press the New Layer icon to create a layer BELOW the current layer.
- Apply an Adjustment Layer (e.g., Solid Color, Gradient, or Pattern) or another image as a background.
- Select the Smart Object layer and then press CMD/CTRL + T to enter the transformation mode and then click on the Free Transform and Warp mode icon at the top of the screen or right-click and select Warp from the menu.
- Click and drag the bottom-right corner handle until you see the back of the image as a curl.
- Create a new layer on top of the other layers and then use the Pen Tool to draw a path around the curl and fill it with white.
- Optionally, add a drop shadow to the picture.
BONUS: REPLACE IMAGES WITH ANOTHER IMAGE
- Right-click on either of the Smart Object layer and select Replace Contents... and then navigate to a new image to replace the original two images.
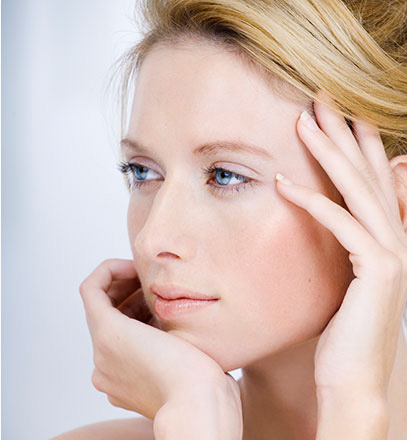
Let The Sun Shine In Effect
This is another effect taht is commonly used.
BEFORE:
AFTER:
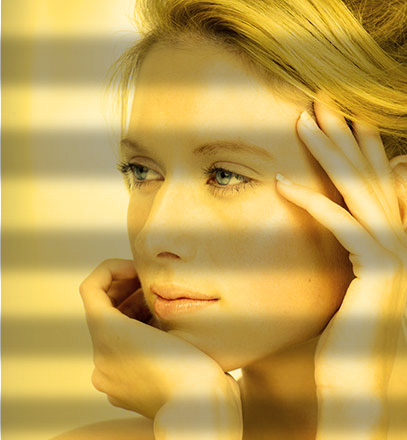
STEPS:
- Open an image you want to add a sun light effect.
- Add a Photo Filter Adjustment Layer with a bright yellow color to represent the sun light.
- Create a new layer and then with the Rectangle Tool set to the pixel mode, add several black rectangles that will represent a window blind.
- See the opacity to about 30% to represent the shadow from the blinds.
- Hold down the CMD/CTRL key and the press the New Layer icon to create a layer BELOW the current layer.
- Optionally, convert the shadow layer to a Smart Ojbect and then add a Guassian Blur with a Radius about 6.
Vintage Effect
This is one of the first effect that most Photoshop user learn when they start.
BEFORE:
AFTER:
STEPS:
- Open an image that you would like to make into a vintage photo.
- Convert the image to a Smart Object and apply a Black and White Adjustment layer with the default settings.
- Apply a Photo Filter Adjustment layer with a Sepia Effect applied.
- Add a Noise Filter with a setting to make the photo grainy.
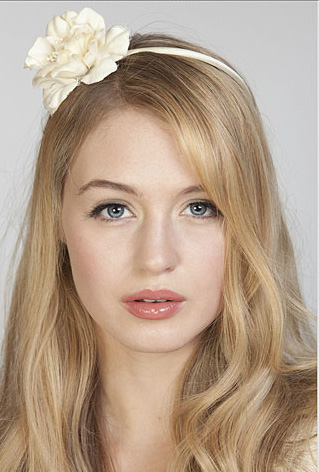
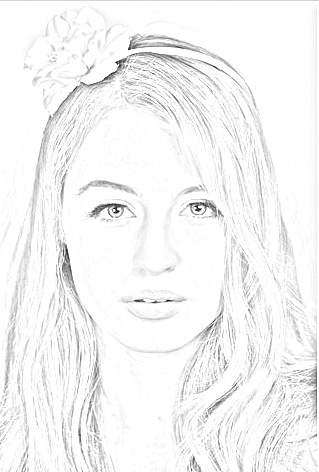
Sketch Effect
This is one of the first effect that most Photoshop user learn when they start.
BEFORE:
AFTER:
STEPS:
- Open an image you want to make as a sketch.
- Select Image > Adjustments > Desaturate.
- Duplicate the Desaturated layer.
- Select Image > Adjustments > Invert and the change the Blend mode to Color Dodge.
NOTE: The layer should appear mostly white. - Apply a Gaussian Blur and adjust the radius to get the sketch look you want.
Glow Effect
This is one of the first effect that most Photoshop user learn when they start.
BEFORE:
AFTER:
STEPS:
- Open an image you like to add a glow effect.
- Select the subject and then duplicate it to a new layer.
- Add a Outer Glow Layer Style with the color and settings of your liking.
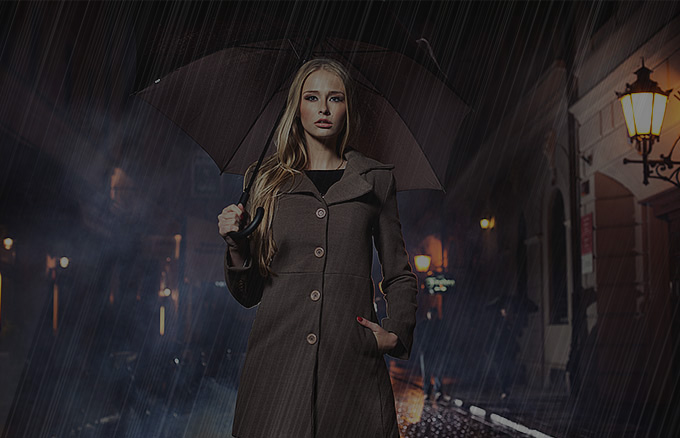
Rain Effect
This is one of the first effect that most Photoshop user learn when they start.
BEFORE:
AFTER:
STEPS:
- Open an image you want to apply a rain effect.
- Create a blank layer and fill it with black.
- Convert the black layer to a Smart Object and apply a Noise Filter with a setting of about 15-20% and a Gaussian Distribution
- Add a Motion Blur with an Angle of about 72 degrees and a Distance of about 500.
- Change the Opacity to about 50%.
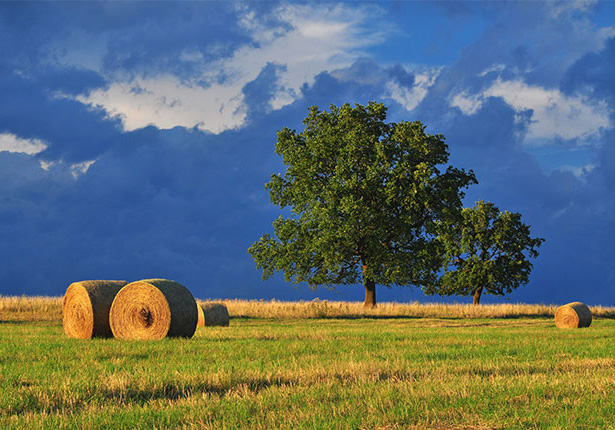
Rainbow Effect
This is one of the first effect that most Photoshop user learn when they start.
BEFORE:
AFTER:
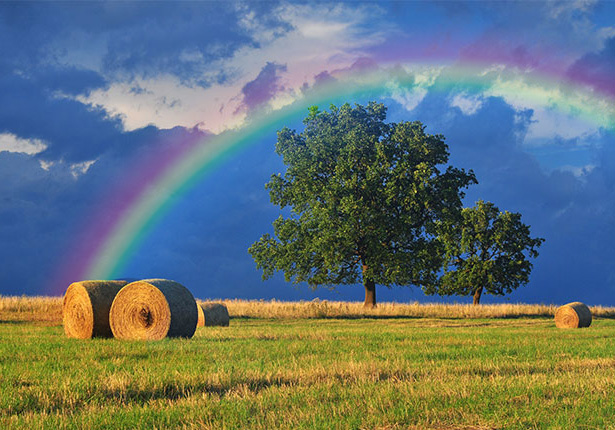
STEPS:
- Open an image you want to apply a rainbow effect.
NOTE: An image with a stormy background works best. - Create a new layer, select the Gradient Tool, and then:
1. Click the Gradient drop-down and select the MyGradienst > gold >Transparent Rainbow gradient.
2. Set the style to Radial
3. Click the Tool Preset Picker.
4. Select the Circular Rainbow option.

- Draw a circle that is larger than the canvas that represents where the rainbow will be displayed.
NOTE: You may have to try several time to get the effect you want. - Set the Blend mode to Screen and lower the Opacity of the rainbow layer.
- Add a Layer Mask and use the brush tool to delete from the rainbow where necessary.
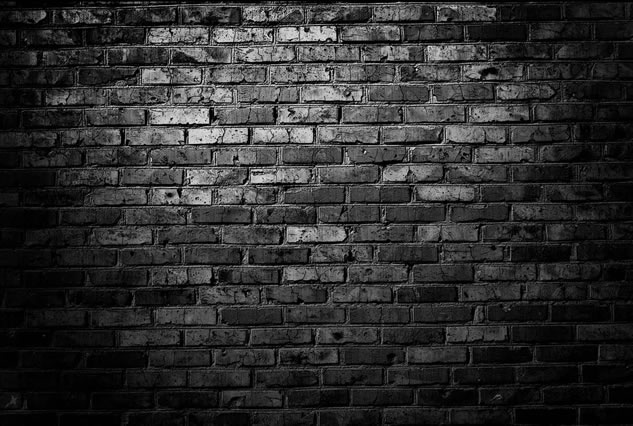
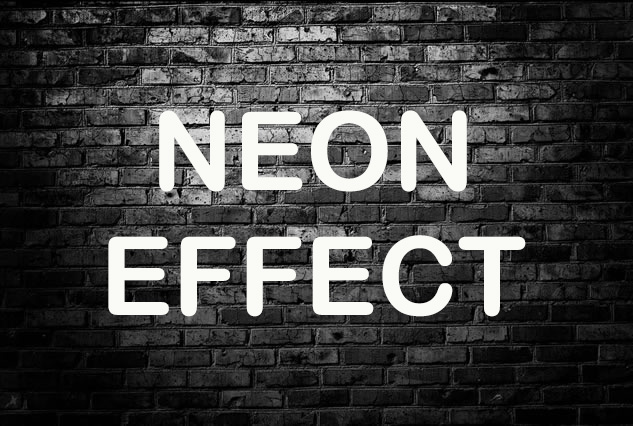
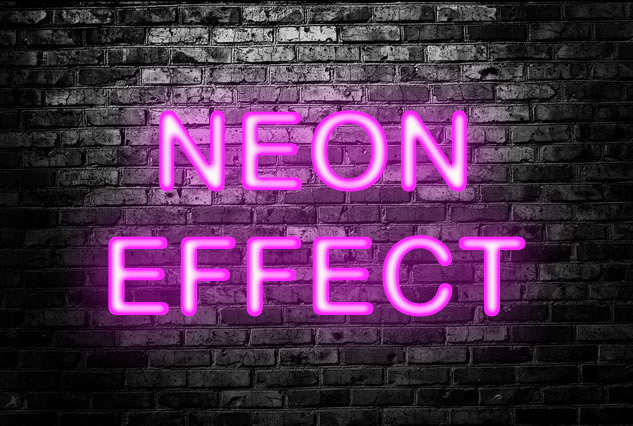
Neon Effect
This is one of the first effect that most Photoshop user learn when they start.
BEFORE:
AFTER:
STEPS:
- Open an image with dark background to use with the neon effect.
NOTE: Since we want a light effect, a dark background works best. - Create a text layer and type the text you want to applied the neon effect.
NOTE: Use a font that has rounded edges (e.g., Arial Rounded MT Bold)
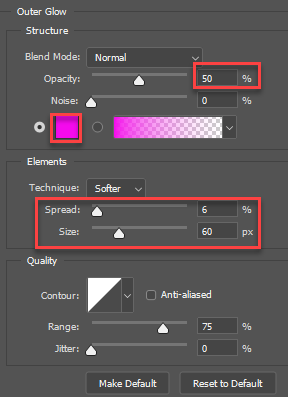
- Select the Outer Glow Layer Style and apply the following highlighted options:
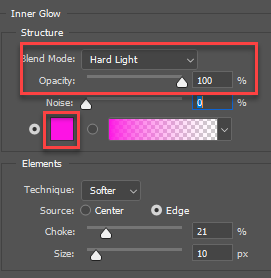
- Select the Inner Glow Layer Style and apply the following highlighted options:
- Click the OK button to commit changes for Inner and Outer Glow Layer Styles.
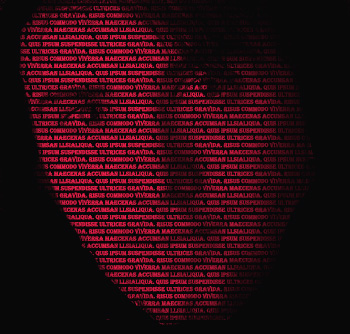
Text In Image Effect
This is one of the first effect that most Photoshop user learn when they start.
BEFORE:
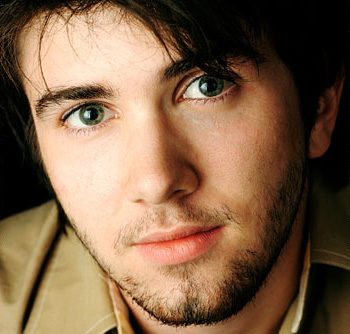
AFTER:
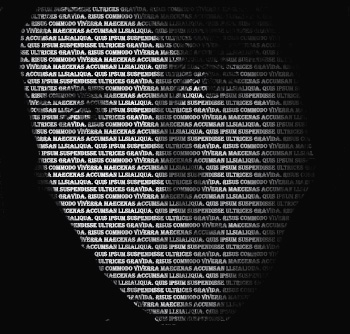
STEPS:
- Open an image you like to embed text into
- Create a new layer ABOVE the original image and fill it with black.
- Select the Text Tool, set the font to 6px, white, and Arial.
- Draw a text box the size of the canvas and fill it completely with text.
- Add another Layer Mask to the Text Layer.
- Click the original layer and press CMD/CTRL+A to select all pixels and then press CMD/CTRL+C to cut the layer pixels.
- Hold down the ALT/OPTION key and click the white layer mask THUMBNAIL to load it in the canvas window.
- Press CMD/CTRL+V to Paste the original image into the Layer Mask.
- Optionally, add a Layer Mask to the Text Layer and use the Brush Tool to erase areas not needed.
- Optionally, double-click the Text layer's thumbnail and change text color to whatever color you want.,
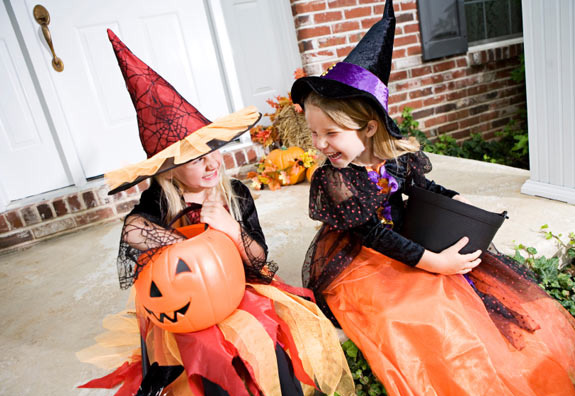
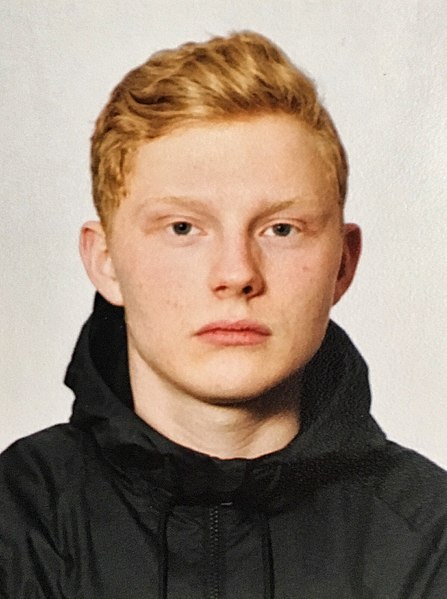
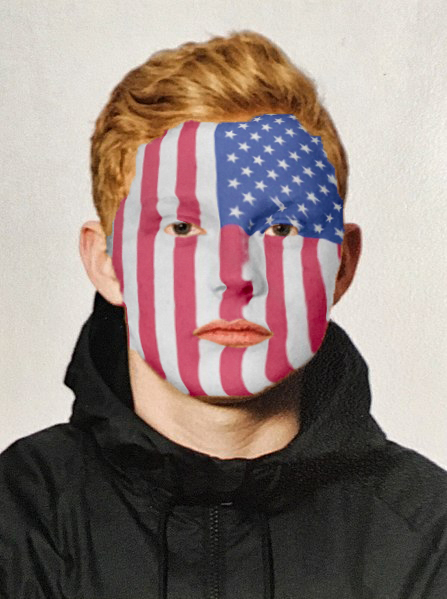
Face Painting
A displacement map is typically used to "map" or "wrap" text to the surface of an object.
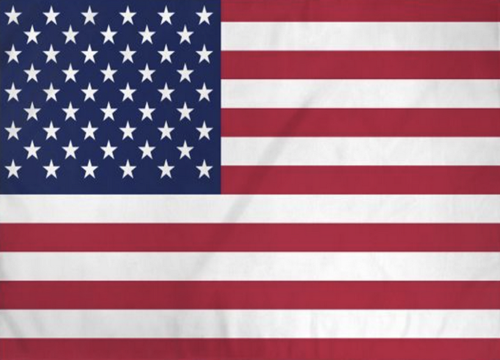
BEFORE:
AFTER:
STEPS:
- Open an image of a person you would like to "face paint" with a full front face view AND an image you would like to use as the paint (e.g., US flag).
- Right click the face image in the Layers panel and select Covert to Smart Object. Then, right-click and select Duplicate Layer, from the Document drop-down and select New, give it a Name of face_paint_displacement_map, and then click the OK button.
NOTE: This will create a new layer that will be used and the displacement map that will wrap the image around the contour of the face. - Select Filter > Blur > Gaussian Blur and adjust the Pixels Radius setting to 1 or more pixels depending on the resolution of the image.
- Click the Adjustment Layer icon and select Black White... from the menu
- Select File > Save As to save the displacement map as a PSD file to the same folder as the other project images by pressing the Save button, click the OK button and then close the displacement map from the tab.
- Re-open the color version.
- Make a selection of the just the face (not the ears or neck) using any selection tools (e.g., Quick Selection Tool).
- Click the Adjustment Layer icon and select Black White... from the menu.
NOTE: The face will turn gray. - With the Layer Mask selected, zoom in on the eyes and use the brush tool to paint black on the mask for the eyes. Do the same for the mouth and nostrils of the nose. Then, double-click the magnifying glass to zoom back.
- With the image that you want to use on the face and the Select tool selected, press CMD/CTRL+A to select all of the pixels and then drag it to the face image on the tab, wait for it to highlight and then drag it to the image.
- Select Filter > Convert for Smart Filter... and then click the OK button. Then, press CMD/CTRL+T and transform the image to fit between the ears. Rotate the image if you need to also.
- Change the opacity to 50%.
- Select Filter > Distort > Pinch and adjust the setting to estimate the contour of the file.
- Press CMD/CTRL+T again and transform the image to fit comfortable within the face.
- Select Filter > Distort > Displace, use the default settings and the click the OK button and the select the displacement map and press Open.
NOTE: Try different settings if you need to. - Hold down the ALT/OPTION key and drag and drop a copy of the face mask to the paint effect layer (e.g., flag).
- BONUS: Click the Adjustment Layer icon and select Vibrance... from the menu.
- Hold down the ALT/OPTION key and drag and drop a copy of the face mask to the Vibrance adjustment. Click the OK button to replace the Mask.
- Click the Vibrance icon (inverted triangle) and the change the Vibrance to 100 and the Saturation to whatever you like.
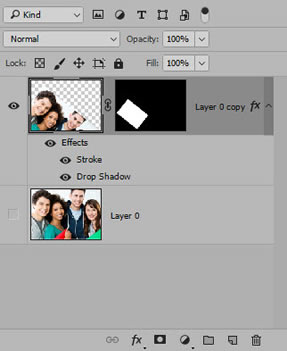
Polaroid® Effect
While Polaroid cameras are not used much any more, the effect is still used even today.
NOTE: Because creating this effect is tricky, screen shots are taken so that you can see the process as it progress.
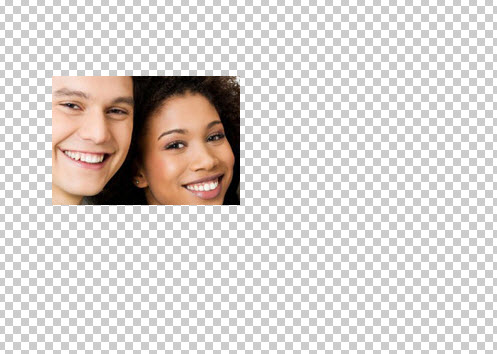
BEFORE:

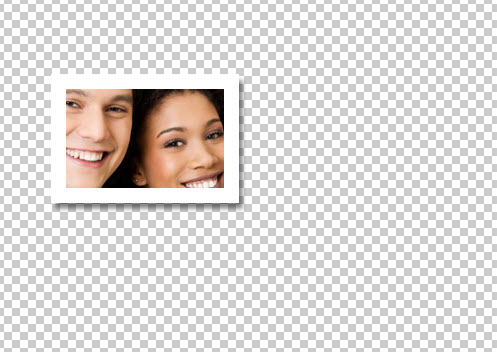
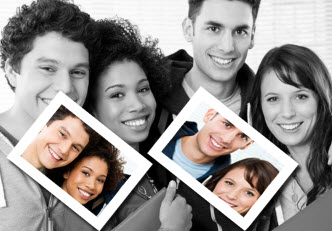
AFTER:
STEPS:
- Open any photo that you would like to convert to a Polaroid picture.

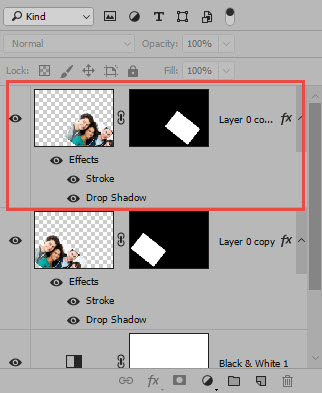
- Duplicate the Background Layer and turn off the bottom layer. Then, create a landscape or portrait selection of a portion of the picture and apply a Layer Mask to it.

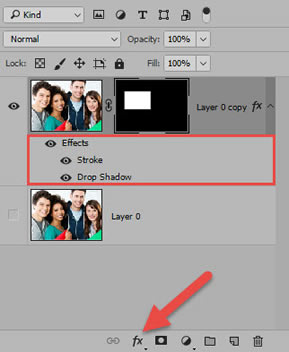
- Apply several effects (a drop shadow, a white stroke of about 15px with a Position of Inside) and then press the OK button to apply these styles to that layer.
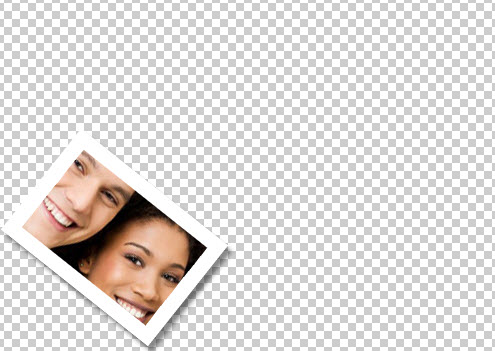
- Press CTRL/CMD+T to ROTATE or MOVE the frame and then double-click the frame to commit the transformation.
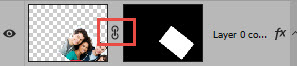
- Unlink the mask from the image by clicking on the link icon between the image and the Layer Mask.

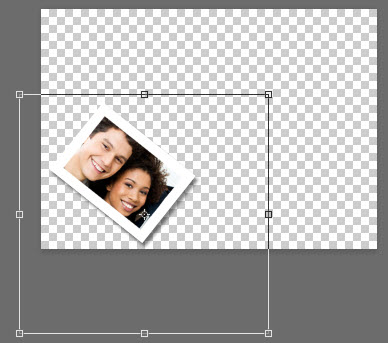
- Select the image thumbnail (not the Layer Mask thumbnail). Now, press CTRL/CMD+T AGAIN, but this time hold down the SHIFT key and drag one of the transformation handle to scale the image within the frame. Double-click on the frame to commit the transformation.
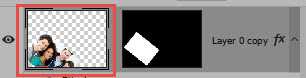
NOTE: It is important to unlink to SCALE but not to ROTATE or MOVE. If you attempt to ROTATE or SCALE without unlinking, it will distort the frame:
- Turn on the Background layer and then apply a Black/White Adjustment Layer to it.
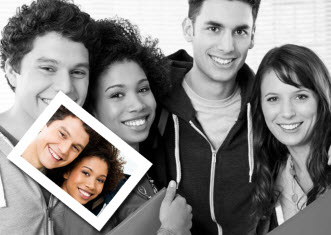
- BONUS: If you would like to add another Polaroid picture frame, do the following:
- Duplicate the Layer Mask Layer (CTRL/CMD+J) and then use the Move Tool to move the duplicate Polaroid frame to another location on the canvas.

- Unlink the mask from the image by clicking the link icon between the image and the Layer Mask.
- Select the image thumbnail (not the Layer Mask thumbnail). Now, press CTRL/CMD+T AGAIN, but this time hold down the SHIFT key and drag one of the transformation handle to scale the image within the frame. Optionally, move the picture frames as needed.
NOTE: It is important to note that you can only scale the image within the CONFINES of the Layer Mask selection that was made so you will have to experiment with it to get it correct without causing the frame to get too small.
- Duplicate the Layer Mask Layer (CTRL/CMD+J) and then use the Move Tool to move the duplicate Polaroid frame to another location on the canvas.
Below is a list of mockup resources from Googles, etc. that you can use to create or get ideas on how to create them:
PSD Freebies
Freebies for Graphic Designers
Blog.SPOON Graphics
25 Free PSD Templates to Mockup Your Print Designs
Free Mockup Tools | Design, Prototype, Experience | adobe.com
Photoshop to prototype all in XD.
Best Free Mockups to Promote Your App | Make a Mockup | Placeit
Create Your Own Mockups in Seconds With Our Customizable Templates. Start Now! Upload Your Design or Use Our Templates. Make Your Mockup in a few Simple Steps! No Design Skills Needed. 50M+ Items Sold. Bring Your Design To Life. Placeit by Envato. Over 7M Customers.
Mockup PSD, +27,000 free PSD files - Freepik
Mockup PSD for free. Download now and use them for personal and commercial use.
All free Mockups | MockupWorld
iPhone, iPad, MacBook, iMac, Apple Watch, Packaging, Billboards & Signs, Fashion & Apparel, Food & Beverages, Magazines & Books. ... A collection of five mockups showing a landscape brochure in various position (the accompanying template is free as well!).
Download Free & Premium Psd Mockups - Graphic Pear
A collection of free & premium photoshop smart object showcase mockups for designers to present their designs; brochures, magazines, books & banners.
Free PSD Mockups Templates - Original Mockups
Free PSD Mockups Templates for: Magazine, Book, Stationery, Apparel, Device, Mobile, Editorial, Packaging, Business Cards, iPad, MacBook, Glassware, Beer, .
mock-up | GraphicBurger
Check out this newly crafted PSD mock-up and use it freely to display your logo ... The free resource of the day is a neat PSD mock-up of a hardcover book with ...
Best Free Photoshop Mockups - Blugraphic
Best selection of photoshop smart object mockups that are easy to be customized and used for various presentation purposes.
Mockups – Free Design Resources
Handpicked free mockups to make your presentations stand out. Ranging from print, apparel, packaging, screen, logo, ... Free Polaroid PSD Mockup. Mockups ...
Free PSD Mockups - Freebiesbug
A great place where to find free PSD mockups to better showcase your work.
Premium and Free Mock-Up Templates | Pixeden
Psd mock-up templates to showcase your design directly on the appropriate medium. Each psd mock-up is fully layered with smart object to make the creation of ..
PSD Mockups | Free Template Mockups
Free PSD Mockups Smart Object and Templates to create Magazines, Books, Stationery, Clothing, Mobile, Packaging, Business Cards, Banners, Billboards,