How To FTP
File Transfer Protocol (FTP for short) is the last step that you perform when creating a web site. FTP is a relative simply process to perform.
It is basically copying LOCAL files and pasting them to a REMOTE (or local server/network) server or folder.
It this tutorial, we will be created a local server (folder) called BigDaddy ISP.
- Create a web site. (See previous lesson, if necessary).
- Create a folder on the desktop and name it BigDaddy ISP.
NOTE: This folder will be used later as a local server. - Select Site > Manage Sites... and in the dialog box that appears, click the edit icon (small pencil) to edit the current web site.
- In the Site Setup dialog box that appears, click the Servers option in the left pane, and then click the Add Server icon (plus sign) to create a new server.
- In the dialog box that appears, give the server a name BigDaddy ISP, connect using > Local/Network, and then click the small folder icon next to the Server Folder's text field and navigate to the BigDaddy ISP folder on the desktop that was created earlier and then click the Select Folder button.
NOTE: For a real ISP, you will select the FTP option instead of the Local/Network option and type in the necessary credentials that they will provided to you to connect to their server. - Click the Save button twice to close both dialog boxes and to create the server.
- In the File panel, select the top level folder for the site and then click the UP arrow icon (Put file to "Remote Server....).
- CHECK POINT: You will be prompted to upload the ENTIRE website to the server.
- Click Yes to upload the entire website.
NOTE: Once you upload the entire web site, afterward, you typically need to upload only the files that has bee updated. - Make any change to any page and then save it.
- In the Files, select only the file (not folder) that was modified in the previous step and then click the UP arrow icon again to upload a single file.
- CHECK POINT: In the Dependent Files dialog box that appears, notice you are being given a COUNT DOWN of 20 seconds before the file is automatically dismiss AND a prompt "Should dependent files be included in the transfer?
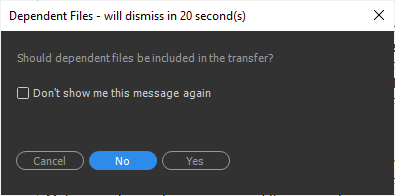
- Press Yes if ANY dependent files (e.g., image file, *.js, or *.css) associated with this file has changed. Otherwise, press No.
Internet Explorer allows you to transfer files directly to your FTP site without requiring an FTP utility:
- Launch Windows Explorer and open the folder that contains your Web site pages.
- Establish an Internet connection, then open Internet Explorer.
- In the Internet Explorer Address Bar, type your FTP Site URL. Usually the syntax is:
"ftp://," followed by your domain name. (i.e., "ftp://www.yourdomainname.com." - Click on the View Page in File Explorer?????
- In the "Log on As" dialog box, enter your FTP user name and password, and then click "Log On." If an
FTP Folder Error dialog box appears, click "OK," and then click "Log in As" in the File menu to open the "Log On As"
dialog box. - Select the files to transfer in Window Explorer and drag them to your FTP directory in Internet Explorer.
You can also copy and paste the necessary files.
For detailed instructions, please consult the Uploading with Internet Explorer tutorial: http://ftphelp.secureserver.net/IE/ie.htm
WS_FTP offers a full range of file transfer features that let you transfer files directly to your FTP directory:
- Establish an Internet connection, then open WS_FTP and click Connect.
- In the Session Properties dialog box, click New.
- Complete profile:
- Profile Name: Enter a profile name
- Host Name/Address: Type your domain name (without the www)
- User ID and Password: Enter your FTP user name and password
- Click OK
- In the WS_FTP window, navigate to your Web site files in the Local System pane on the left side of the window.
- Double-click the file to transfer, or select multiple files and click the transfer arrow located between the Local
System and Remote Site panes. - Click Exit and close the program.
For detailed instructions, please consult the Uploading with Internet Explorer tutorial: http://ftphelp.secureserver.net/WSFTP/wsftp.htm
Mac:
- Fetch: http://fetchsoftware.com/
- Transmit: http://www.panic.com/transmit/
- Cyberduck: http://www.cyberduck.ch/ (FREE)
PC:
- Smart FTP: http://www.smartftp.com/download
- WS_FTP: http://www.ipswitch.com/products/file-transfer.asp (FREE for basic version and cost for Pro version)