Four Ways of Adding or Subtracting Selections
There are many ways to add or subtract selections. While the first three are more difficult, it does show how to add/subtract complex selections while learning how to work with alpha channels, and the Make Selection dialog box. Depending if there are Alpha Channels or not, these techniques could be mixed to get the same result. It is best practice when working with complex and multiple selections to save the selections as Alpha Channels first. That way, you can load the selection using various means and combine Alpha Channels selections to make new selections.
A. Using the Channel Panel (Selecting the selections)
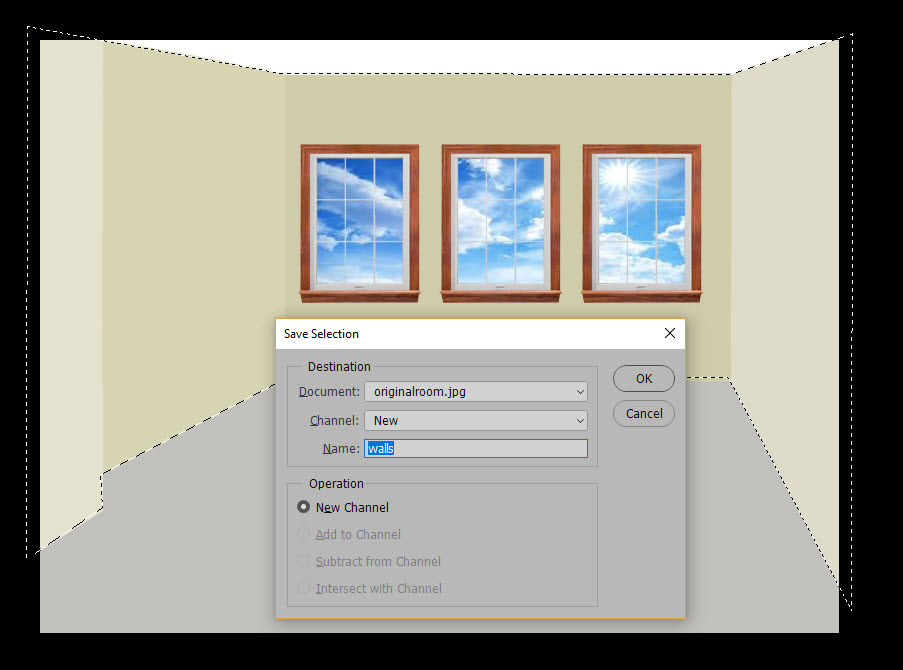
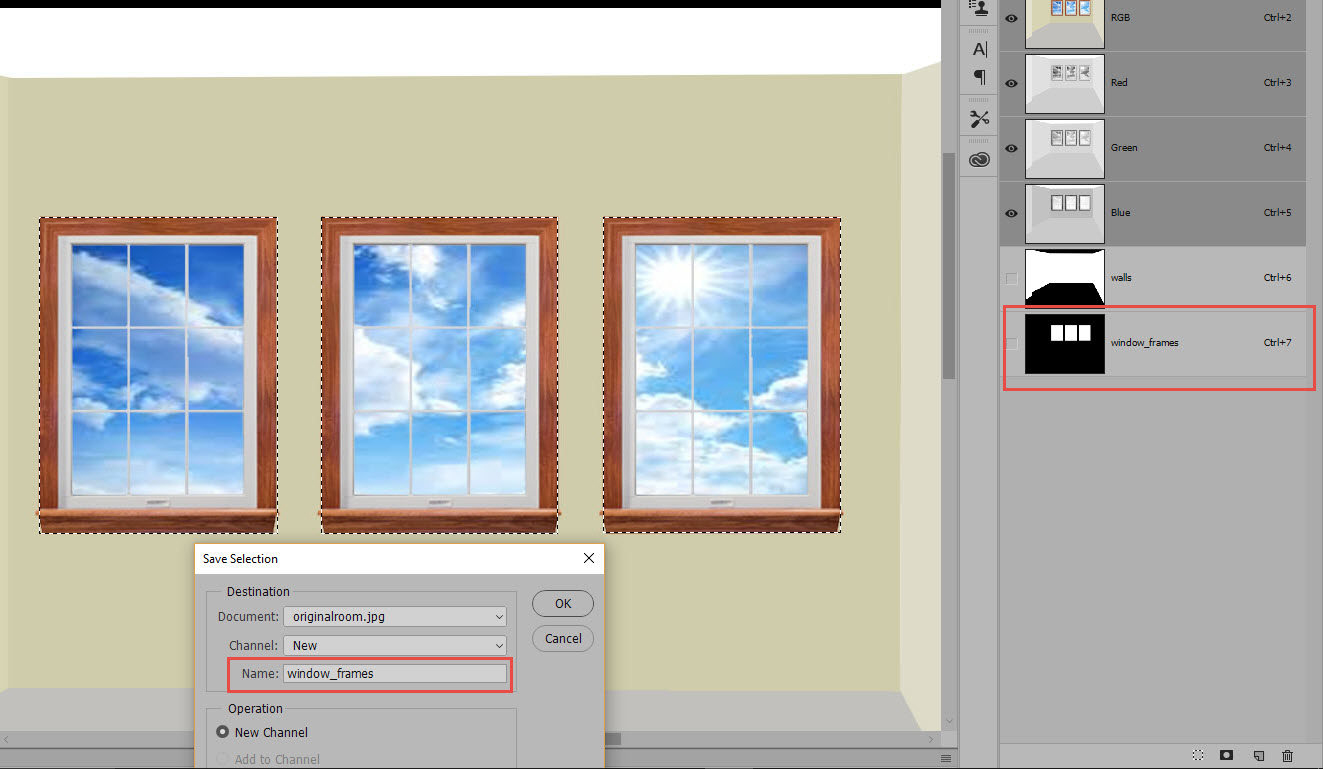
First, create some selections using any of the selection tools, save and name them in the Alpha Channel Panel either by right-clicking inside the selections and choosing Save Selection or Select > Save Selection... from the menu.
NOTE: A selection can also be created by using the Pen Tool (instead of a Selection Tool) and then converting the path to a selection by right-clicking inside the path, choosing "Make Selection..." from the menu. and then clicking the OK button. Then, use the step above to save the selection as an Alpha Channel.
In our example:
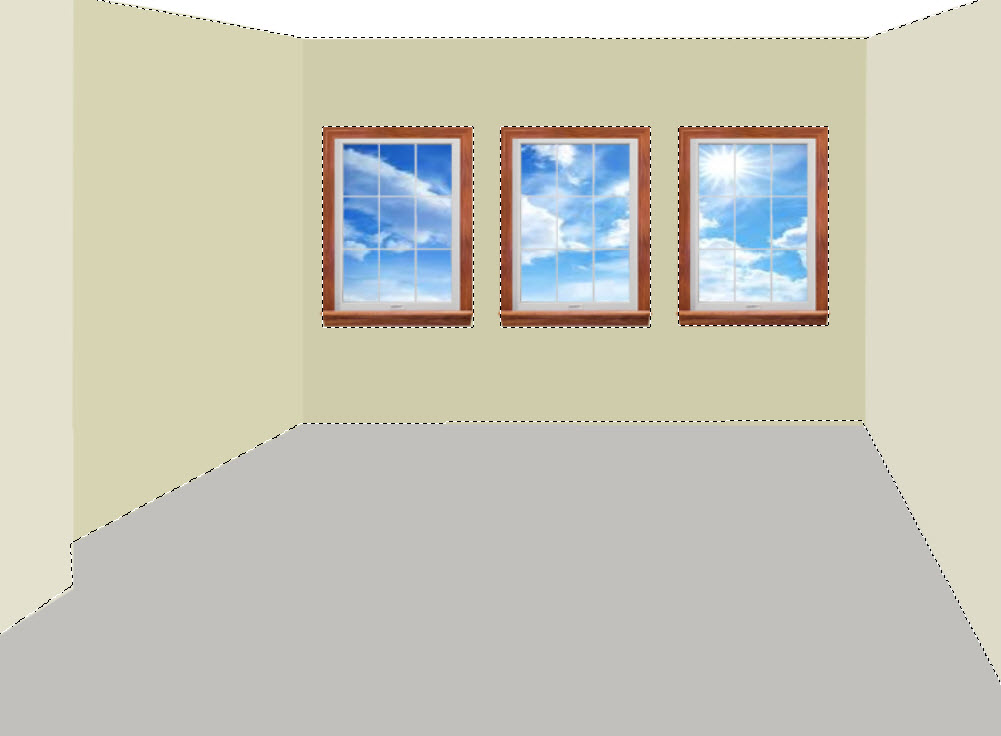
- Open original_room.jpg and using the Pen Tool, create a selection of only the walls (not ceiling or floor).
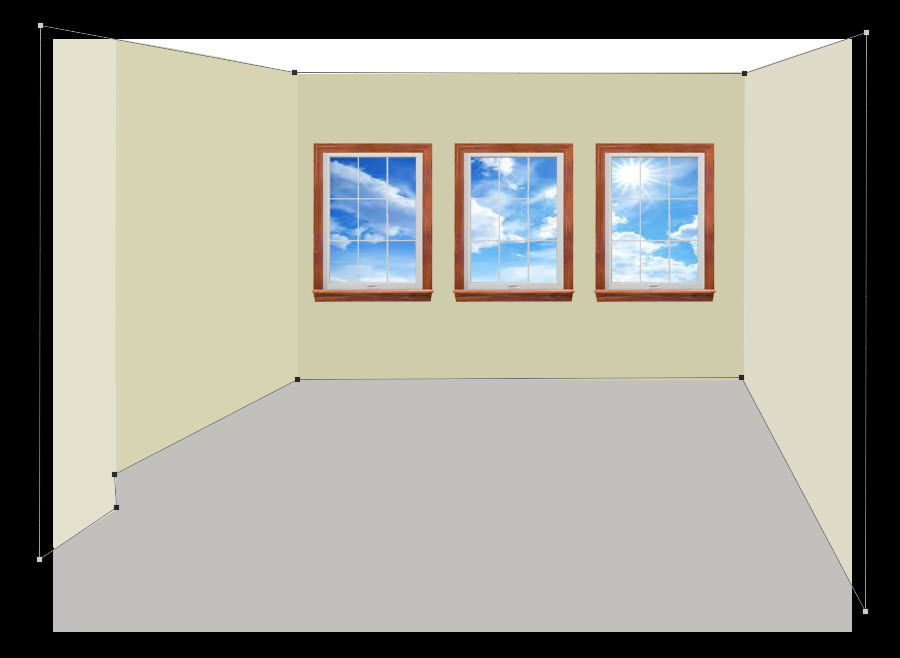
- Right-click inside the path (vector), choose Make Selection... from the menu, and then click the OK button to make a selection of the wall.
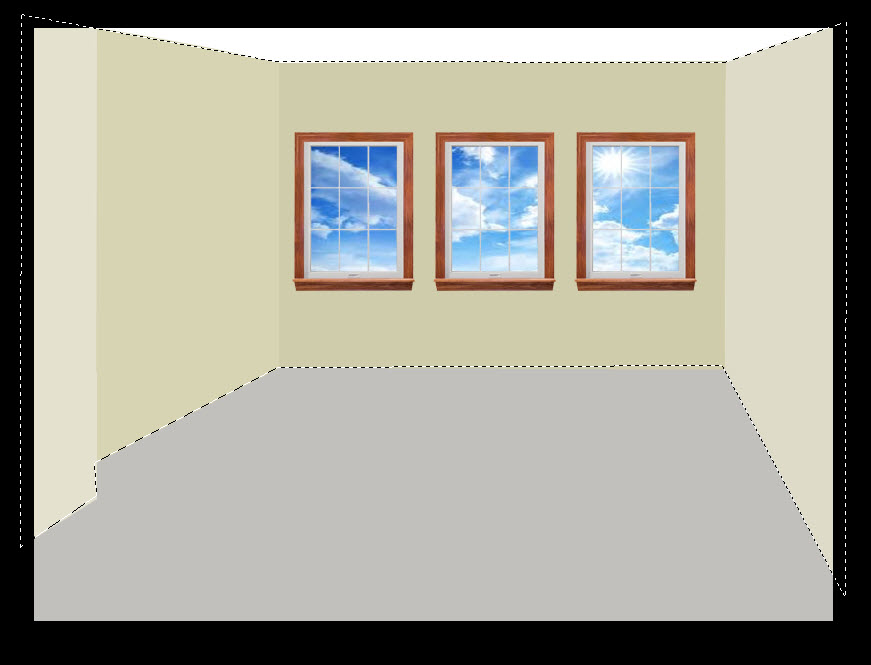
- Click on any Selection Tool, right-click inside of the selection and in the dialog box that appears, give the selection a name of "walls" and click the OK button.
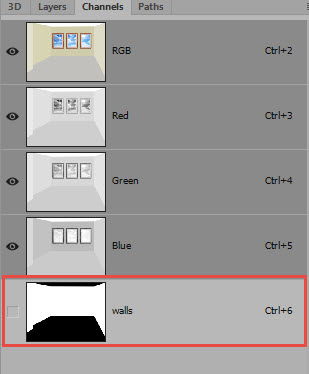
- CHECK POINT: This will save the selection as an alpha channel in the Channel panel.
- Repeat the previous steps, but this time create a selection of just the window frames and name it window_frames.
Open the Channel panels to see the Alpha Channels that were created from the selection, then load the Alpha Channels as selections as needed.
In our example:
- Optional: Switch to the Quick Mask mode (Q key) to check selection result after each step below
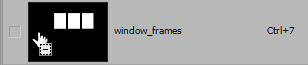
- In the Channels Panel, press the CTRL key and click the wall channel to load just the wall
- In the Channel panel, press the CTRL+ALT keys and click on the window_frames channel to SUBTRACT from the existing selection. In essence "cutting holes in the wall to create the window frames."
NOTE: Notice when press the CTRL+ALT keys together, you get a smart cursor of a small selection with a minus sign in it to let you know that you will SUBTRACT (the window frames) from an EXISTING selection (namely, the walls).
CHECK POINT: Check result as Quick Mask by pressing the Q key.
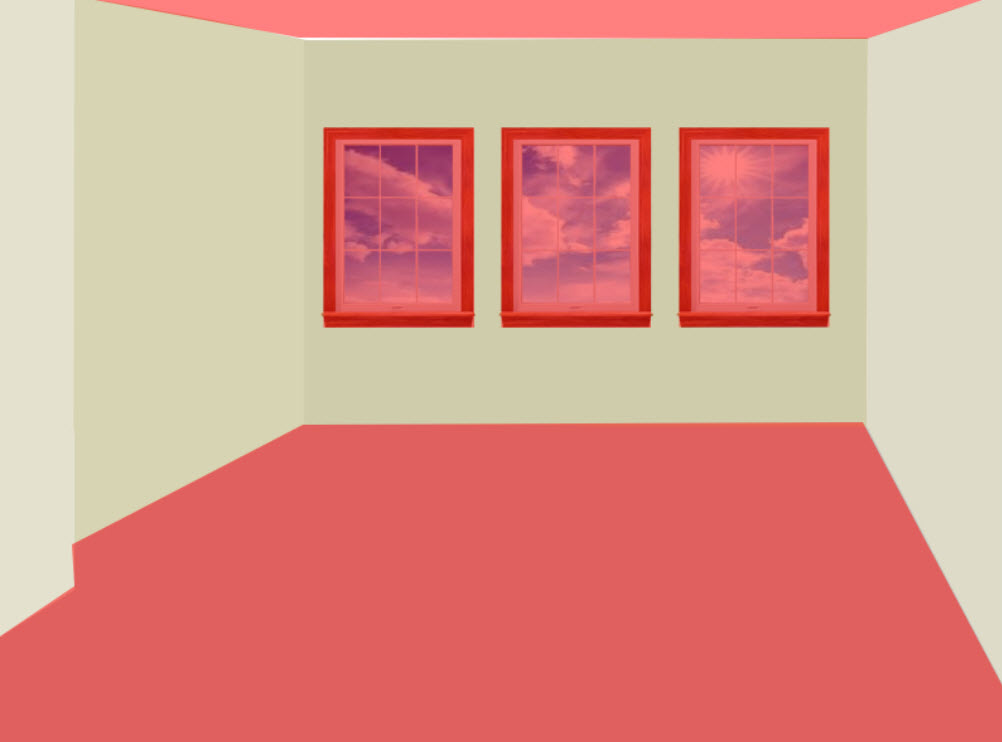
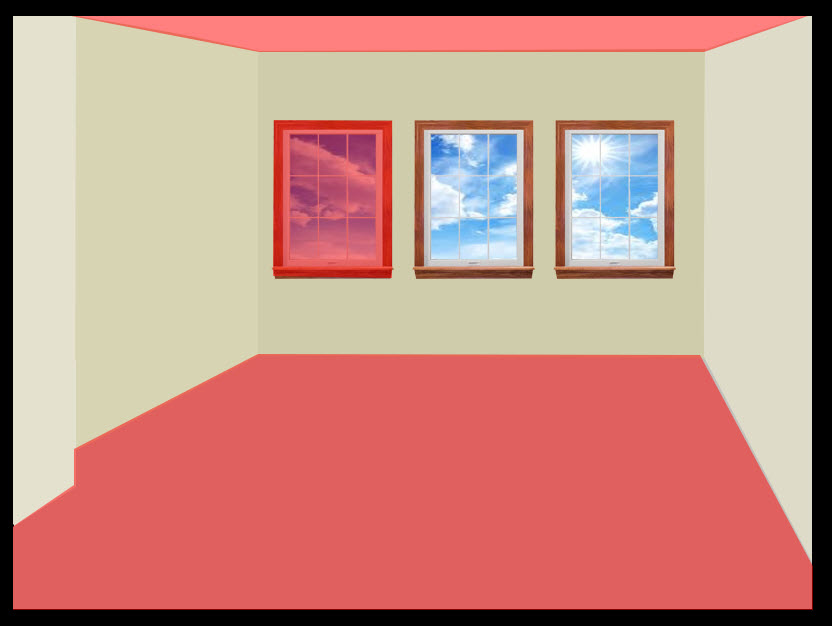
Optional: Add an Hue / Saturation adjustment layer in the Layers Panel and change any of the adjustment sliders (Hue, Saturation, or Lightness) to change the color of the walls. Notice only the walls are changed and not the window frames or the window panes.
B. Using the Select > Load Selection... Menu (Loading the selections)
Since alpha channels were made of the selections in the previous section (Using the Channel Panel), these selections can be added or subtracted from the menu instead of the Channels Panel.
In our example:
- Select Select > Load Selection... from the main menu and select "walls" from the Channels drop down list to load only the walls selection and click the OK button.
- Repeat step 1 again, but this time change the the Operation radio button to Subtract from Selection and the selection to "wall_frames" and click the OK button.
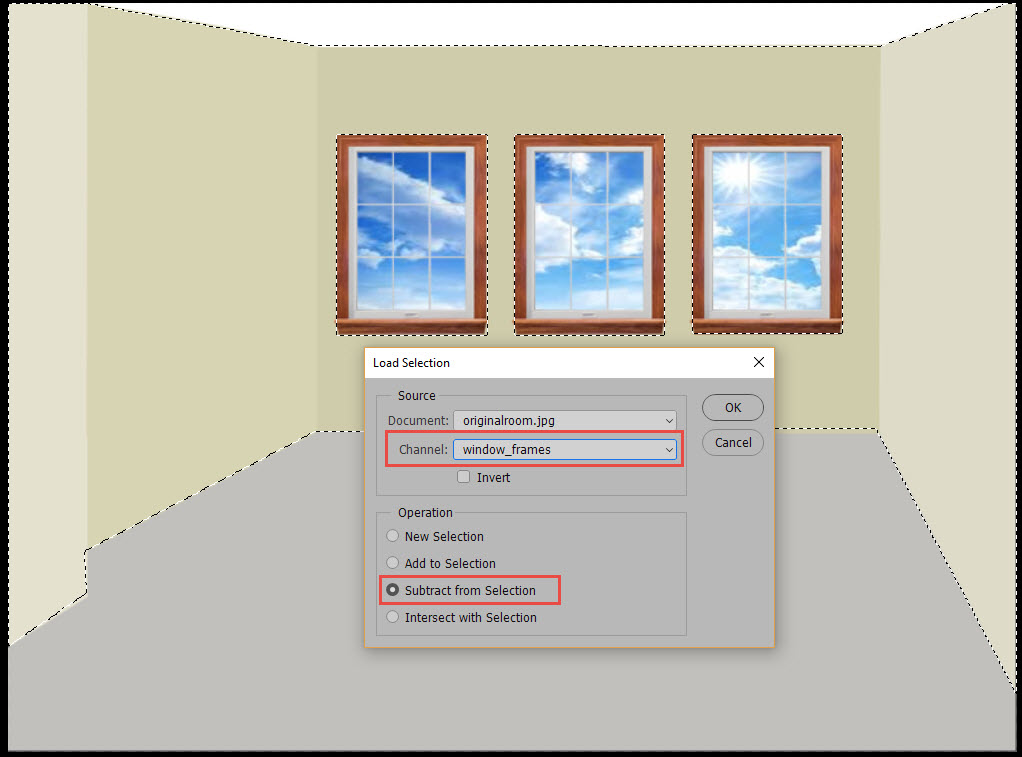
- CHECK POINT: You should see that the window_frames selection were SUBTRACTED from the wall selection (See screen shot above).
Optional: Add an Hue/Saturation adjustment layer in the Layer panel and change any of the adjustment sliders (Hue, Saturation, or Lightness) to change the color of the walls. Notice only the walls are changed and not the window frames or the window panes.
C. Adding or Subtracting Selections one at a time (Drawing the selections)
You can add or subtract from an existing selection one selection at a time without using Alpha Channels by creating the first selection and then using the Add Selection dialog box to add or subtract from selection(s).
In our example:
- Create a path for the walls using the Pen Tool. (see section above on how to) and then right-click inside of the path and select Make Selection...
- Create a path for the ONE window frame using the Pen Tool (see section above on how to) on TOP of the EXISTING selection. Then, right-click and in the dialog box that appears, select Subtract from Selection and then click the OK button,.
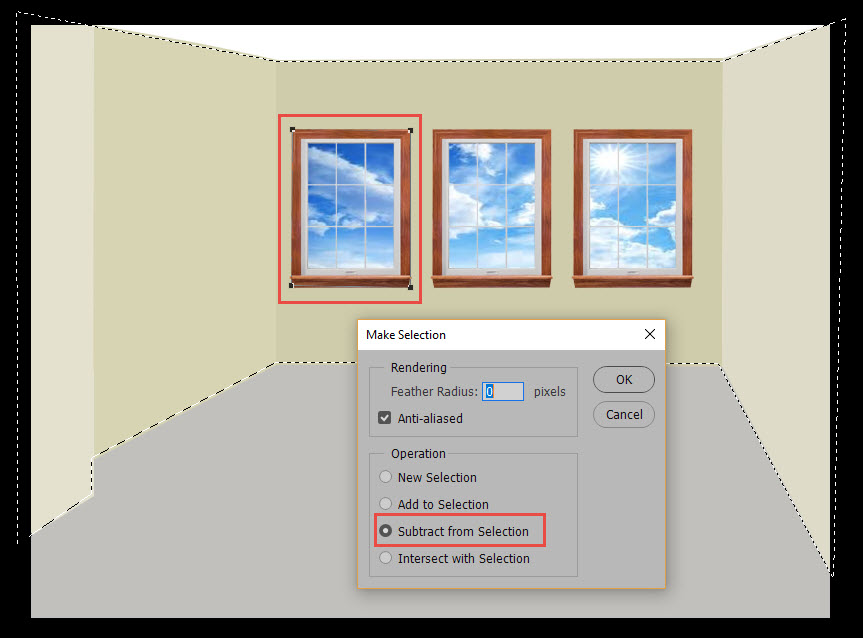
- CHECK POINT: You should see the ONLY ONE window has been "cut out" of the existing selections when the Quick Mask mode is turned on.
- Repeat the previous steps for each window one at a time.
- CHECK POINT: You should see that all windows have been "cut out" of the walls selection.
Optional: Add an Hue / Saturation adjustment layer in the Layer panel and change any of the adjustment sliders (Hue, Saturation, or Lightness) to change the color of the walls. Notice only the walls are changed and not the window frames or the window panes.
D. Adding or Subtracting Selections all at once (Drawing the selections)
You can add or subtract selections all at one time by using the pen to to draw all selections at once and then make a SINGLE selection from the MULTIPLE paths. Or use the selection tools to draw all selections at once.
In our example:
- Make selection for walls, then the window frames all at once using the Pen Tool.
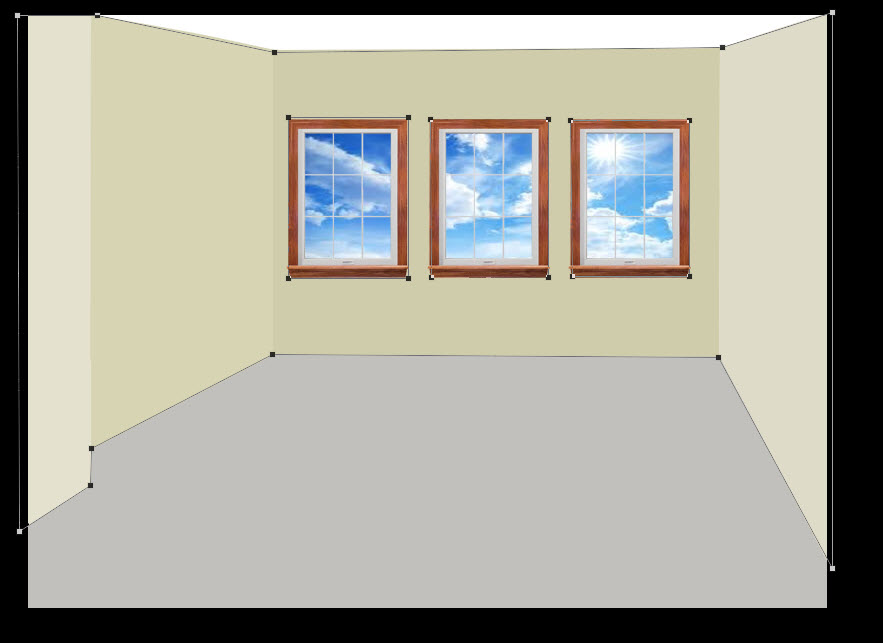
- Hold down the SHIFT key and click on each path (3 windows and walls), and then click inside of the paths and select Make Selection...
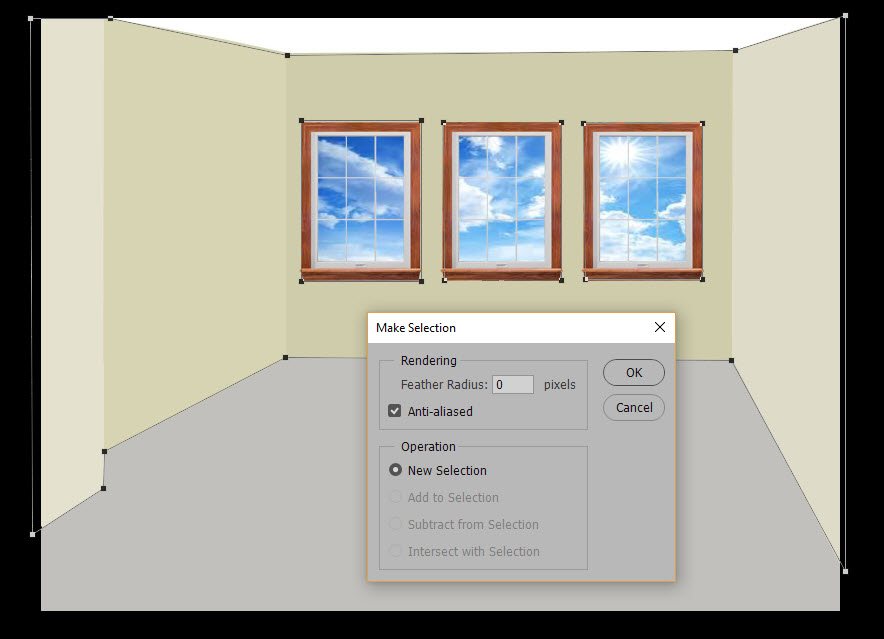
- CHECK POINT: Notice Photoshop determine what selection is added or subtracted based on the NESTED selections. Also note that the only Operation that is available is New Selection because no EXISTING selection is currently in force.
- CHECK POINT: Again, you should see that all windows have been "cut out" of the walls selection when view with a Quick Mask.
Optional: Add an Hue/Saturation adjustment layer in the Layer panel and change any of the adjustment sliders (Hue, Saturation, or Lightness) to change the color of the walls. Notice only the walls are changed and not the window frames or the window panes.
BONUS:
You can also create selections when using the Make Selection dialog box be selecting the Intersection with Selection Operation or selecting the CTRL+ALT+SHIFT keys together when creating a complex selection or using the Alpha Channel Panel.