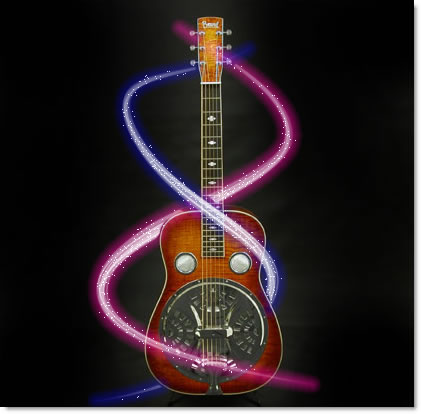
How to Create Light Streaks Effect
This is a very popular effect that is used for static images as well as video:
Create Layers
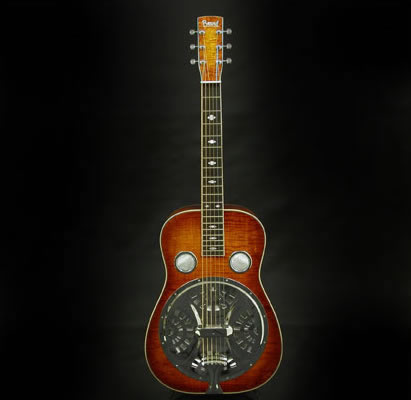
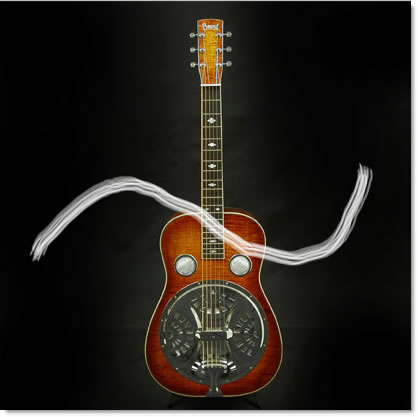
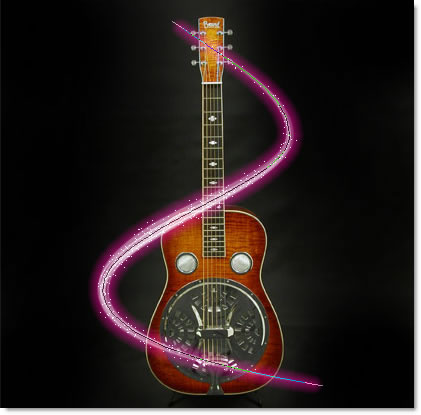
- Open an image of an object (e.g., musical instrument) or person (e.g., dancer) that you want to "wrap" light streaks around.
TIP: Select preferably an image with a black background since the light effect works better against a dark background.
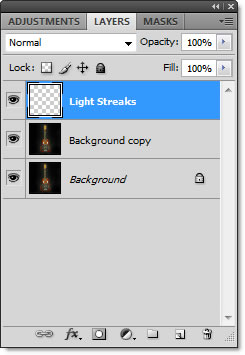
- (Optional) Duplicate the Background layer by pressing CTRL/CMD+J or drag it to the New Layer icon at the bottom of the Layers panel so that you can have a backup if you mess up.
- Create a new blank layer (CTRL+SHIFT+N), name it "Light Streaks", and set the foreground color to white.

Load Brush
- Select the Brush tool (B), click the Brush Preset Picker drop-down menu on Option Bar, click the small triangle (highlighted in snapshot),
choose Assorted Brushes from the menu, and then click the Append button to append these brushes to the current list of brushes.
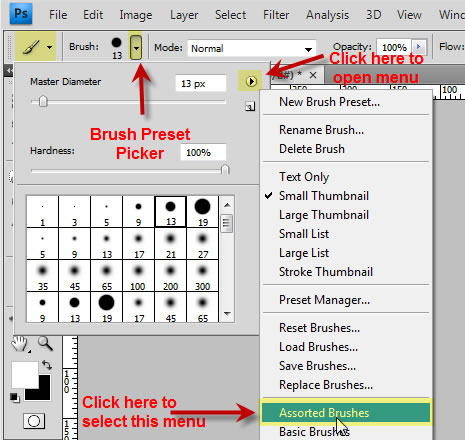
- Select the Spatter 28-pixels brush (Texture 4) or a similar brush.
CAUTION: There may be more than one brushes with the number 28 associated with it.
TIP: If you hover over a brush icon, a tool-tip will show the name of the brush (e.g., Texture 4)
Style Brush
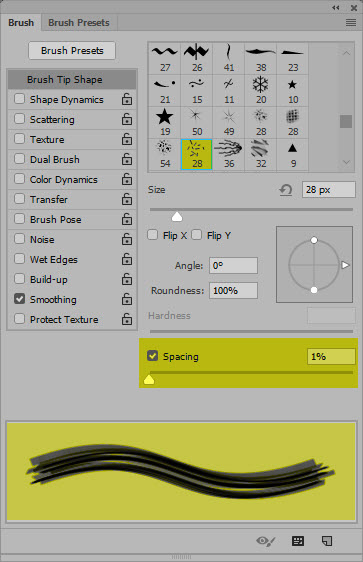
- Click the Brush Panel icon on the Option Bar

- In the Brushed dialog box that appears, select the Brush Tip Shape option and change the following setting:
- Spacing: 1% -- To make the brush stroke look more like solid lines.
- Spacing: 1% -- To make the brush stroke look more like solid lines.
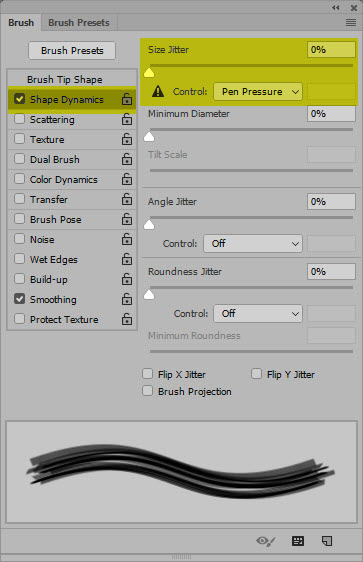
- Select the Shape Dynamics option and change the following settings:
NOTE: When you select the Shape Dynamics option and you are using a tablet, you will see the endpoints taper off.
- Size Jitter: 0%
- Control combo box: Pen Pressure (even if you don't have a tablet)
- Exit brushes dialog box.
Style Layer
- With the Brush Tool still selected, reduce its size to a small brush using the square brackets, and then draw a temporary stroke so you can "see" the effect in action as you style the layer.
NOTE: When you apply a Layer Style, you are applying style(s) to the Layer itself and NOT the object. However, any object(s) on that layer or that will be drawn on that layer will inherit the style(s) you set in the Layer Style dialog box.
- Add a Outer Glow Layer Style to the blank layer by clicking on the "fx" icon at the bottom of the Layers Panel and choose Outer Glow:
- In the Layers Style dialog box, change the following settings and then click the OK button:
- Blend Mode: Hard Light
- Size: 10-20
- Opacity: 60% - 100%
- Color: Any bright color
- Technique: Precise
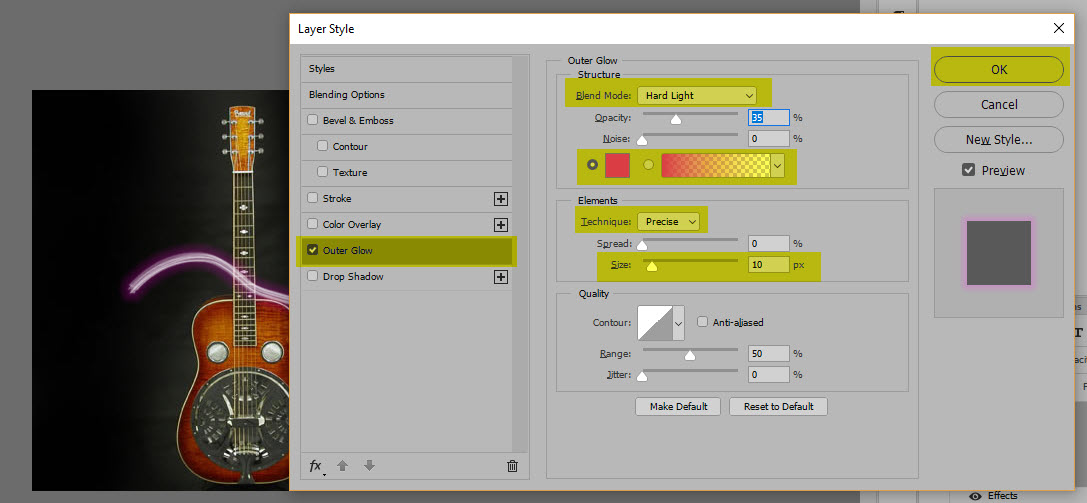
- CHECK POINT: You should see the effect AUTOMATICALLY APPLIED to the brush stroke because it on on the Layer with a Layer Style.
- (Optional) Add a Inner Glow to the same Layer Style and set the following options:
- Blend Mode: Linear Light
- Other settings same as Outer Glow
- (Bonus) Re-open the Layer Style of the "Light Streaks" layer if necessary and then create a sparkle effect around the stroke by selecting the Drop Shadow option and changing the following options and then click the OK button:
- Color: White
- Blend Mode: Dissolve
- Size: about 6
- Opacity: 5-16
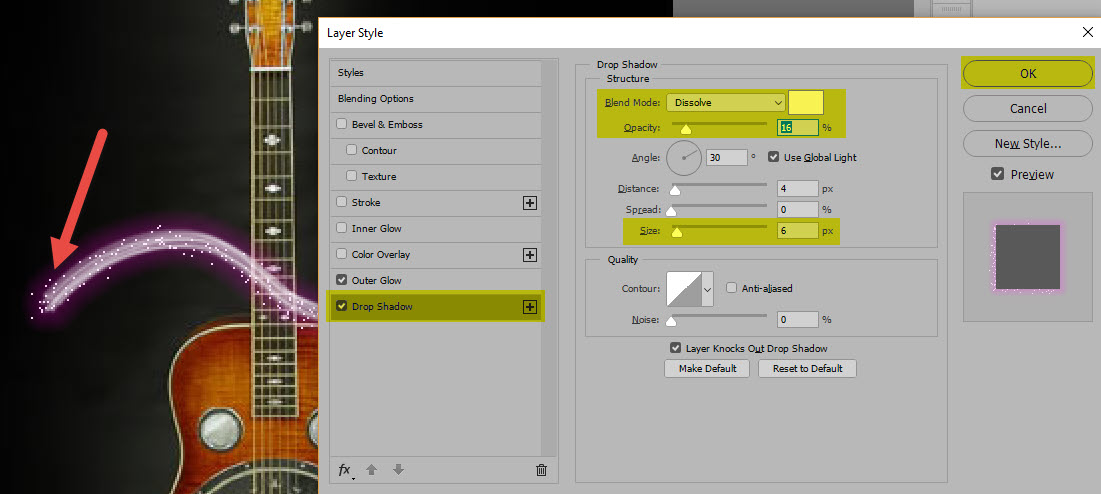
- CHECK POINT: You should see white speckles around the edge of the brush stoke (See red arrow above).
- Delete the temporary stroke as it was only used so you can "see" the styles that were applied by selecting CTRL/CMD+A and click the Delete/Backspace key. Also, press CTRL/CMD+D to deselect the selection.
Draw Path(s) with Pen Tool
While you could use the brush tool to draw the light streaks, it is best to create paths and apply brush strokes to the paths to get smoother curves as we will be see later. You will "simulate" brush strokes of a pressure sensitive writing tablet.
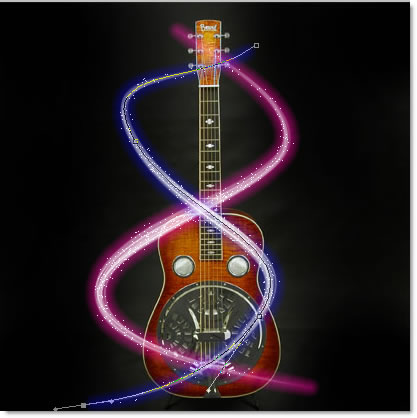
- Draw a path with the Pen Tool that will represent the path the light streak will follow.
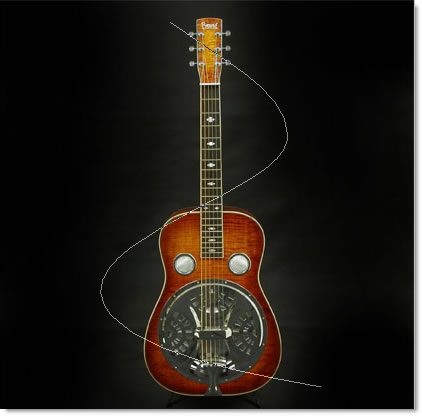
- Set the foreground to white (or any other color you like as the stroke color) and make sure the brush stroke size is small.
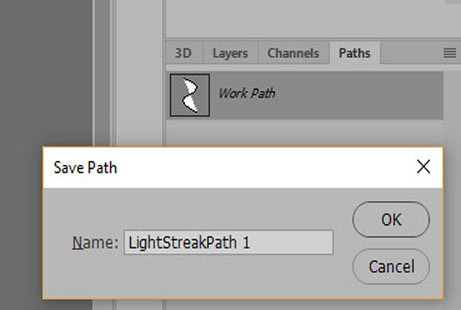
- In the Paths Panel, double-click on the Work Path and rename it to "LightStreakPath1" so that additional paths can be created later and then click the OK button.
NOTE: If you did not save the path, when you create another path it would be "written" to the same Paths layer.
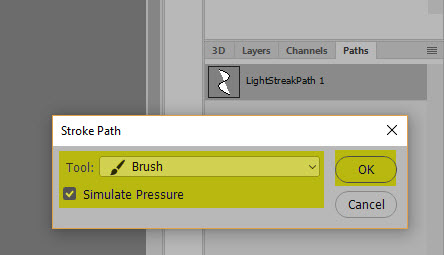
- While still in the Paths Panel, click the down-arrow and choose Stroke Path... , select the following options and then click the OK button:
- Choose the Brush option
- Choose the Simulate Pressure checkbox
NOTE: You should see the white stroke or whatever color you selected with a Pen Style effect and an Outer Glow applied to it.
NOTE: To hide the actually path, press CTRL+ H or click on the gray area in the Paths Panel.
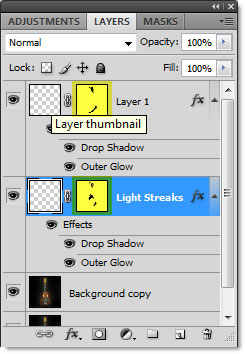
- (Bonus) Create a new blank layer and while holding down the ALT key drag and drop the word "Effect" or the "f" icon from the previous layer to the new layer to copy effect(s) to it.
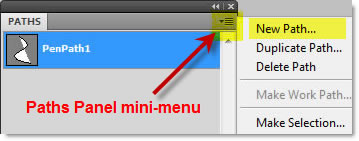
- In the Paths panel select the mini-menu and select New Path.... option from the menu and name it "Light Streaks Path 2" so that the new path is "written" to that layer and not the previous path layer.
- Repeat step 1-3 but name the Path layer "LightStreakPath2"
- (Optional) Double-click the Layer (or double-click on the word "Effect" or the "f" icon) to open the Layer Style dialog box and change the color(s) of the Outer or Inner Glow to a another color of your liking.
- Add a Layer Mask to either or both of the layers and use the Eraser or Brush tool to erase the area of the stroke that you want to "push" to the back of the object or person. Press the D key and then the X key as needed to toggle the foreground and background colors and to either erase or add to the layer mask.