Masking Made Easy:
Knowing how to use masks will separate you from the masses
Vital Few: All Masks
Unlike Photoshop that has over a half a dozen masks, Illustrator only has two masks; however, they ALL do the SAME things (show or hide, and protect the object(s) under them) but in DIFFERENT ways:
- Clipping Mask
- Opacity Mask
When creating a mask, you TYPICALLY:
- Create IT [can be created from other objects (e.g., text, vector (path))]
- See IT [can be seen by one or more means (e.g., on the artboard, as a thumbnail)]
- Edit IT [can be changed by one or more means (e.g., vector tools like the Pen Tool, or bitmap tools like the Blob Brush Tool)]
- See the Effect of IT [can see the end result of the mask]
- Release the Effect of IT [can be removed by RELEASING the mask]
Moreover, ALL masks will:
- NEVER ALTER the underlying IMAGE or SHAPE
NOTE: This is a technical term that is referred to as NON-DESTRUCTIVE EDITING
- ALWAYS be on TOP of the object it is masking when created.
NOTE: Once created, the object in the <Clip Group> in the Layers panel can be anywhere in the stacking order.
- BOTH the mask AND the underlying layer that is being masked has to be selected
- BE STORED somewhere (e.g., Layers, Layers (Opacity Mask) panel, Transparency panel)
- SHOW/HIDE all or a portion of the underlying layer
EXECUTIVE SUMMARY: Once you realize the above concepts, it will help to "take" the mystery out of creating, editing, and seeing the effect of any mask or releasing or deleting it.
While both the Clipping Mask and the Opacity Mask can be used to SHOW/HIDE content under them. The different is the a Clipping Mask is a VECTOR mask and will always have a HARD EDGE and NO BUILT-IN TRANSPARENCY. Whereas, the Opacity Mask is a BITMAP mask and will allow for SOFT EDGES and can have BUILT-IN TRANSPARENCY based on the grayscale values (black, white, and gray) of the mask. The Opacity Mask can DOUBLE as a Clipping Mask and you can use both mask on the same in the same project.
Below are the two Adobe Illustrator mask types:
Clipping Mask (Similar to Clipping or Vector Mask in Photoshop)
Clipping Mask – a VECTOR MASK used to SHOW or HIDE content BELOW it. It is helpful to think of the Clipping Mask as a "electronic" cookie cutter.
NOTE: Because a Clipping Mask is based on vectors, it is resolution independent meaning that it can be scaled without losing any crispness. However, it edges cannot be feathered. However, you can make the whole mask transparent by adjusting the Opacity.
REFERENCE: To learn more about the different between a vector and a bitmap, see the "Bitmap vs. Vector" app.
Create It
To CREATE a Clipping Mask:
- Import (File > Place...) a background image (e.g., sunset) that will be "masked."

- Create a Clipping Mask using one of the following means:
- with a vector-creation tool (e.g., Pen Tools, Shape Tools, Text Object) or
- from a vector shape (e.g., Path, Compound Path) or
- a group of these vector objects
NOTE: The mask has to be created ABOVE the layer you want to clip into it.
Example 1: Add some text (e.g., HAWAII) using with the Type Tool

- Select both the Clipping Mask (e.g., HAWAII) and and an underlying layer (e.g., sunset image) and then right-click and select Make Clipping Mask (or CMD/CTRL + 7 or select Object > Clipping Mask > Make ).

CHECK POINT: Notice the background image is "clipped inside" of the text outline (e.g., HAWAII). Notice also in the Layers panel, a new sub-layer called <Clip Group> and placed the image and the mask in it. Also, notice the mask is denoted by an UNDERLINE in its name.
BITMAP IMAGE CANNOT BE USED AS A MASK
CAUTION: You cannot use a BITMAP IMAGE as a clipping Mask. Otherwise, you will get an error.
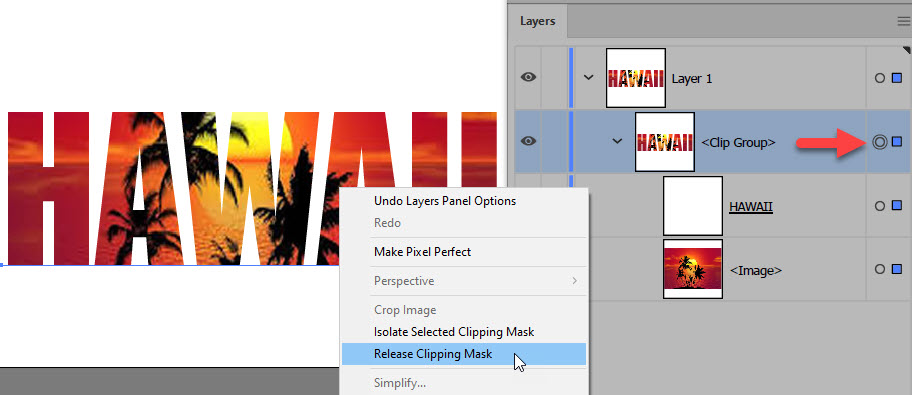
- Right the artboard to select the masked group and then right-click and select Release Clipping Mask.
CHECK POINT: This will RELEASE the mask from the layer and return everything back to the way is was before Make Clipping Mask was selected. Notice in the Layers panel, the <Clip Group> sub-layer has been deleted and the text and the image are back the way they were before. The text is no longer a mask. - TEMPORARILY move the text (e.g., HAWAII) BELOW the image (e.g., sunset) by one of the following means:
- Right-click the text and select Arrange > Send Backward (or press CMD/CTRL+ [ ) or right-click the image and select Arrange > Bring Forward or press CMD/CTRL +] )
- In the Layers panel, move the text layer BELOW the image layer or move the image layer ABOVE the text layer. - Select both the Clipping Mask (e.g., HAWAII) and and an underlying layer (e.g., sunset image) and then right-click and select Make Clipping Mask (or CMD/CTRL + 7 or select Object > Clipping Mask > Make ).
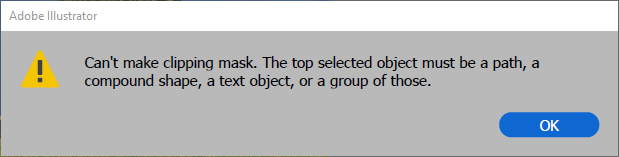
CHECK POINT: Notice you can the following error above because you tried to use a bitmap image as a mask.
OTHER VECTOR SHAPES USED AS A CLIPPING MASK
Beside text that was used in the previous examples, you can use a host of other vector shapes as a mask.
- Press the OK button to dismiss the dialog box and then press CMD/CTRL + Z to undo the previous operation and return the text to the top.
The following EXAMPLES uses all of the SAME steps EXCEPT the mask is created using a DIFFERENT vector object:
NOTE: In the exercise example file, all of the objects are already created for you. Release the mask to redo each example.
Example 2: Shows background image clipped into a shape using a Shape Tool (e.g., a star) on the artboard:

Example 3: Shows background image clipped into an object drawn with the Pen Tool (e.g., a heart) on the artboard:

Example 4: Shows background image clipped into an path drawn with the Blob Brush Tool (e.g., a ) on the artboard:

Example 5: Shows background image clipped into an artwork drawn with the PathFinder Tool (e.g., a gear) on the artboard:

Clip An Object Out of An Image
A Clipping Mask is also useful in "clipping" out the BACKGROUND in bitmap (*.jpg, *gif, *png) image leaving just the object(s).
- Import (File > Place...) an image of an object you would like to clip out.

- Use the Pen Tool to draw a path around the object you want to clip.
TIP: Zoom in on the image if you need to.

- Select both the Path and the Object and then right-click and select Make Clipping Mask

- Optionally, add the clipped object over another background and add a drop shadow effect.

Add Other Effects
You are not limited to just creating the Clipping Mask, you can add whatever effects you want including adding BACK the stroke that was deleted when the Clipping Mask was made.
- Import (File > Place...) an image (e.g., smiling girl) that you would like to add some additional effects and type some text (e.g., BEAUTIFUL) on top of it.
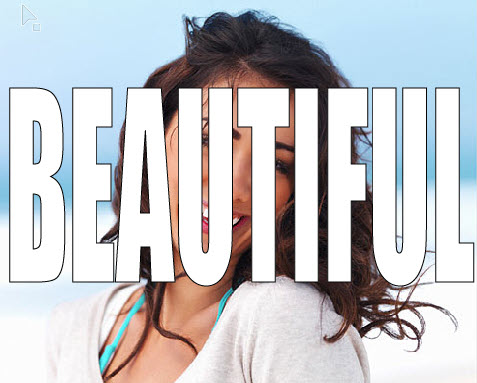
- Select both the image and the text and right-click and select Make Clipping Mask.

CHECK POINT: Notice that both the Fill and the Stroke was removed from the Clipping Mask. While you can add back a stroke in this example, you cannot add back a Fill because of the underlying image this is being clipped. - Add whatever effects you want (e.g., stroke, drop shadow, etc.)

CANNOT USE MULTIPLE SHAPES UNLESS CONVERTED
CAUTION: While you can use a host of vector objects, you cannot use MULTIPLE VECTOR SHAPES as a Clipping Mask. You will need to CONVERT them into a SINGLE Compound Path by selecting all of the shapes and then right-click and select Make Compound Path. Otherwise, only one of the shapes will be "clipped."
NOTE: You may try to group (CMD/CTRL + G) the shapes but this will not work either. While a text object has multiple letters (shapes), it is already Compound Path.
- Draw multiple shapes (e.g., four white polygons) over a background image (e.g., sunset).
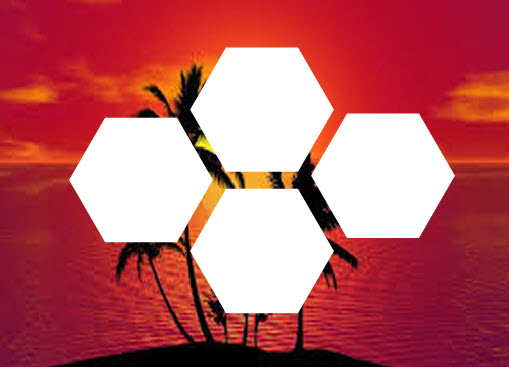
- Select the background and all of the shapes and then right-click and select Make Clipping Mask.

CHECK POINT: You should see that only the last shape that was drawn is "masked" instead of all four. - Undo the previous step (CMD/CTRL + Z), select ALL of the shapes (but not the background), and then right-click and select Make Compound Path (not Make Clipping Mask). You can also press CMD/CTRL + 8 to create a Compound Path
NOTE: A Compound Path will GROUP all of the shapes together and treat them as ONE SHAPE so that it can be clipped successfully. - Select the <Compound Path> layer in the Layers panel or on the artboard and SHIFT + click on the background (e.g.,sunset) to select it and then right-click on both of them and select Make Clipping Mask.

CHECK POINT: Notice that ALL of the shapes are now mask because they were converted into a Compound Path.
CAN CREATE A MASK USING THE DRAW INSIDE MODE
Another way to INDIRECTLY create a Clipping Mask is to use the Draw Inside Mode.
- Create a shape (e.g., circle) that you can draw over.
- Click on the shape to select it and the select the Draw Inside icon at the bottom of the Tool Bar.
NOTE: You must select a shape BEFORE the Draw Inside icon can become active. Otherwise, it will be disabled (grayed out).

NOTE: Another way to enter the Draw Inside mode is to press SHIFT + D TWICE. The reason you have to click SHIFT + D twice is to go from the Normal to the Draw Behind to the Draw Inside mode (See the icons change in the Tool Bar as you press SHIFT + D).
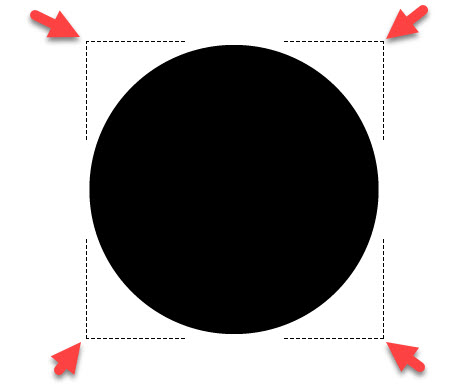
CHECK POINT: Notice the dash lines in the corners that denotes you are in the Draw Inside Mode. To return to regular drawing mode, click the Draw Normal icon or click SHIFT + D to toggle between these two modes and the Draw Behind mode.
- Use ANY VECTOR-BASED TOOLS and draw ACROSS the shape.
- Draw ACROSS the drawn object. In the example below, the Blog Brush Tool was used to draw a line ACROSS and INSIDE the circle.
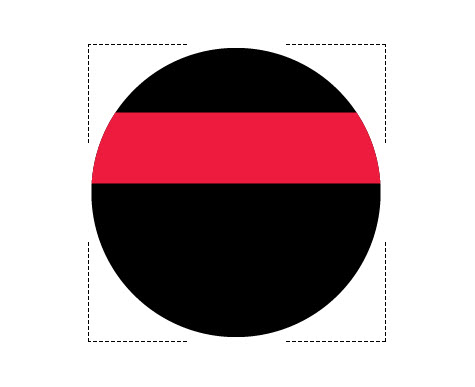
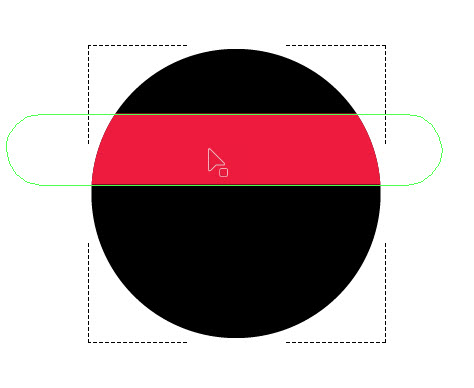
CHECK POINT: Notice that after a drawing tool is used, even though the line was drawn ACROSS the circle, only the area INSIDE of the circle maintained the line. If you want to see an OUTLINE of shape that was drawn ACROSS the object, hover over the shape on the artboard and you will see an "outline" of the shape (with a green border below).
If you look in the Layers panel, you will see that a Clipping Mask was automatically created when you performed the Draw Inside operation.
Click on the Draw Normal icon at the bottom of the Tool Bar to return to the normal drawing mode. To see the ACTUAL shape, right-click on the artboard and select Release Clipping Mask.
CHECK POINT: Notice that the ACTUAL shape is not visible but is behind the other shape.
See It
The actual mask can be SEEN:
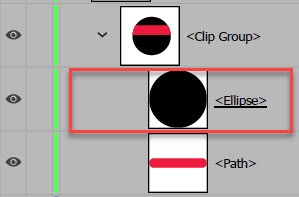
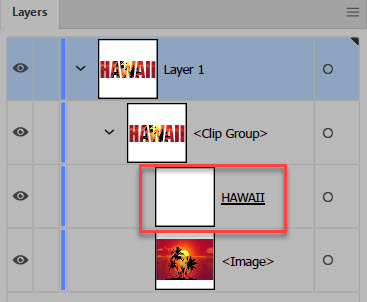
In the Layers panel as a thumbnail with its name (e.g., HAWAII) or shape name (e.g., Ellipse) or Compound Clipping Path UNDERLINED in a sub-layer that was automatically created called <Clip Group>. The underline is similar to what is seen in Adobe Photoshop.
In a few of the previous examples, the clipping mask thumbnail is highlighted with a red border.
Modify It
To MODIFY a Clipping Mask:
- CHANGE any point(s) on the clipping mask with any Vector Tools (e.g., Direct Selection Tool) to alter the vector shape to show or hide more or less of the clipping mask or the image it is masking. If the mask is a text object, it will have to be converted into an outline before it can be modified.
Shown by modifying one point on the circle and one point on the red line in a previous example. The two black oval was add just for fun but is not including in the Clipping Group to create a Ninja.
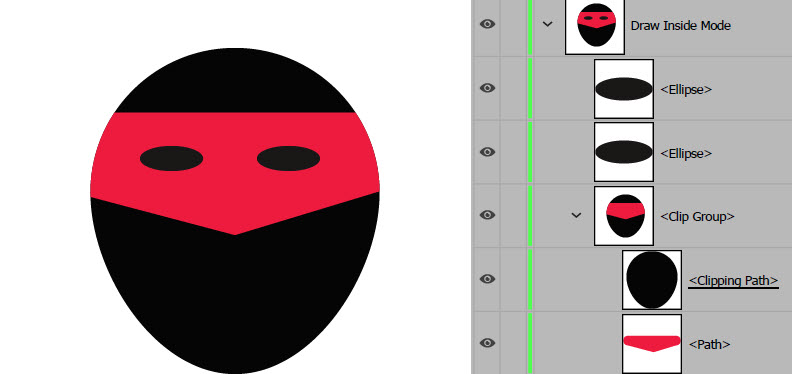
- Any layer moved INSIDE of the Clipping Mask Group will be "clipped" as well. You can also MOVE content OUTSIDE of the clipping group to "unclip" it. This process is similar to Adobe Photoshop.
- TRANSFORMING (e.g., move, rotate, resize, etc.) the Clipping Mask by clicking the "meatball" icon next to the Clipping Mask in the Layers panel.
- EDITING CONTENT in a Clipping Mask by clicking on the Edit Content icon at the top of the window.
Besides modifying the a mask, you can also modify the CONTENT of a mask:
SHOW EXAMPLES HERE (Edit Content menu or Isolation Mode)
See Effect Of It
To SEE EFFECT after modifications has been:
On the artboard to show and hide pixels of the underlying layer:
Release It
To RELEASE a Clipping Mask for whatever reason:
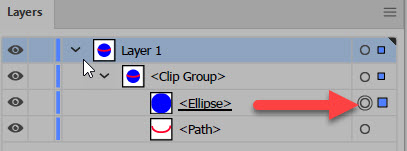
- Click on the artboard to select the Clipping Group (denoted with a colored outline) or click the Indicated Selected Artwork blue icon (highlighted by red arrow) on the sub-layer name <Clip Group> to select it.
- On the artboard, right-click and select Release Clipping Mask.
NOTE: You can also RELEASE a Clipping Mask by pressing ALT/OPTION + CMD/CTRL + 7 or select Object > Clipping Mask > Release from the menu.
In a previous example, the Clipping Mask has been released.
CHECK POINT: Notice the following changes:
- the full background can be seen along with the text
- In the Layers panel, the <Clip Group> sub-layer has been deleted
- The text (e.g., HAWAII) turned from white to black.
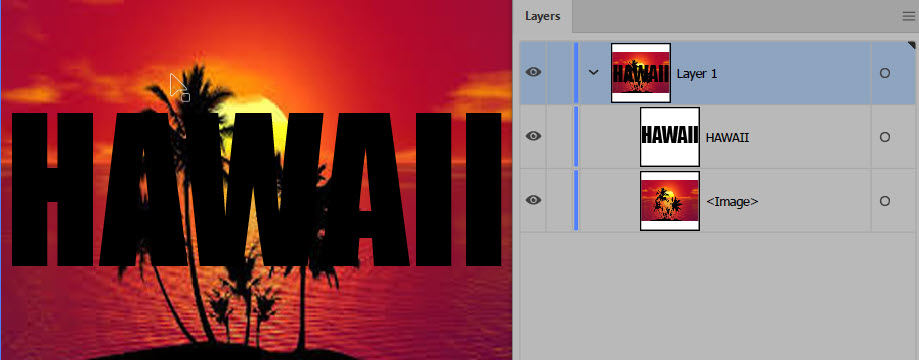
The reason the text turned black is because when a Clipping Mask is applied, the shape that was used to define the mask will loss its Fill and Stroke colors or text will be converted to a default black color.
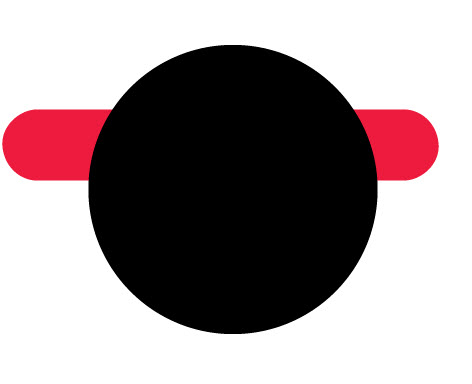
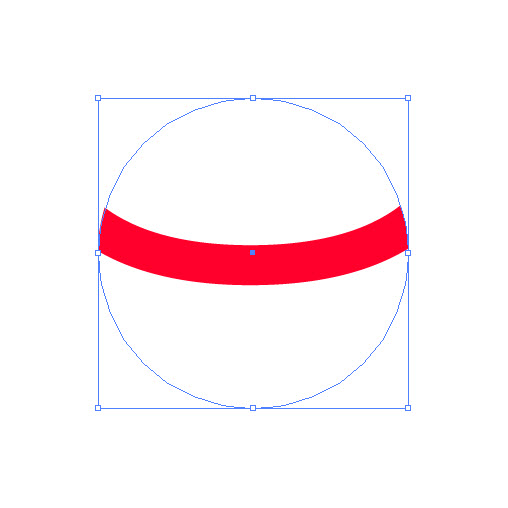
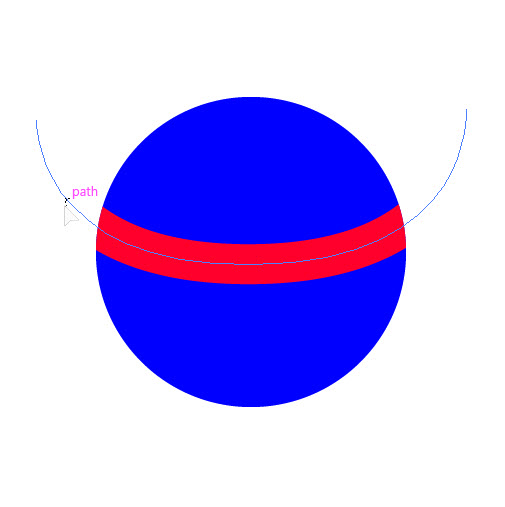
In the example below, the red curve was clipped inside of the blue ball. However, the color and fill of the ball disappeared.
First, the blue circle was drawn and then the red curve was drawn on top.
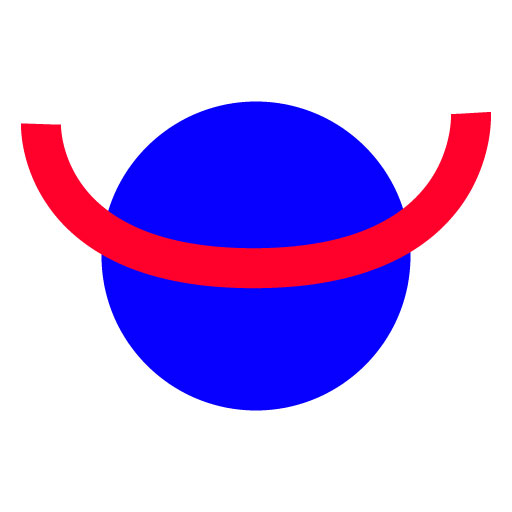
However, we want to use the blue ball as the mask not the curve. So, the blue ball was moved forward.
Both blue ball and red curve were selected and then they were right-clicked on and select the Make Clicking Mask menu option was selected.
However, notice that the FILL COLOR of the ball is no longer visible. .
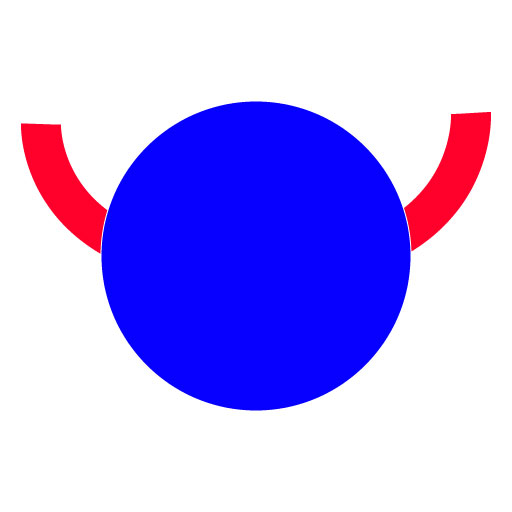
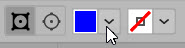
The ball color was added back by clicking on the target icon in the Layers panel and then RESELECTING the blue FILL color.
NOTE: This also applies to stroke that would need to be added back.
The result is the blue ball with the red curve inside of it.
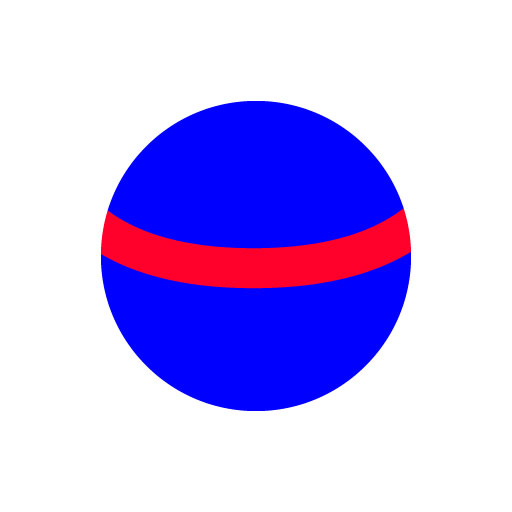
To SEE the ACTUAL length of the red curve that was drawn ACROSS the ball, hover mouse over the curve and you will see the COMPLETE curve path instead of a "truncated" version.
Opacity Mask (Similar to Layer or Gradient Mask in Photoshop)
Opacity Mask – a BITMAP MASK used to show or hide underlying content based on the gradient grayscale colors of the mask, where:
- BLACK areas of the mask will CONCEAL pixels (make areas of the image transparent on the artboard)
- WHITE areas of the mask will REVEAL pixels (make areas of the image opaque (visible) on the artboard)
- GRAY areas of the mask will make pixels TRANSLUCENT (make areas of the image show various degrees of transparency). In essence, you get the best of both worlds where gray partially conceal and partially reveal depending on the level of grayscale.
It is helpful to think of an opacity mask as a tinted window on a car.
Create It
To CREATE a Opacity Mask:
- Create a vector shape or use a grayscale image over the area you want to apply an Opacity Mask.
- Select the shape/image from step 1, select Window > Transparency (or SHIFT + CMD/CTRL + F10) to open the Transparency panel, and click the Make Mask button.
EXAMPLE 1: ADDING A F/X EFFECT:
In this example, the Gaussian Blur effect was used to create a Vignette effect.
- Import (File > Place...) an image (e.g., smiling girl) and create a white oval shape with a Gaussian Blur
effect (Effect > Blur > Gaussian Blur) ABOVE the image

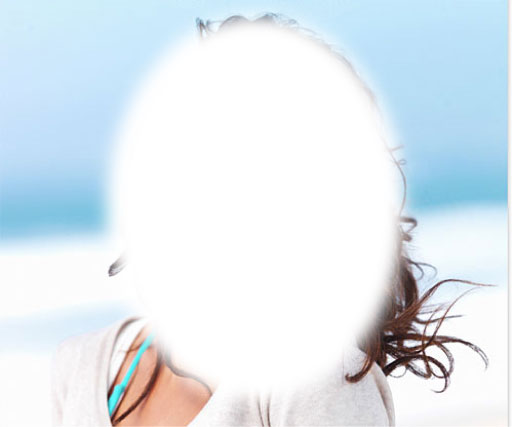
- Select both the oval and image, then right-click on them and select Make Clipping Mask.

CHECK POINT: The Gaussian Blur effect did not work because a Clipping Mask will not PRESERVE any BITMAP EDGE EFFECT (e.g., feather edge).
NOTE: These steps were done only to show that a Clipping Mask will not work for a Vignette Effect. - Undo (CMD/CTRL + Z) the previous steps to get back to the Gaussian Blurred oval and then in the Transparency panel click Make Mask.
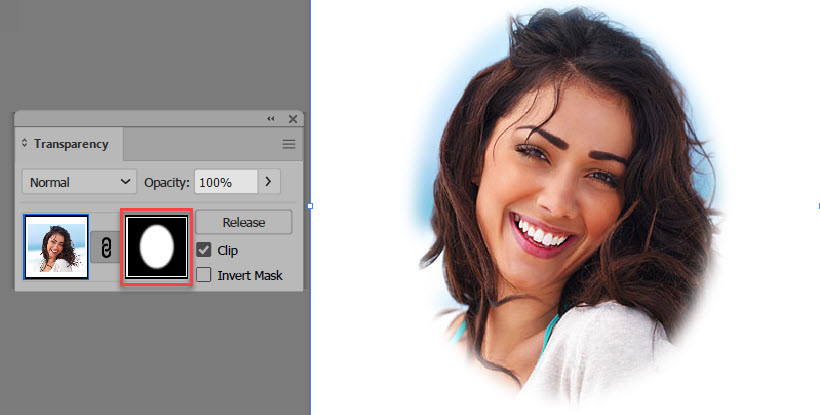
CHECK POINT: Notice that using the Opacity Mask instead of the Clipping Mask worked to create the Vignette Effect because the the Gaussian Blur effect was preserved. To see the Vignette feather effect better based on the Gaussian Blur Effect that was applied, a dark background behind it.

EXAMPLE 2: ADDING A LINEAR GRADIENT:
In this example, a foreground image was merged with a background image using a LINEAR GRADIENT.
- Import (File > Place) two images and positioned on the artboard.

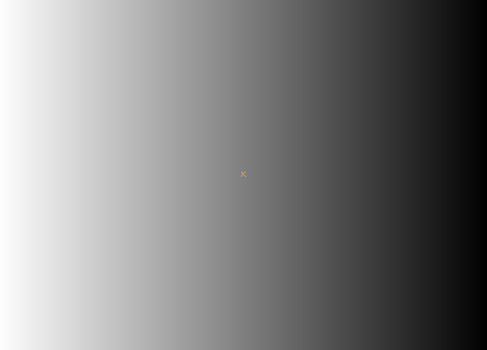
- Using the Rectangle Tool, draw a shape to cover the area where the opacity mask will be applied and then fill it with a default Black and White Gradient.
- Lock the background layer, select both the gradient shape and the foreground image (e.g., model), and in the Transparency panel click the Make Mask button.
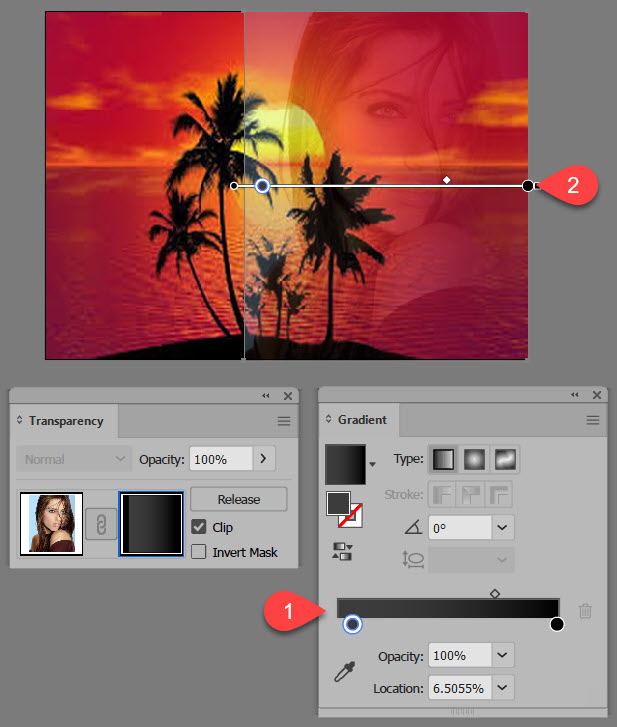
- Select the Opacity Mask in the Layer (Opacity Mask) panel, and then use the Gradient panel and the Gradient Annotator to adjust the gradient as much as possible to correct the default gradient.
- To further refine the Opacity Mask, click on the Opacity Mask thumbnail in the Transparency panel and ensure that the Opacity Mask is NOT selected in the Layers (Opacity Mask) panel, use the Blob Brush Tool set to black and the Color mode (instead of the Gradient mode) and then use the Blob Brush to draw on the mask on the artboard to remove the unwanted areas of the mask so the background can show through.
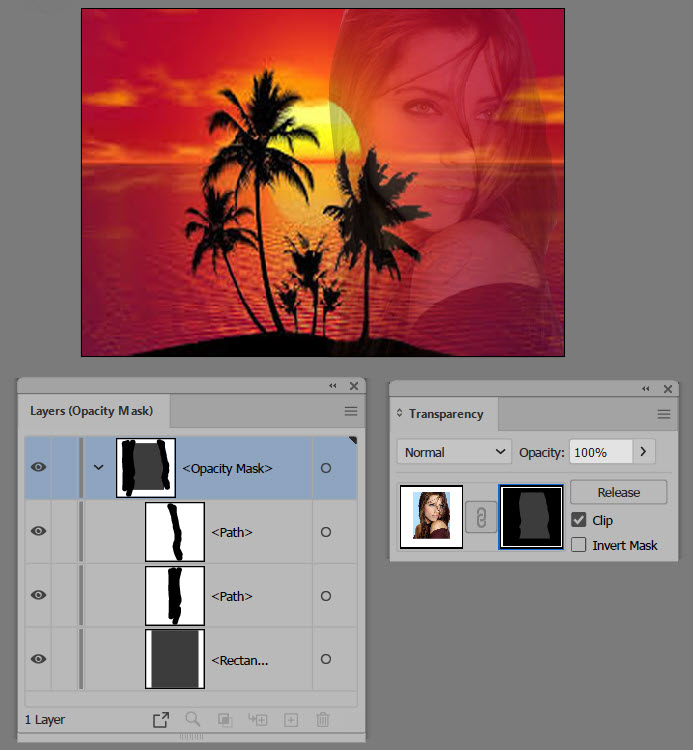
CHECK POINT: It is important to note that since the GRADIENT MASK was DESELECTED, TWO NEW BLACK/WHITE MASKS were added. See the three layers in the screenshot above.
EXAMPLE 3: ADDING A RADIAL GRADIENT:
In this example a radial instead of a linear gradient was used.
- Create a 15 point yellow star-burst without a stroke above a background image (e.g., sunset).
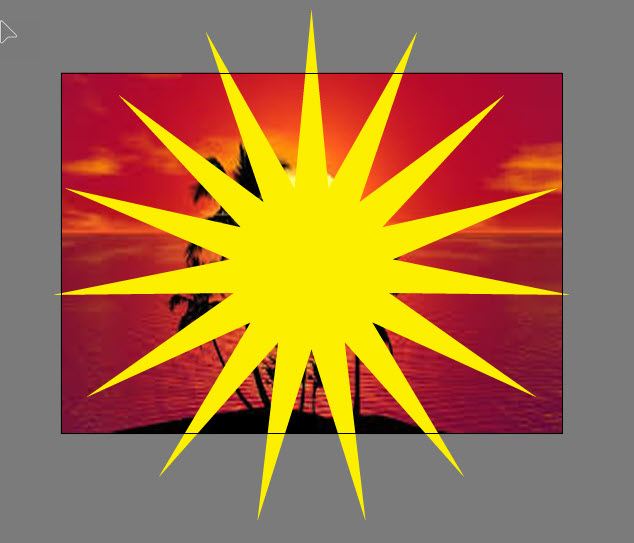
- Draw a circle with a default radial gradient without a stroke on top of the sunburst.
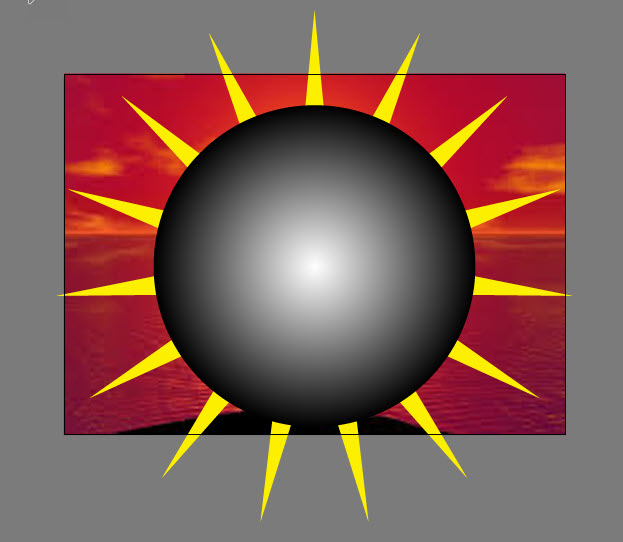
Lock the background layer and select both the circle and star-burst and in the Transparency panel click the Make Mask button.

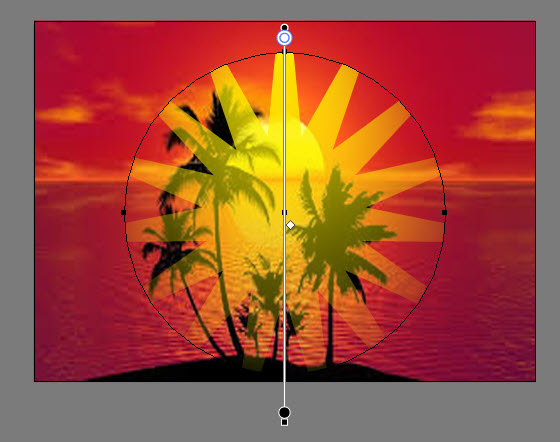
- Use the Gradient panel and the Gradient Annotator to adjust the gradient to your liking.
See It
The actual mask is SEEN as:
A black, white, or gray bitmap thumbnail image in the Transparency panel.
In this previous example, the mask is highlighted with a red border.
Modify It
To MODIFY the Opacity Mask:
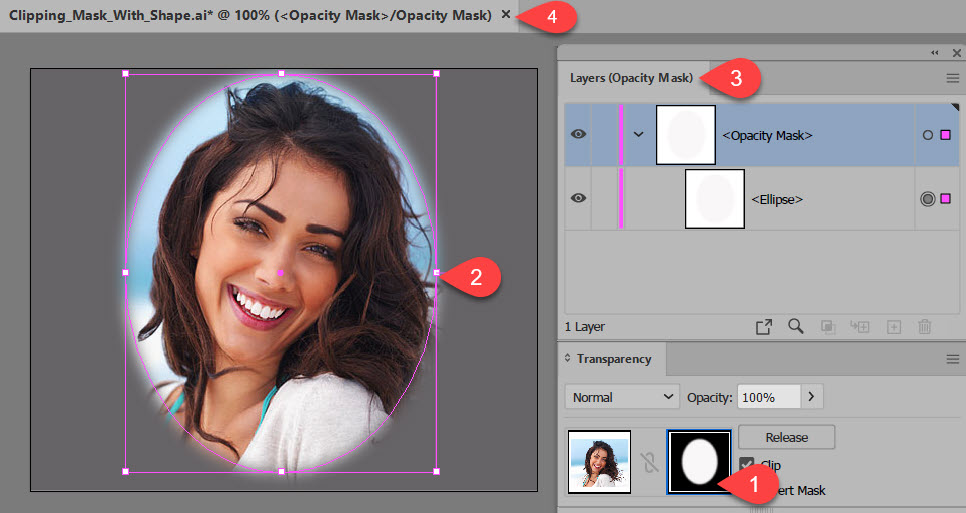
- Select the artboard and then in the Transparency panel click the Opacity Mask thumbnail to load the Opacity Mask in the Layers (Opacity Mask) panel.
NOTE: You should see the layers selected in the Layer (Opacity Mask) panel.
There are several cues to let you know you are in the Opacity Mode:
1. The thumbnail is highlighted in the Transparency panel
2. The outline of the mask is highlighted on the artboard
3. The title of the Layers panel changes from Layers to Layers (Opacity Mask)
4. The tab at the top of the window will change from RGB/Pixel Preview to < Opacity Mask>/<Opacity Mask>
IMPORTANT NOTE: You cannot perform any other operation until you get out of the Opacity Mask Mode.
Like Photoshop:
- To SHOW/HIDE the Opacity Mask EFFECT, press SHIFT + click on the mask thumbnail.
- To SEE the Opacity Mask ITSELF, press ALT/OPTION + click on the mask thumbnail. - Modify the Opacity Mask by:
- performing any type of transformation (e.g., resize, move, skew).
- adding or modifying the gradient of the mask by clicking on the Gradient swatch in the Tool Bar and modifying the gradients colors, stops, etc. in the Gradient panel.
- changing any f/x effect (e.g., Gaussian Blur) by opening the Appearance panel with the Opacity Mask selected.
Press the G key access the Gradient Annotator to change the gradient settings with the Fill Swatch selected.
See Effect Of It
Its effect can be SEEN after modifications has been made:
In a previous example, the Opacity Mask was rotated and scaled. Also, the Gaussian Blur effect was adjusted. Below is the BEFORE and AFTER example.

Release It
To RELEASE an Opacity Mask:
- In the Transparency panel, click the Release button.
TRANSPARENCY PANEL OPTIONS
There are several options in the Transparency panel that can be used to manipulate an Opacity Mask:
- 1. Unlock Mask
- 2. Inverse Mask
- 3. Clip Mask
- 4. Change Mask Opacity
- 5. Blend Mask
There are also three additional advanced options in the Transparency panel that you can use as well if you select the menu and choose Show Options.
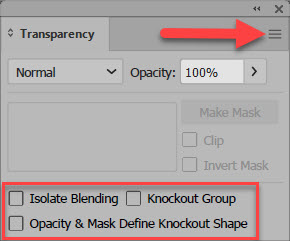
- Isolate Blending - prevents blending modes from being applied past the bottom of the group.
- Knockout Group - prevents the elements of a group from showing through each other.
- Opacity & Mask Define Knockout Shape - In the knockout group, cause each element to be shaped by its opacity setting and mask.
UNLOCK MASK
By default, the ARTWORK and MASK are LOCKED TOGETHER so they will be manipulated (e.g., move) together. However, you can UNLOCK them so that either the Mask or the Artwork can be manipulated SEPARATELY.
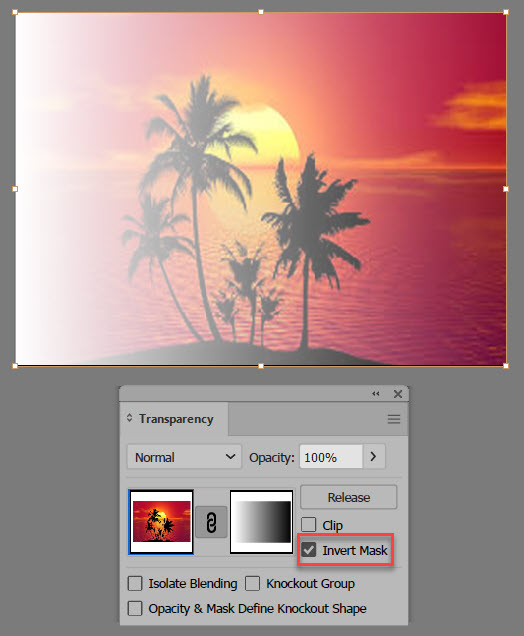
In the example below, the text (e.g., HAWAII) is used as the Opacity Mask for the underlying image (e.g., sunset image).
- Import a background (e.g., sunset), type some text (e.g., HAWAII), select both and in the Transparency Panel, click the Make Mask button.
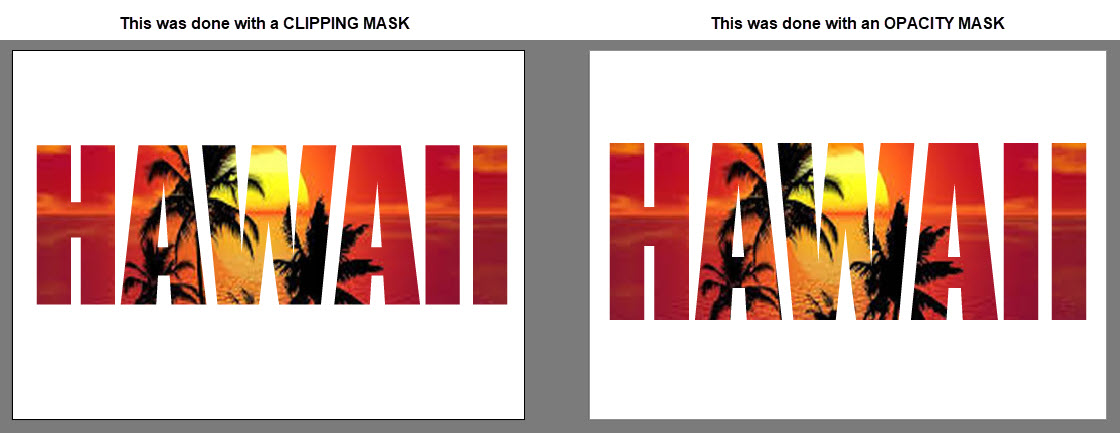
IMPORTANT NOTE: Notice there is no difference between the version created with a Clipping Mask or with an Opacity Mask. What's difference is HOW they are created.
- The Clipping Mask used only the SHAPE of the mask (e.g., the HAWAII text) regardless of the text color.
- The Opacity Mask actually uses the COLOR of the mask (as well as its shape). Remember, BLACK CONCEALS, WHITE REVEALS pixels. - With the Selection Tool, move the text.

CHECK POINT: Notice the text and the background moved together to the top of the artboard. - In the Transparency panel, click the link icon to UNLOCK the artwork from the Opacity Mask.
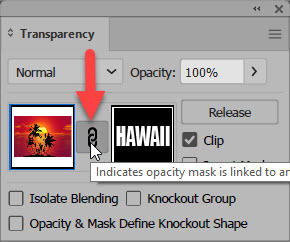
- Click the Artwork icon (highlighted above with a light blue border) in the Transparency panel and with the Selection Tool, click inside the text and move the background image (e.g., sunset) within the text shape (e.g., HAWAII).

CHECK POINT: Notice the sun is at the BASE of the letters instead at the top but the text (e.g., HAWAII) did not move. - Click the Opacity Mask icon in the Transparency panel and with the Selection Tool, click the text to move the text (e.g., HAWAII).

CHECK POINT: Notice the TEXT (e.g., HAWAII) is at the BOTTOM of the artboard instead of the MIDDLE but the background image (e.g., sunset) did not move.
CLIP MASK
By default, the OPACITY MASK is CLIPPED to the MASK SHAPE. However, you can UNCLIP it so that the Opacity Mask is the SAME SIZE as the artwork. So, the Opacity Mask can DOUBLE as a CLIPPING MASK.
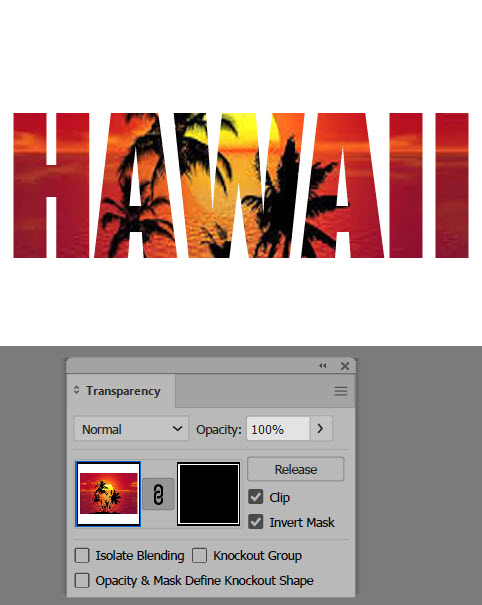
- Import a background (e.g., sunset), draw a white box in the middle of the artboard, and type some text (e.g., HAWAII).

- Lock the background (e.g., sunset), select text and the box, and in the Transparency Panel, click the Make Mask button.
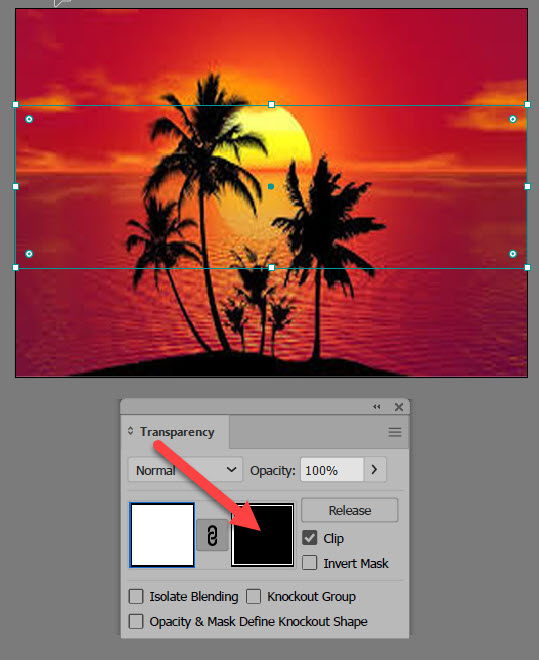
CHECK POINT: Notice the text disappeared. The reason for this is because the Opacity Mask is totally BLACK (highlighted with red arrow above). As a result, remember, black conceals pixels making them transparent and white reveals pixels making them opaque. Moreover, the Opacity Mask is "clipped" to the shape of the white box on the artboard. To clip the Opacity Mask to the shape of the text (e.g., HAWAII), you need to click the Clip check box as will be done in the next step. - Click the Clip check box to DESELECT this option.

CHECK POINT: Notice because the Opacity Mask is "clipped" to the text instead of the box, the area of the text disappears making it appears that the text has been "cut out" of the box showing the background image (e.g., sunset) through it. - Optionally, click the Release button in the Transparency panel, change the text to something else (e.g., SUNSET), and the click the Make Mask button again.
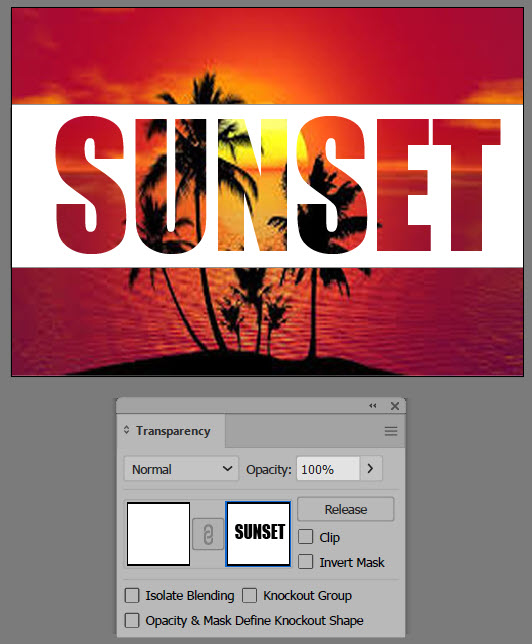
CHECK POINT: Notice that the mask effect still works because the text was not converted to an outline.
Below is another example of showing how the "clip" option in the Transparency works.
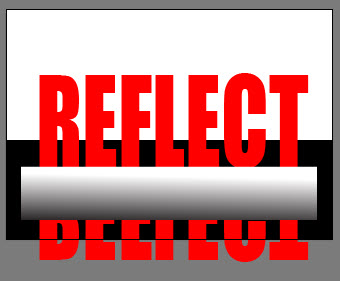
- Using the Rectangle Tool, draw a black rectangle about third of the artboard size at the bottom and then add some text or a shape where the base is about mid-way of the black rectangle to allow the text/shape room to reflect in the upcoming steps.

- Select Object > Transform > Reflect... and in the dialog box that appears, ensure the Horizontal Axis is selected and then click the Copy button (not the OK button) to make a "reflected"copy below the original and then move the reflected copy down about two pixel to create a gap between the original and the reflected copy.

CHECK POINT: Notice the "reflected copy" is "hanging outside" of the artboard area (e.g., gray area). This was done purposely so that you can see the clip effect better in the next step. - With the Rectangle Tool, draw a rectangle about half the height of the "reflected" object and then fill it with a black and white gradient with white on top and black on bottom.
- Select the rectangle and the "reflected" object and in the Transparency panel click the Make Mask button..
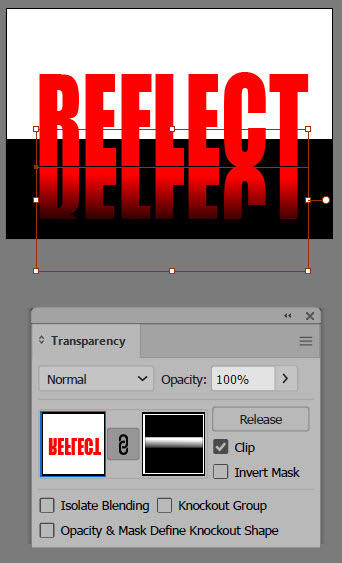
CHECK POINT: You should see the reflected object gradually fade into the dark area of the rectangle. - Click the Clip check box to DESELECT it.
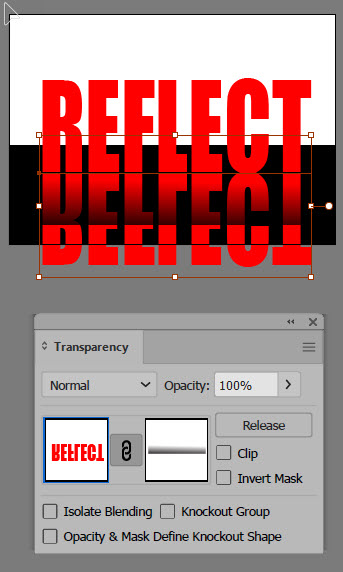
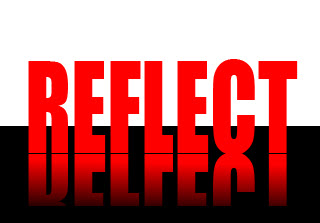
CHECK POINT: You should see that the Opacity Mask is affected by the entire bounding box the object it is suppose to be masking. In this example, this is not exactly want you want. When the Clip checkbox is selected, EVERYTHING UNDER the mask shape is CLIPPED and EVERYTHING OUTSIDE of the mask shape is HIDDEN. If you deselected the Clip checkbox, the opacity mask still works BUT ANYTHING "HANGING" OUTSIDE of the mask shape will STILL BE SHOWN. - Click the Clip check box again to have the mask "clip" to the mask shape above the original shape.
Another example to show HOW the CLIP option works with an Opacity Mask.
- Type two or more large letters in the center of the canvas and then draw a black and white oval with a 20 pixels stroke. Optionally, use the Width Tool to taper the top of the oval.

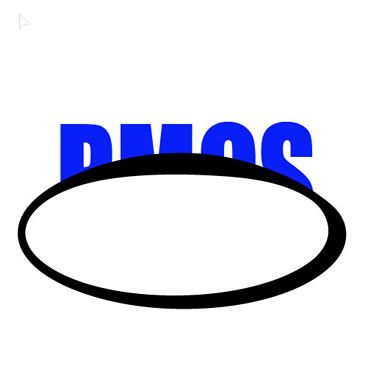
- Select both the text and the oval and in the Transparency panel click the Make Mask.
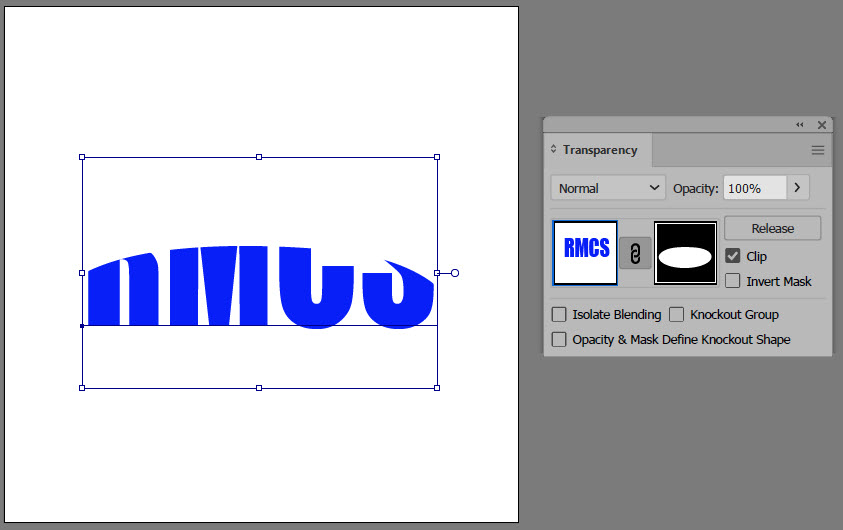
CHECK POINT: Notice only the bottom half of the text is being displayed. This is because if you look at the Opacity thumbnail--the area that is white reveal the underlying image and the area that is black conceals or make pixels transparent in the image.
- In the Transparency panel, deselect the Clip check box.

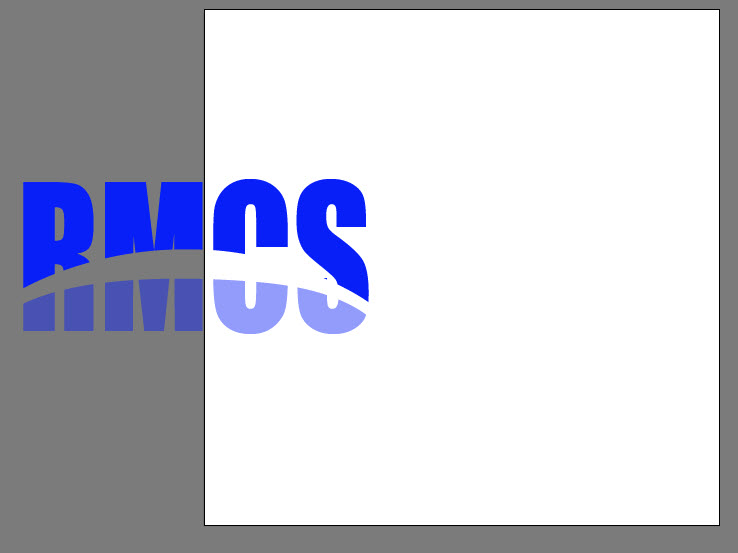
CHECK POINT: Notice that the top half of the shape is now visible. This is because the whole area of the text is being used not just the area that is being masked. - Select the artwork on the artboard and click the Opacity Mask thumbnail again if necessary to select the Opacity Mask. Move the mask on the artboard down a bit and click the Fill swatch to change the color from white to a light gray.


CHECK POINT: Notice that the bottom half of the text has been dimmed (or made transparent). Also, notice that the Opacity Mask is black and gray instead of black and white. It is also important to note that the mask did not create a white stroke between the top and bottom of the text but rather that area is transparent. If you move the artwork off the artboard, you will see the transparency better.
INVERT MASK
By default, the OPACITY MASK will work with the current grayscale color of the mask. However, you can INVERT it so that the the black areas of the mask become white and the white areas becomes black. The gray will also be inverted based in the intensity of the gray value.
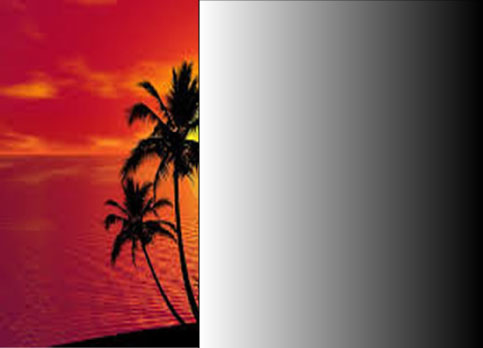
- Import a background (e.g., sunset), with the Rectangle Tool, draw a shape the same size as the artboard and then fill it with the default White,Black gradient.
- Select the gradient and the background, and in the Transparency Panel, click the Make Mask button.

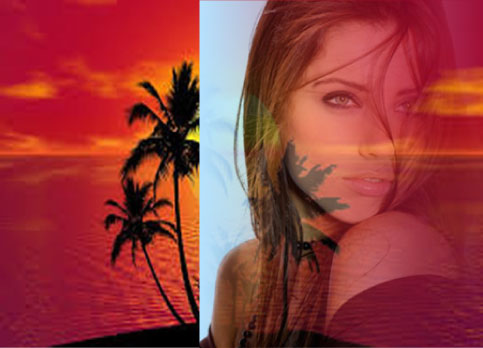
CHECK POINT: Notice the LEFT side of the image the background (e.g., sunset) is OPAQUE and the RIGHT side of the image the background is TRANSPARENT. - In the Transparency panel, click the Invert check box to invert the grayscale colors of the mask.
CHECK POINT: Notice the LEFT side of the image the background (e.g., sunset) is TRANSPARENT and the RIGHT side of the image the background is OPAQUE. This is because of the gradient mask has been INVERTED. Note also, that the grayscale thumbnail did not invert.
The Invert Mask function is also useful if you forgot to change the color of your object or text (e.g., HAWAII) from black to white. Instead of going back and changing it, you can simply invert the mask by clicking on the Invert Mask check box to select it.
In the example, let's say you forgot to change the text color from black to white.
- Import a background (e.g., sunset) and then add some text with black font (e.g., HAWAII).

- Select both the text and background and in the Transparency panel, select the Make Mask button.

CHECK POINT: You should notice that all you get is a BLANK artboard. This is because the text was created in black. And since the text is ACTING as the mask and is in black, it will not be shown because BLACK CONCEALS and WHITE REVEALS pixels. - Click the Invert Mask check box to select it.
CHECK POINT: You should see that the mask work now even though the text is still in black. That is because when a mask is inverted, black areas become white and white areas become black. This saves you the step of NOT having to change the color of the text.
CHANGE MASK OPACITY
By default, the OPACITY MASK and the ARTWORK OPACITY are both set to 100%. However, you can adjust the opacity of either within the Transparency panel.
- With a previous example, in the Transparency panel, select the Artwork icon and then adjust the Opacity slider.
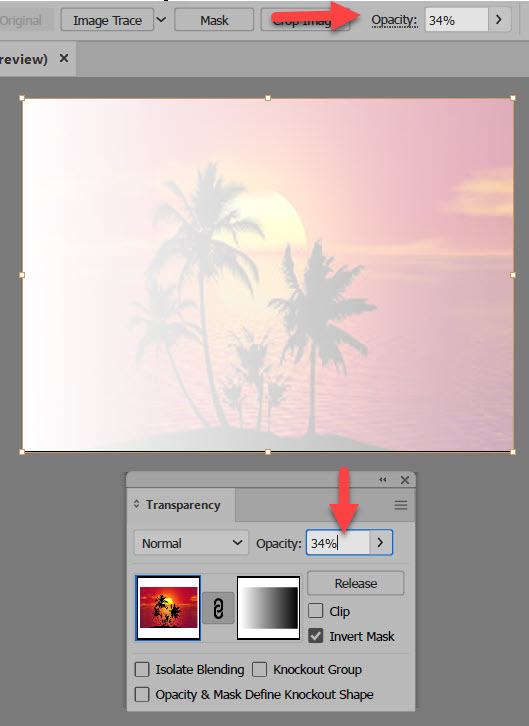
CHECK POINT: Notice the Artwork icon is selected (highlighted with a light blue border) and the opacity was set to 34%. Also, note the Opacity at the top of the screen also changed to 34%. - With a previous example, in the Transparency panel, set the Artwork opacity back to 100% and then select the Opacity panel icon and then adjust the Opacity slider.
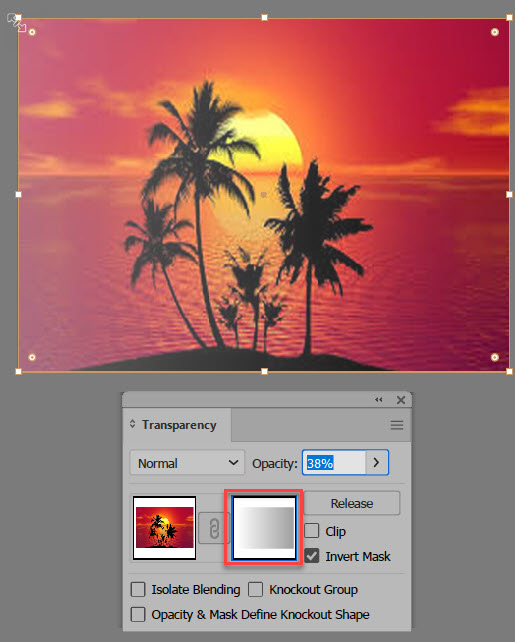
CHECK POINT: Notice the Opacity Mask icon is selected (highlighted with a light blue border) and the opacity was set to 38%. Also note that the Opacity Mask thumbnail opacity itself is adjusted (e.g., highlighted with a red border above).
BLEND MASK WITH LAYER BELOW
By default, the BLEND MODE is set to NORMAL. However, you can CHANGE THE BLEND MODE to create difference "blending" effects with layers below the mask.
- In a previous example, add a black and white object (e.g., star)
NOTE: You can see the blend options better when the object is black and white.

- In the Transparency panel, experiment with the various blend options to see if they work.
- CHECK POINT: Notice none of the blending modes work because the object is on TOP of the mask.
- Move the object BELOW below mask layer (denoted with a dash line). In the Transparency panel, experiment with the various blend options to see what works best for you.
Normal Blend Mode:

Darken and Multiply Blend Modes:

Color Burn, Color Dodge, Overlay, Soft Light, Hue, Saturation, and Color Blend Modes:
Lighten and Screen Blend Modes:

Hard Light Blend Mode:

Difference and Exclusion Blending Modes:

Luminosity Blend Mode:

CHECK POINT: Notice that some but not all of the blend modes works with the black and white object. You can use a colorful object to see how it will interact with the blend modes.
OTHER WAYS TO ADD AN OPACITY MASK
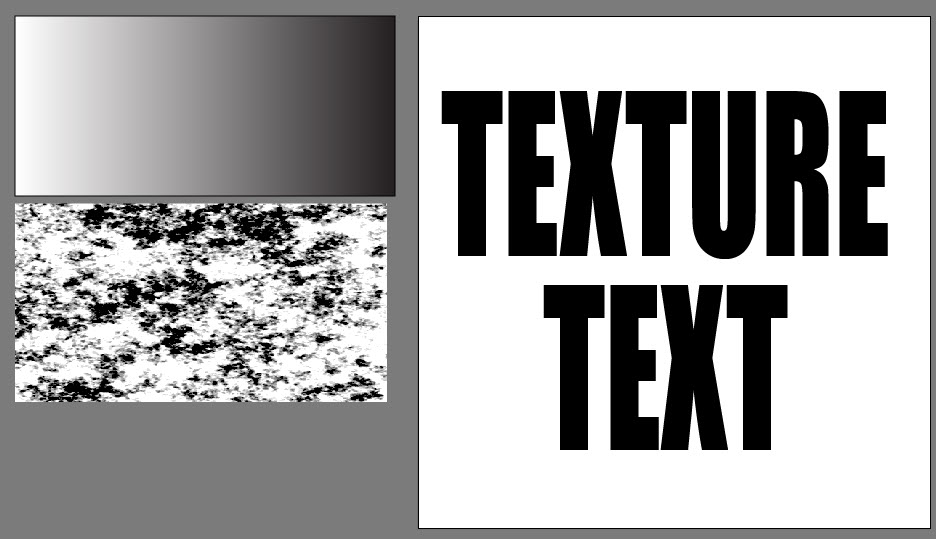
While the most common way to use an opacity mask is to used a shape with a black, white, or a gradient, there are other ways to create an opacity mask. You can also use a shape with a grayscale pattern or a grayscale image created in another program like Photoshop to create a TEXTURE OR DISTRESS EFFECT. Moreover, you can CUT and PASTE these shapes into the opacity mask to create an OPACITY MASK.
- Create a shape or type some text (e.g., TEXTURE TEXT) in black that you want to add a texture or distress effect. Import (File > Place...) any grayscale image or create a rectangle with a gradient in it and place it OUTSIDE of the artboard to be used later.
- Do the following steps to create a texture effect:
1. Select the texture shape that is off the artboard
2. Select Edit > Copy (or CMD/CTRL + C)
3. Select the texture (distress image) on the artboard
4/5. In the Transparency panel, click the Make Mask button then select the Opacity Mask thumbnail
NOTE: Alternatively, you can DOUBLE-CLICK on the Opacity Mask thumbnail to create or edit the mask.
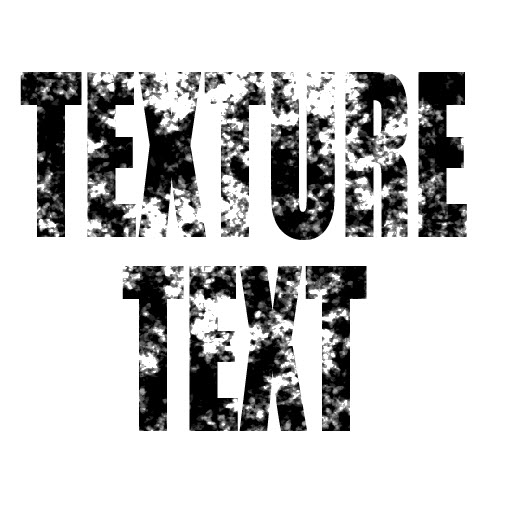
6. Select Edit > Paste (or CMD/CTRL + V)
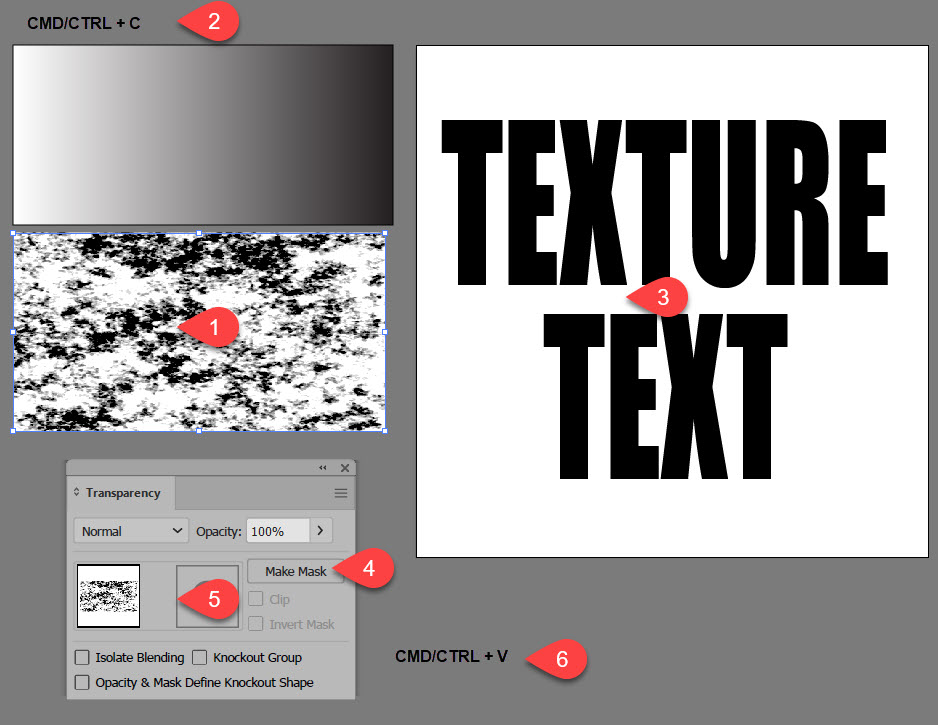
- Resize the Opacity Mask to better fit the shape/text.
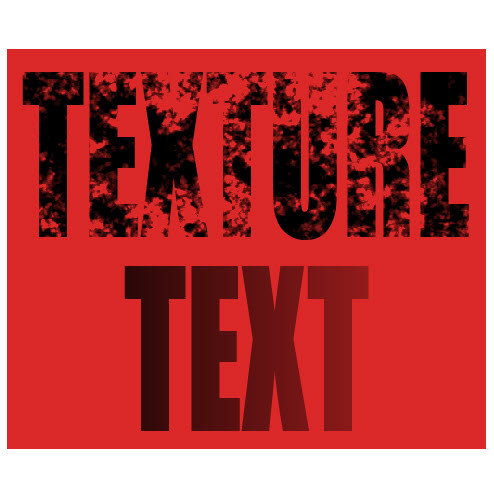
- Optionally, in the Transparency panel, select the Artboard thumbnail instead of the Opacity Thumbnail to return to the normal edit mode and repeat the previous step but this time select another texture (e.g., gradient rectangle) but DO NOT click the Make Mask/Release button since the mask was already created.

CHECK POINT: Notice that the SECOND mask is applied on top of the FIRST mask (see red box in screenshot above). You could have scaled the second mask to hide the first mask if you wanted to replace it. - Optionally, add a color background so that you can see the effect transparency.
SUMMARY OF MASKS
| Mask | Type | Typically created by | Typically modified by |
|---|---|---|---|
| Opacity | Bitmap | Creating a Opacity Mask and applying a gradient | Painting on the Opacity Mask with black, white or gray gradient |
| Clipping | Both | Clipping an image(s) into an image or shape above it | Manipulating image(s) below the layer being clipped |
WHEN TO USE WHAT MASK TYPE:
| Mask Type | Best used when you need to: |
|---|---|
| Opacity | - make mask translucent to show and hide portion of the image |
| Clipping | - clip more than one images into a vector shape |
WHERE ARE THEY STORED:
| FORMAT | WHERE IT IS STORED | HOW IS IT STORED |
|---|---|---|
| Opacity | Layers (Opacity Mask) Panel | Bitmap |
| Clipping | Layers Panel | Vector |
BEST OF BOTH WORLDS
You can use the Clipping Mask and the Opacity Mask together to for even more creativity.
- Draw a rounded rectangle in the center of the artboard to represent the shape of a credit card.
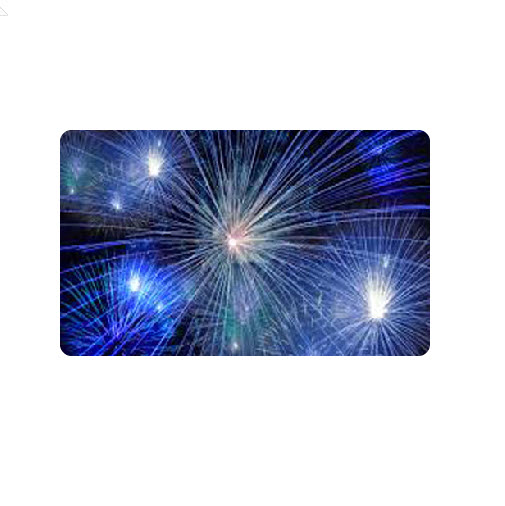
- Import an image (e.g., fireworks) that you want to "clip" into the credit card shape, scale is a little bit larger than the rectangle, and then move it below the rounded rectangle. Then, select both the rectangle and the image, right click on therm, and select Make Clipping Mask.
- Import another image that you want to "clip" into the credit card and scale to fix a little larger the half of the credit card and position it to the right side.
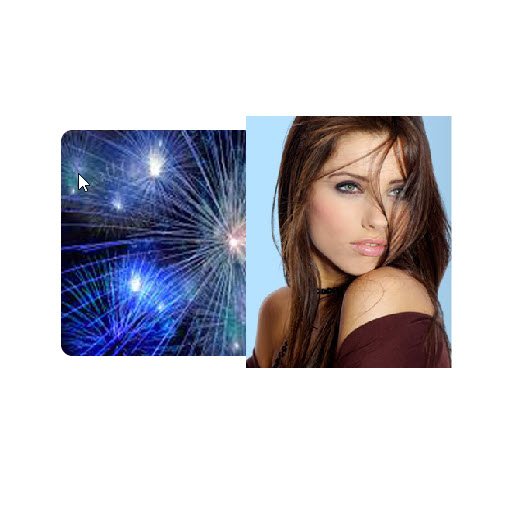
- Move the second imported image in the Layers panel below the rectangle to clip in into the group as well.
- With the Rectangle Tool, draw a white rectangle over the second imported image and then move it above the second imported image in the Layers panel.
- Select both the image and the rectangle and in the Transparency panel, select the Make Mask button.
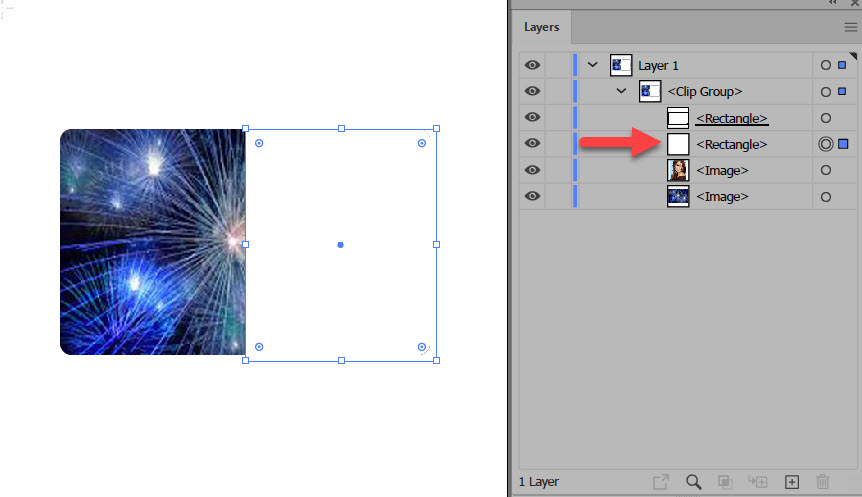
- IMPORTANT STEP: Click the Opacity Mask thumbnail to select it, with the Selection Tool, click outside of the artboard to DESELECT the Opacity Mask in the Layer (Opacity Mask) panel.
NOTE: The reason why the mask has to be deselected is because edits will be made to the mask if a gradient was applied to it. To create another mask, you have to deselect the original mask. Moreover, the Blob Brush is used instead of the Paint Brush because it will create fewer paths that the Paint Brush Tool.
- Set the Color swatch to black and with the Blob Brush Tool, paint in the area of the artboard where you want to REMOVE (or mask) content.
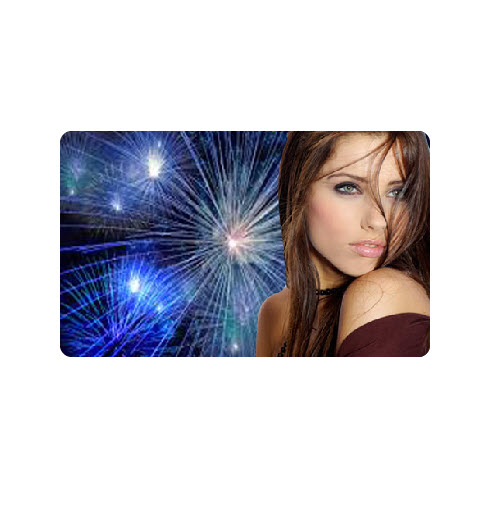
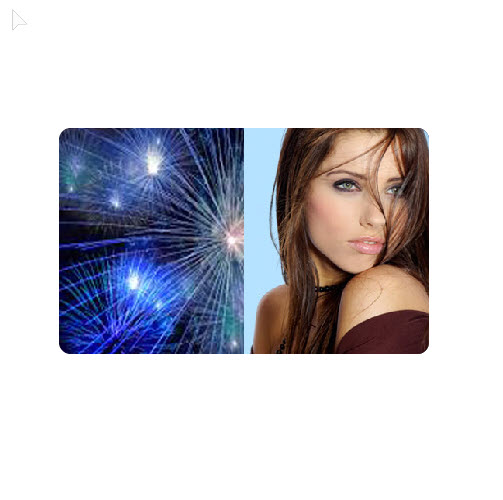
- Click the Artboard thumbnail, add some text, select all shapes and images, and press CMD/CTRL + G to group them.
- Add a drop shadow, rotate the credit card, and reposition it where you want it.

- Optionally, import another image as a background and move it to the bottom of the Layers panel. Resize the artboard if necessary. Add whatever other effects or text you want.

FAUX MASK
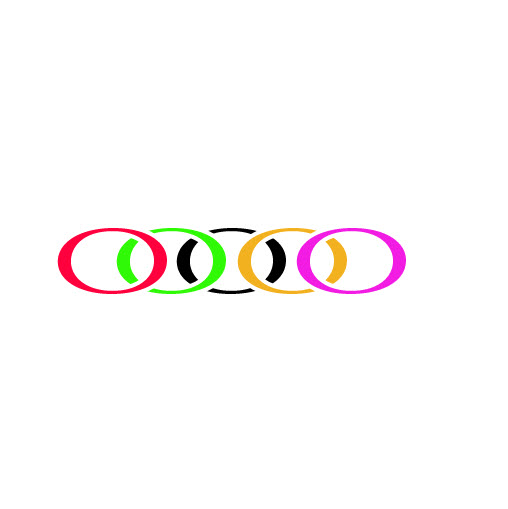
The word "faux" is defined as artificial or imitation; fake. So, a faux mask is not a traditionally mask in Illustrator but it behaves as one in that it can show, hide or protect content under it. Moreover, it can be easily created.
- Type a black shape that you would like to use (e.g., capital O) and scale it so that is looks like a oval and then add a four pixels white stroke to it. Duplicate the shape several times and ovelap them on top of one another.
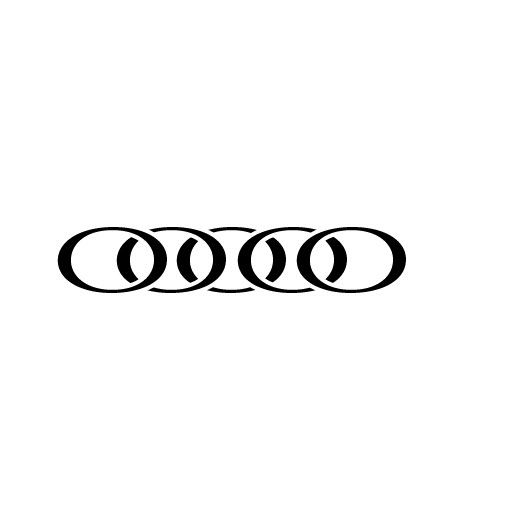
CHECK POINT: Notice how the white strokes act as sort of masks hiding the underlying shapes making them appear as though there are "gaps" between the shape segments. If you were to move the artwork off the artboard, you would see the white strokes better.
- Optionally, change the color to each shape to your liking.