FAQ and Benefits of Using Smart Objects
A Smart Object is a separate reference file (e.g., LayerName.psb file) that ENCAPSULATES and PRESERVES bitmap or vector image data enabling a user to perform nondestructive flexible editing. A Smart Object is in essence another file:
- embedded in a Photoshop file, or
- linked to a Photoshop file
NOTE: The "file" can be another Adobe Photoshop, Illustrator, PDF, or Camera Raw file. Embedded vs Linked Smart Objects will be discussed later in this training. Because Photoshop stores a reference of the original file in a Smart Object, using a Smart Object will make the overall file size bigger.
There is a host of ways to create a Smart Object:
- Select one or more layers, then right-click or control-click and then select Convert to Smart Object. (PREFERRED METHOD USED MOST OFTEN)
NOTE: If you select more than one layer, it will be converted to a single Smart Object layer. Also, it is better to use a Smart Object than to merge multiple layers because you have to redo all of the merger steps if you want to make a change. - From the Layers Panel mini-menu, select Convert to Smart Object
- From the main menu, select Layer > Smart Objects > Convert to Smart Object.
- Drag-and-drop an Adobe PDF or Adobe Illustrator file into Photoshop.
- Copy and Paste an Adobe Illustrator file into Photoshop and choose Smart Object in the Paste dialog box.
NOTE: For more flexibility, select File > Preferences and enable PDF and AICB (No Transparency Support) in the File Handling & Clipboard section in Adobe Illustrator. - From the File Menu:
- File > Open as Smart Object…
- File > Place Embedded…
- File > Place Linked…
NOTE: Although a *.jpg file can be placed, it is better to place a *.psd, *.tiff, or *.psb files because layers can be added, pixels modify, and file resaved without any loss. Otherwise, saving a *.jpg file requires the file to be flatten and recompressed which will cause image quality degradation. - File > Open and select a camera raw file (*.dng) and then press the Open button. In the Camera Raw dialog box that appears, hold down the SHIFT key to change the Open Image button to change to Open Object.
- In Lightroom, select Photo > Edit In > Open as Smart Object in Photoshop…
- In Bridge, select File > Place > In Photoshop
TIP: You only have to remember the ways that you prefer.
A Layer that has been converted to a Smart Object will have:
- An Embedded Smart Object displayed with an EMBED icon in the lower right corner of the Layer’s thumbnail.

- A Linked Smart Object displayed with a LINK icon in the lower right corner of the Layer’s thumbnail.

CROSS-REFERENCE: See What’s the different between a Linked vs. Embedded Smart Object? for details.
The overall benefits of using a Smart Object is that it allows a user to PERFORM NONDESTRUCTIVE EDITS:
You can transform (e.g., scale, rotate, skew, distort, perspective, or warp) a layer without losing any quality of the image.
WHY: Normally, you would lose the original image data or quality just by doing a simple transformation.
EXAMPLE OF TRANSFORMATION
Let's see how the quality of an image is affected if you transform an image with and without a Smart Object applied.
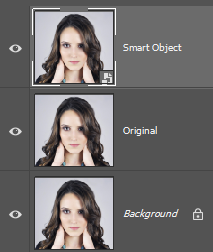
- Open an image and duplicate the Background layer twice (press CTRL+J twice) and name the first layer Smart Object and the second layer Original. Hide the Background layer by clicking the show/hide icon. Then, right-click or control-click on the Smart Object layer and select Convert to Smart Object from the menu.
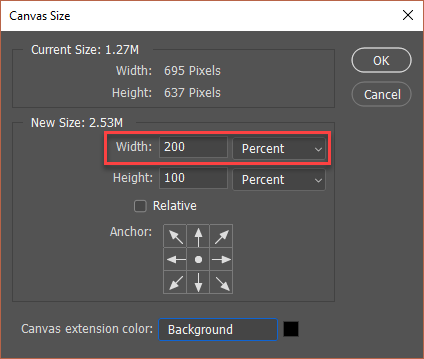
- Select Image > Canvas Size (ALT+CTRL+C), change the unit to Percent, the value to 200 for the width, and then click the OK button to double the canvas width.
- With the Smart Object layer selected, hold the SHIFT key and use the Move Tool to move the image to the left of the canvas to cover the first half of the canvas.
- While holding down the SHIFT key, use the Move Tool again and move the Original layer to the right side of the the canvas.
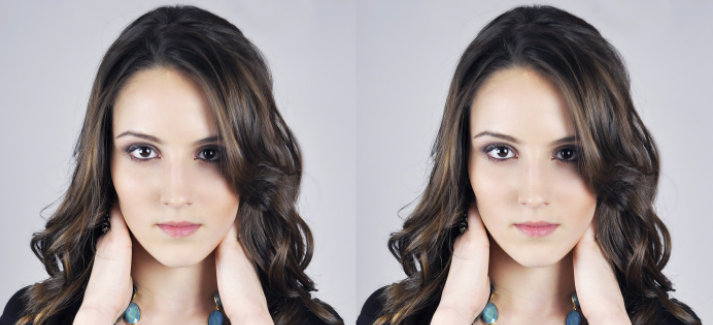
- Hold down the SHIFT key and select both the Smart Object and the Original Layer so that you can perform the next step on both layers simultaneously.
- Press CMD/CTRL+T, hold down the ALT key to transform the selection from the center, scale it to a small size, and then press the ENTER/RETURN key to commit the TRANSFORMATION.
- Press CMD/CTRL+T again, hold down the ALT key to transform the selection from the center, scale it back to the original size or close to it.
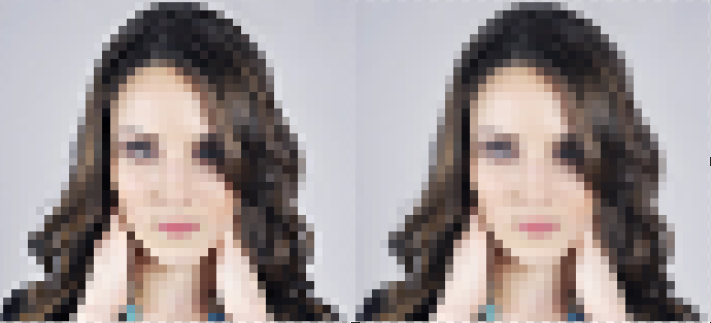
NOTE: Notice that the transformation process does not take effect (both images are still pixelated) until transformation is complete which will be done in the next step. If you decide to revert back to the original size, rotate, or x/y position. Photoshop keeps track of these settings. You can reset any of these settings at the top of the window. For example, you can reset the dimension by setting both the W and H to 100%, reset the rotation by setting it to zero, or if you want to reset all of the settings, click the Cancel Transformation icon ( ) or use the ESC key.

- Press the ENTER/RETURN key to commit the TRANSFORMATION.
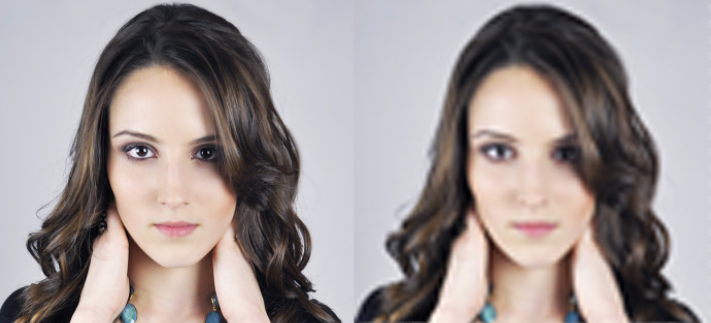
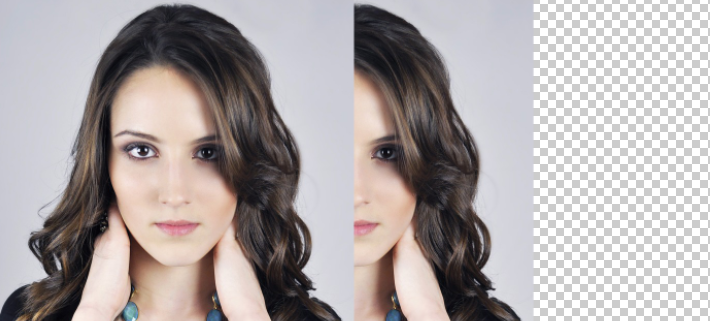
NOTE: Notice that once the images are scaled back to their original size, the Original layer image without a Smart Object is blurry. This is because when the the image was scaled down, pixels were "thrown away" to make the image smaller. However, once the image was scaled back Photoshop could not recreate the same pixel quality again. However, the Smart Object layer was restored to its original glory because Photoshop reference the image data from the original file to recreate the image without any distortion. Hence, the power of Smart Object. - Repeat steps
 -
-  four or more times.

NOTE: Notice that each time the transformation was performed, Photoshop "throws out" more pixels to make the image smaller for the Original layer so it get even more pixelated. However, the Smart Object layer look the same regardless of the number of times the image is scaled. This technique also applies to all other types of transformations (e.g., rotate, skew, distort, perspective, or warp) but is the most obvious with the scaling transformation.
TIP: Transformation is useful when creating reusable mockups (e.g., cup, billboard, book, laptop, computer, picture frame, business card, t-shirt, etc.)
EXAMPLE 1 - MOCKUP
Let's see how to create a simple mockup that will be reuse later in this tutorial:
- Open up an image that you would like to make a mockup.
- Using the Rectangle Tool, create a shape below the area you want to use as a mockup that is close to the size of that area. Name the layer (Billboard)
NOTE: You can use whatever fill color that you want since it can be easily replace within the Smart Object that will be created in the next step.
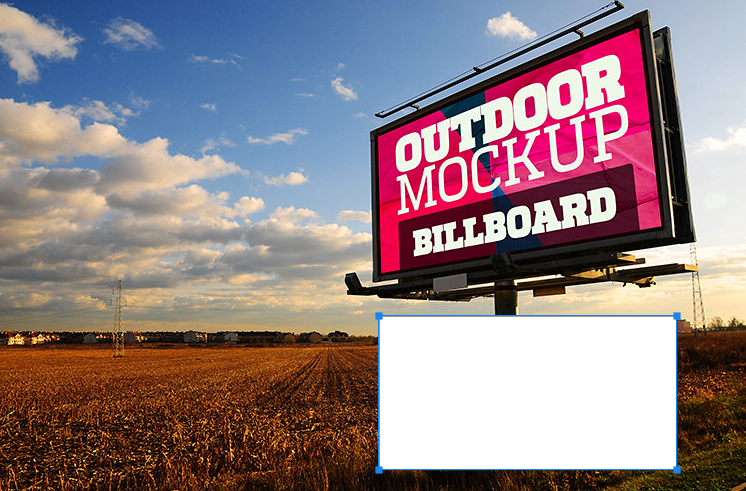
- Convert the Shape Layer to a Smart Object by right-clicking or control-clicking on the layer and select Convert to Smart Object.
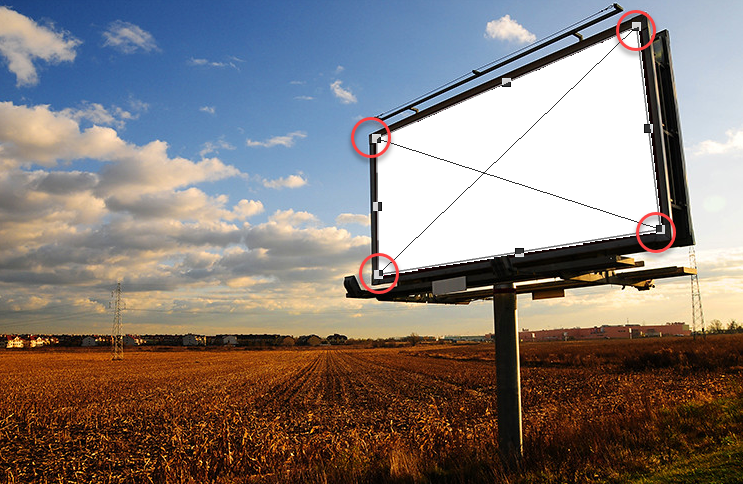
NOTE: Notice the highlighted Smart Object icon in the lower right corner of the layer's thumbnail. This icon denotes that the layer has been made into a Smart Object and is non-destructive. - Move the shape over the area you want to make into a mock up, press CMD/CTRL+T, and then hold down the CTRL key and move the four handles of the shape into the four corners of the mockup area to match the perspective of the mockup area. Use the zoom Tool, if necessary, to fit them neatly in their respective corner. Then, press the ENTER key to commit the transformation.
- Double-cllick the Billboard layer thumbnail to open the Smart Object in its own tab in Photoshop with the same name as the layer but with the .psb extension. (Billboad.psb).
NOTE: This is why is it a good idea to name the Photoshop layer before you convert it to a Smart Object. PSB stands for Photoshop Big.

- Zoom in on the image if necessary and then add whatever content you want to the Smart Object. In this case, a picture and text were added.

CAUTION: The Smart Object is RECTANGLE and not in perspective like the main document because the rectangle shape was converted to a Smart Object BEFORE it was TRANSFORMED. If you have TRANSFORMED the rectangular shape and then convert it to a Smart Object, the Smart Object shape would be in perspective in the Smart Object as well and would not render correctly once it was closed and saved. - Close and save the Smart Object and then return to the original file.
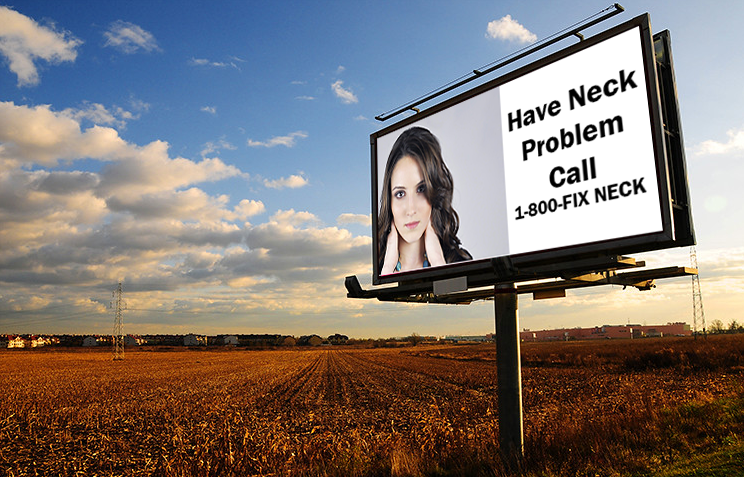
NOTE: You should see that the edits done in the Smart Object get reflected in the original file and that it is in perspective with the mockup area even though there were no perspective in the Smart Object. You will see later how to edit the Smart Object to change the original file without even having to recreate the transformation.
KEY: The Smart Object was created BEFORE the transformation (perspective) was made.
EXAMPLE 2 - MOCKUP
Let's see how to create another simple mockup:
- Open up an image that you would like to make a mockup.
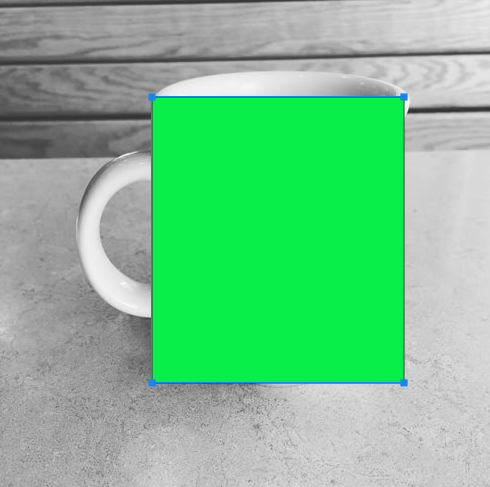
- Using the Rectangle Tool, create a shape slightly larger than the area you want to use as a mockup. Name the layer (Coffee Mug).
NOTE: You can use whatever fill color that you want since it will be turned off in the Smart Object that will be created in the next step.
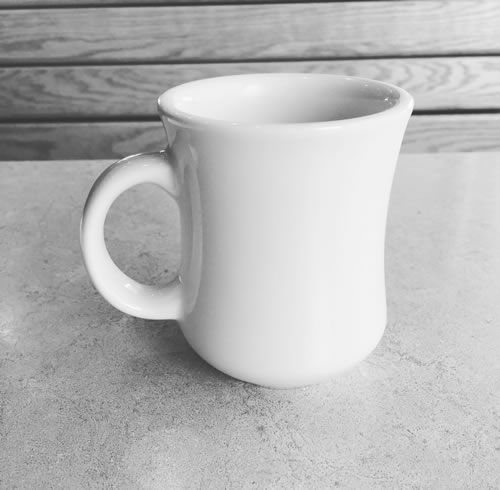
- Convert the Shape Layer to a Smart Object by right-clicking or control-clicking on the layer and select Convert to Smart Object.
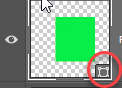
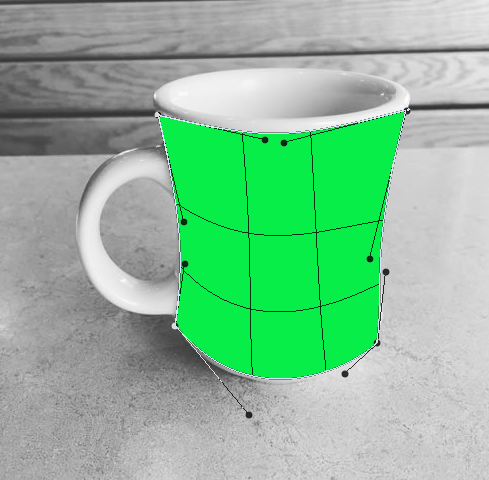
NOTE: Notice the highlighted Smart Object icon in the lower right corner of the layer's thumbnail. This icon denotes that the layer has been made into a Smart Object and is non-destructive. - Press CMD/CTRL+T, and right-click or control-cllck and select Warp as the transformation option. Move the handles and reshape the lines to match the mockup area. Then, press the ENTER key to commit the transformation.
NOTE: You don't have to be exact because this background will be turned off later.
- Double-cllick the Coffee Mug layer thumbnail to open the Smart Object in its own tab in Photoshop with the same name as the layer but with the .psb extension. (CoffeeMug.psb) PSB stands for Photoshop Big.
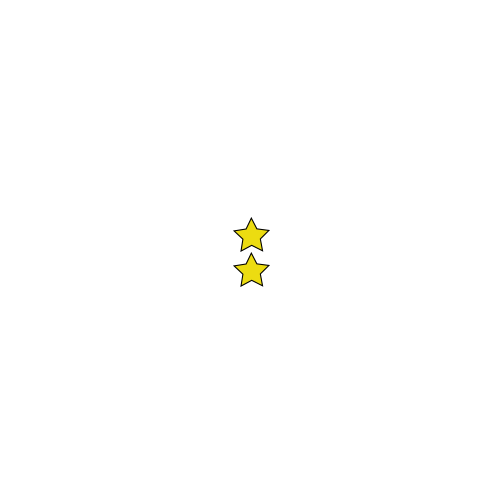
- Zoom in on the image if necessary and then add whatever content you want to the Smart Object. In this case, only text was added. Turn off the Background layer so that the content shows against a transparent background.

- Close and save the Smart Object and return to the original file.

NOTE: You should see that the edits done in the Smart Object get reflected in the original file and that it is in perspective with the mockup area even though there were no perspective in the Smart Object. You will see later how to edit the Smart Object to change the original file without even having to recreate the transformation.
KEY: The Smart Object was created BEFORE the transformation (warping) was made.
You can edit vector data (e.g., from Adobe Illustrator) without losing any quality of the image.
WHY: Normally, a vector would have to be rasterized which would cause it to lose its ability to be resolution independent which means that if you scale it up it will not pixelated.
There are several ways to get Adobe Illustrator file into Photoshop
- Copy vector art from AI and Paste it into Photoshop. In the Save as Paste dialog box that appears, select Smart Object and then click the OK button, scale the Smart Object as needed, and then press the ENTER key to commit the transformation.
NOTE: If you double-click on the Smart Object icon, it will open in AI - Drag-and-drop an AI file into Photoshop.
NOTE: This will AUTOMATICALLY create a Smart Object. - Open a PDF file in Photoshop
- From the File menu;
- File > Place Embedded...
- File > Place Linked...
EXAMPLE OF TRANSFORMATION
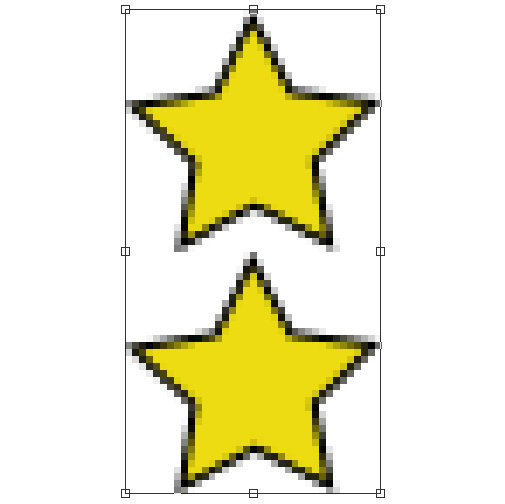
Let's see how the quality of an image is affected if you transform an VECTOR image with and without a Smart Object applied.
- Open a new Photoshop file and select File Placed Embedded..., navigate to an Adobe Illustrator file, and then press the Place button.
- In the Open As Smart Object dialog box, select Fit Page as the Thumbnail size to see the image better, and then click the OK button.
- Move and scale the image to fit half of the canvas size and the press the ENTER key to commit the transformation.

NOTE: This automatically create a vector Smart Object and give the layer that name and a number (Vector Smart Object1) - Press CTRL/CMD+J to duplicate the layer and name it Bitmap.
- Right-click/Control-click on the Bitmap Layer and select Rasterize Layer.
NOTE: Notice the Smart Object Layer disappears to let you know the layer is not longer a Smart Object but a regular bitmap layer. - With the Move Tool move the Bitmap version below the vector version.

- Hold down the SHIFT key and select both the Vector Smart Object Layer and the Bitmap Layer so that you can perform the next step on both layers simultaneously.
- Press CMD/CTRL+T, hold down the ALT key to transform the selection from the center, scale it to a small size, and then press the ENTER/RETURN key to commit the TRANSFORMATION.
- Press CMD/CTRL+T again, hold down the ALT key to transform the selection from the center, scale it back to the original size or close to it.
NOTE: Notice that the transformation process does not take effect (both images are pixelated) until transformation is complete which will be done in the next step.
- Press the ENTER/RETURN key to commit the TRANSFORMATION.

NOTE: Notice that once the images are scaled back to their original size, the Bitmap layer image without a Smart Object is blurry. This is because when the the image was scaled down, pixels were "thrown away" to make the image smaller. However, once the image was scaled back Photoshop could not recreate the same pixel quality again. However, the Vector Smart Object layer was restored to its original glory because Photoshop reference image data from the original file to recreate the image without any distortion. Hence, the power of Smart Object. - Repeat steps -
 four or more times.
NOTE: Notice that each time the transformation was performed, Photoshop "throws out" more pixels to make the image smaller for the Original layer so it get even more pixelated. However, the Smart Object layer look the same regardless of the number of times the image is scaled. This technique also applies to all other types of transformations (e.g., rotate, skew, distort, perspective, or warp) but is the obvious with the scaling transformation.

You can edit filters (e.g., Blur, Motion) applied to a Smart Object. You can also edit any adjustment type you applied to an image using Image > Adjustments > [Adjustment Type].
NOTE: The Adjustment menu options is not to be confused with the Adjustment Layer option at the bottom of the Layers panel which already create non-destructive edits.
WHY: Normally, you would destroy a layer ability to be edited if you apply a filter without first converting it to a Smart Object.
Once a filter is created, you can:
- show/hide filters
- adjust filters settings
- modify filters mask
- stack multiple filters
NOTE: Filters allow you to eliminate the need for a lot of layers. Also, when a Smart Object is transformed that has a Smart Filter applied to it, Photoshop will turn off the effect until the transformation is completed.
EXAMPLE OF ADJUSTMENT FILTER TRANSFORMATION
Let's see how the quality of an image is affected if you transform an image with and without a Smart Object applied.
- Open an image and duplicate the Background layer twice (press CTRL+J twice) and name the first layer Smart Object and the second layer Original. Turn off the Background layer and then right-click or control-click on the Smart Object layer and select Convert to Smart Object from the menu.
- Select Image > Canvas Size (ALT+CTRL+C) and change the unit to Percent and the value to 200 for the width, and then click the OK button to double the canvas width.
- With the Smart Object layer selected, hold the SHIFT key and use the Move Tool to move the image to the left of the canvas to cover the first half of the canvas.
- While holding down the SHIFT key, use the Move Tool again and move the Original layer to the right side of the the canvas.
- Select the Smart Object Layer and then select Filter > Convert for Smart Filters.
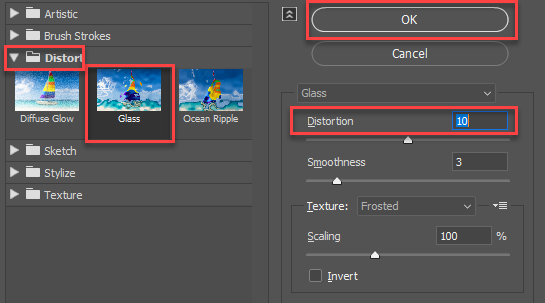
NOTE: You could have also right-click the Smart Object layer and select Convert to Smart Object. - With the Smart Object Layer still selected, select Filter > Filter Gallery... >. In the dialog box that appears, open the Distort folder, select the Glass filter, set the Distortion to 10, and then click the OK button.
- Now, select the Original layer and apply the same setting to it.

NOTE: Notice that both the Smart Object Layer and the Original Layer is blurry. However, because the Original layer did not have a Smart Object applied to it, if you save this file, there would be no way to restore the image back to its original state. However, the Smart Object Layer gives you the flexibility to:
1. Change the filter effect amount
2. Modify the Filter Mask for the effect
3. Delete the effect altogether
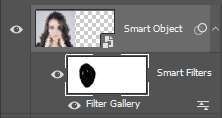
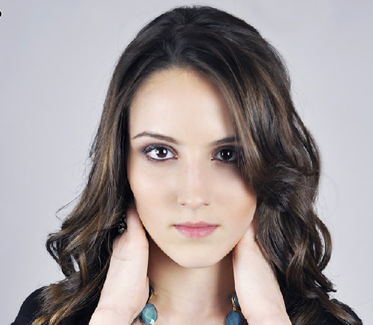
4. Stack other non-destructive effects to it - Select the White Smart Filter thumbnail, select the Brush Tool, set the Brush size to a large brush and with the the Foreground set to Black paint on the image to bring in just the model's face.
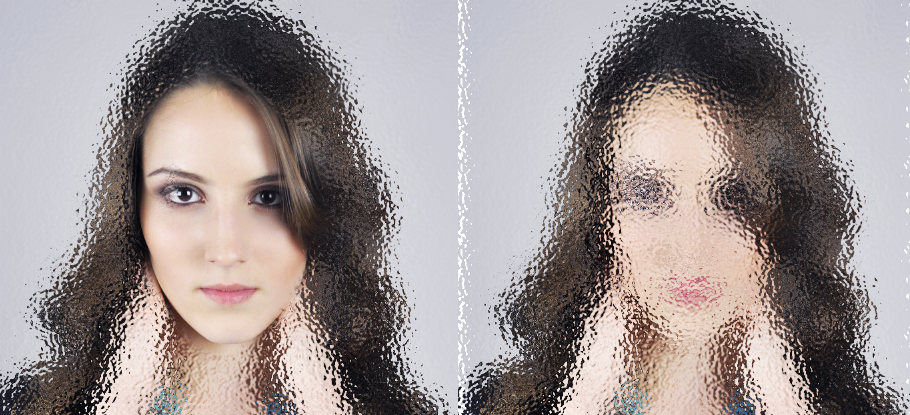
ANALOGY: It is helpful to think of the Glass filter with the Smart Object as a clear shower glass that has been made foggy by the hot shower steam and as such a person can use a hand to remove the steam vapors. However, it is helpful to think of the Glass filter without the Smart Object as a frosty shower glass that cannot be made clear because the frost effect has been permenantly etched into the glass.
NOTE: Notice that painting with black reveals more of the EFFECT. Remember:
1. black conceals (hide) the EFFECT so the image is shown clear, and
2. white reveals (show) the EFFECT so the image is blurry there.
- Double-click the Glass Effect name under the Smart Layer thumbnail and change the Distortion setting to 0.
NOTE: Notice how the image is restored to its original glory. - Delete the Smart Filter Mask and the Filter Gallery effect by dragging both of them to the trash can icon at the bottom of the Layers panel.
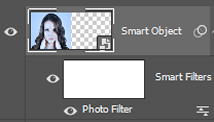
- Select Image > Adjustment > Photo Effect, choose Cooling Filter(82), and then click OK.
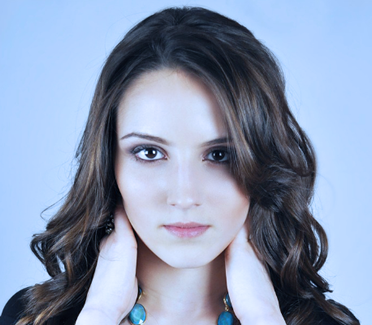
Notice also like a filter, Image adjustment create a white Smart Filter as well.
- Select the white Smart Filter thumbnail, select the Brush Tool, set the Brush size to a medium brush and with the the Foreground set to Black paint on the image to bring in just the model's face, neck and hand to remove the blue tint created by the Photo Filter. Remember:
1. black conceals (hide) the effect so the image is shown clear, and
2. white reveals (show) the effect so the image is blurry there.
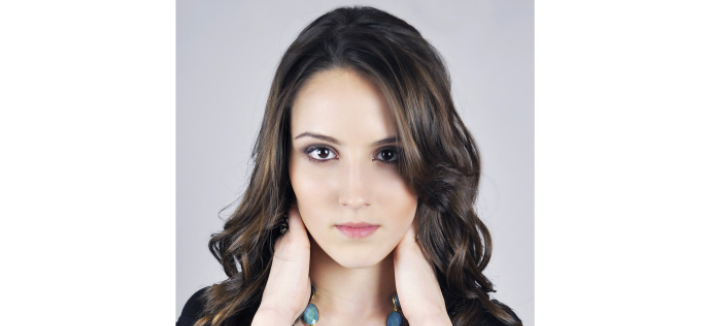
Original Image:
Original Image with Filter and Modified Mask:
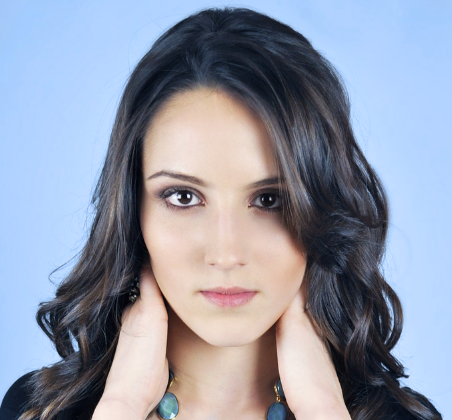
NOTE: Notice that painting with black reveals more of the ADJUSTMENT. Remember again:
1. black conceals (hide) the ADJUSTMENT so the image is shown clear, and
2. white reveals (show) the ADJUSTMENT so the image is black and white there.
When you edit a Smart Object, the source content is opened in either Photoshop (if the content is raster data or a camera raw file) or the application that handles the placed format by default (e.g., Adobe Illustrator or Adobe Acrobat). When you save changes to the source content, the edits appear in all linked instances of the Smart Object in the Photoshop document or in the embedded Smart Object.
- Select the Smart Object from the Layers panel, and do one of the following:
- Double-click the Smart Object thumbnail in the Layers panel. (PREFERRED METHOD)
- Choose Layer > Smart Objects > Edit Contents
- In the Layers panel, right-click or control-click and select Edit Contents
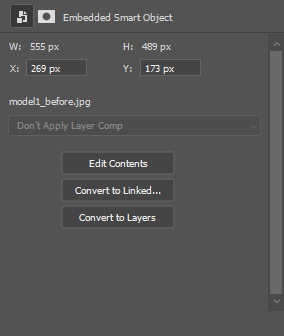
- In the Properties panel, click Edit Contents
- Make edits to the source content file, then choose File > Save to save the Smart Object.
- Return to the original document to see changes made to the Smart Object reflected in the original document. If changes are not seen, make the Photoshop document containing the Smart Object active.
NOTE: If you don't like the changes, select Edit > Undo Update Smart Objects (CTRL+Z) to revert back to the original image.
EXAMPLE: Update Billboard
- Open a file that you have already converted to a Smart Object. In our case, we re-open the Billboard.psd file.
- Double-click the Billboard layer thumbnail to open its Smart Object.
- Make whatever change you want to the *.psb file. In this case, add Photo Filter Adjustment layer.
- Save and close the Smart Object (*.psb). You should see changes reflected in the main document.

There are two ways to COPY a Smart Object. Which option you select will determine how the duplicated Smart Object behaves. In the Layers panel, select a Smart Object layer, and do one of the following:
To create a duplicate Smart Object that is linked to the original:
- Choose Layer > New > New Layer Via Copy, or
- Drag the Smart Object layer to the Create A New Layer icon at the bottom of the Layers panel.
NOTE: This technique makes an IDENTICAL copy and shares content with the original. Edits made to the original affect the copy and vice versa.
To create a duplicate Smart Object that isn’t linked to the original:
- Choose Layer > Smart Objects > New Smart Object Via Copy
NOTE: This technique creates a new Smart Object that is separate from the original. Edits made to the original don’t affect the copy.
A new Smart Object appears in the Layers panel with the same name as the original and “copy” as a suffix.
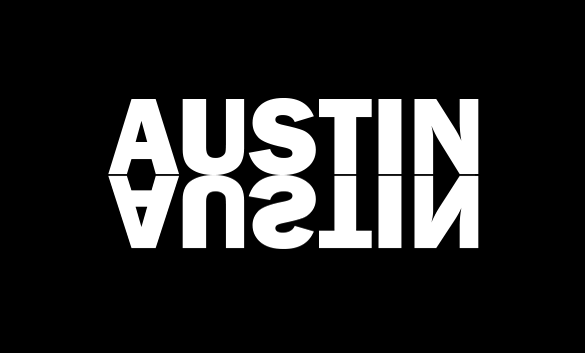
EXAMPLE 1: Reflection
- Create a new file with a black background and type some large bold white text.

- Right-click or control-click and select Convert to Smart Object.
- Press CTRL+J to duplicate the Smart Object text layer.
- Select either of the text layer and then, press CTRL/CMD+T and then hold down the SHIFT key and move the top handle to create a "mirror" image of the text layer and then press the ENTER/RETURN key to commit the transformation.
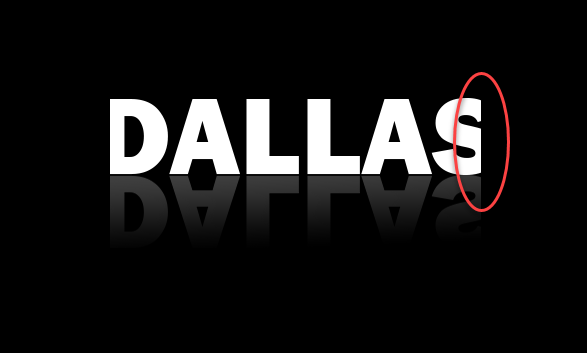
- Create a layer mask of the reflection layer and then add a Black and White gradient to the mask.
CAUTION: Do not use a selection of the text (e.g., control/cmd+click on layer's thumbnail) when defining the gradient mask for the Smart Object. Otherwise, it will limit the gradient mask effect to only the text that was typed. - Adjust the opacity as necessary to create a realistic reflection.

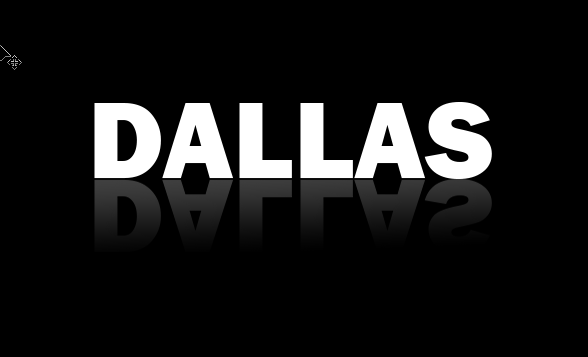
- Double-click on EITHER one of the text layer Smart Object layer and type a new word or phrase into the Smart Object source content.
- Save and close the Smart Object. The original layer should show the changes that were made. However, it this case, the content is larger that the original content so it is truncated. This will be resolved in the next step.
- Double-click on either of the Smart Object layer again and press the C key to invoke the Crop Tool and adjust the size of the canvas to accommodate the amount of the new text OR select Image > Reveal All.

- Save and close the Smart Object AGAIN. The original layer should show the changes that were made to accommodate the updated canvas size.
TIP: If Smart Object update is too small or too large, resize the canvas in the Smart Object using the Crop (C) Tool.
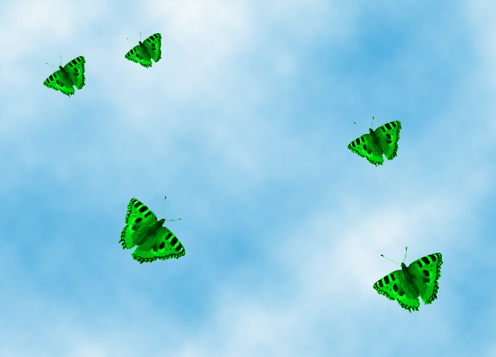
EXAMPLE 2: Unique Instance
- Open an image that you would like to create multiple instances of. Include a background layer if necessary.
- Scale the image if necessary and then convert it into a Smart Object.

- Press CTRL/CMD+J several times to create duplicate copies of the original Smart Object and then resize, rotate and reposition them as needed.
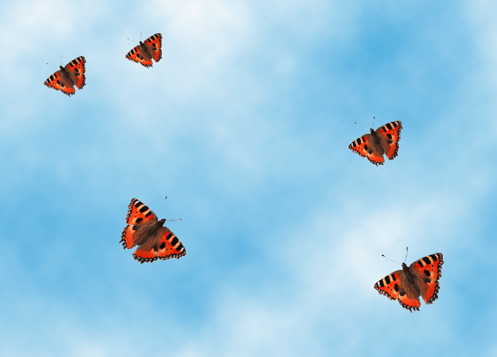
- Double-click on any one of the Smart Object layer and then add an adjustment layer and change it color to whatever you like.
- Save and close the Smart Object to see the change reflected in ALL INSTANCES on the canvas.
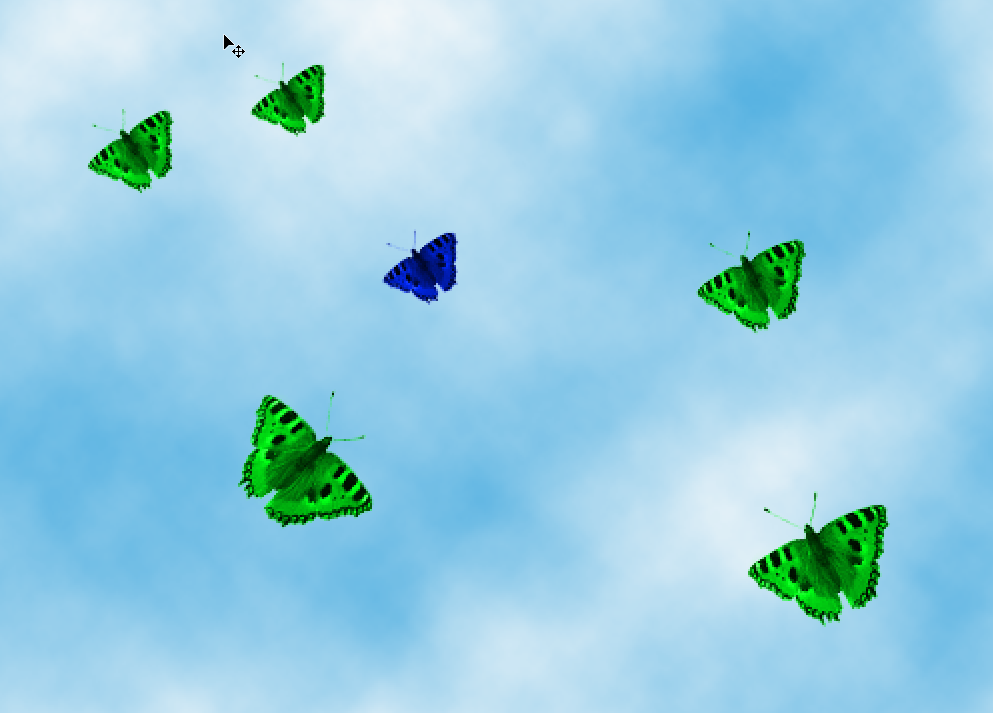
- Click the top layer and then select New Smart Object via Copy.
- Move, rotate and position the newly create layer and then double-click on it to update the Smart Object content and then change the adjustment setting to another color.
- Save the Smart Object to see the update adjustment changed only affect that Smart Object and not all of the other instances because the New Smart Object via Copy was selected instead of Convert to Smart Object.
Not only can you TRANSFORM an image with a Smart Object, you can REPLACE the content of a Smart Object which allows a user to experiment with:
- changing out content with other content
- using various low-resolution design as placeholder images than replace them later with final versions.
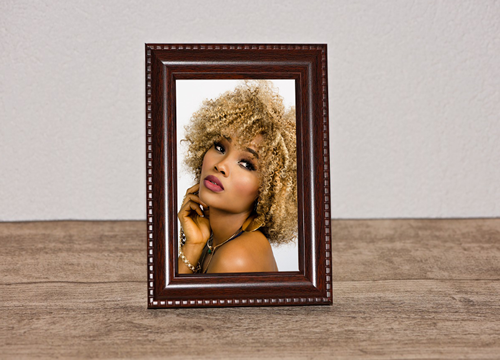
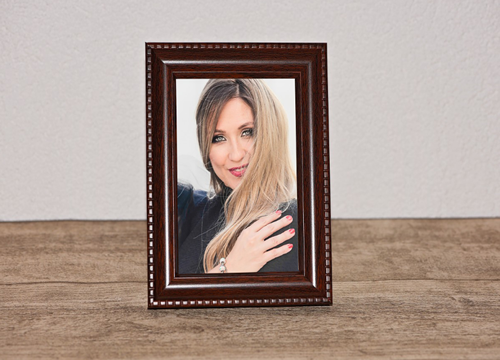
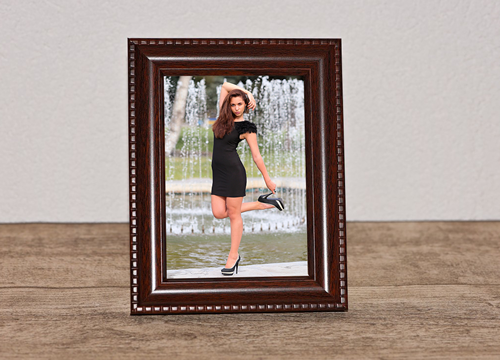
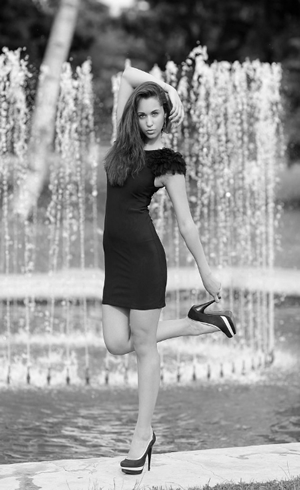
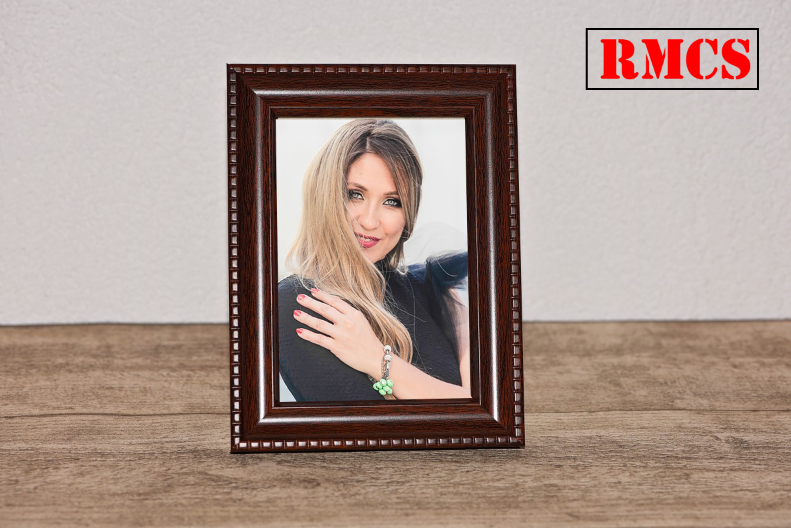
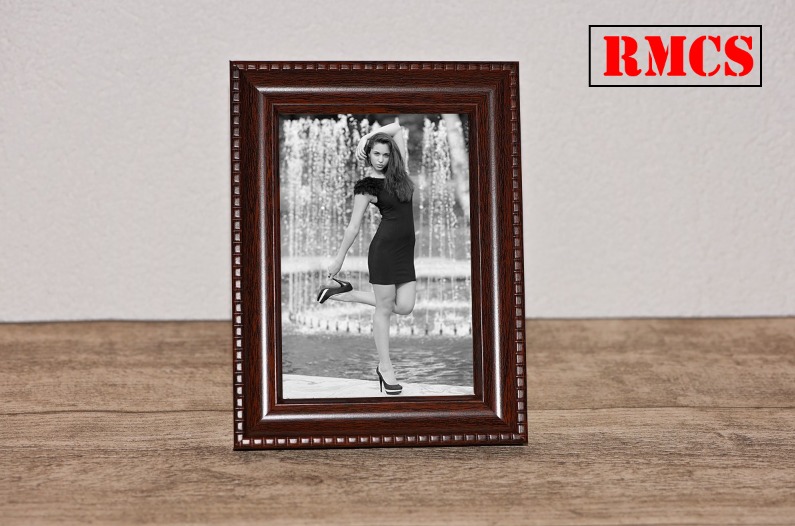
EXAMPLE: Portrait
- Create or open an image that you would like to use as a template for the portrait.
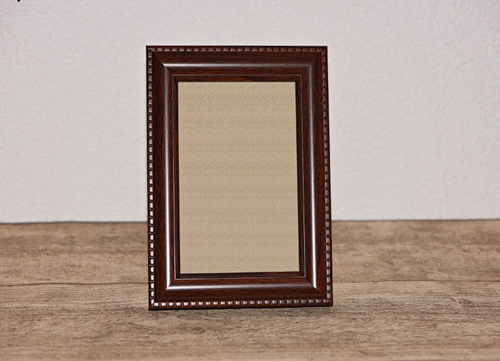
- Zoom in first if necessary and then use any selection tool that is appropriate to make a selection of the area of the frame that you what to create a layer mask for. In this case, the Quick Selection Tool was used to make the selection..
- Press CTRL/CMD+J to create a layer from the current selection. You can also fill the selection with a different color. Name the layer Template.
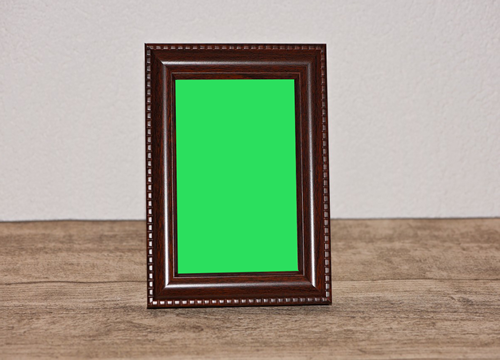
- On the Template layer, right-clicking or control-clicking and selecting Convert To Smart Object.
- CTRL/CMD+click to get a selection of the Template layer and then click the Add Layer mask icon at the bottom of the Layers panel.
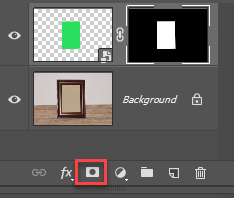
CAUTION: It is important to note that the Layer Mask was created AFTER the Smart Object was create so that the two would be separate. If the Smart Object was create AFTER the layer mask was added, it would be part of the Smart Object. Keeping them separate will allow them image to be transformed or moved independent of the Smart Object. - Select the image thumbnail (highlighted with red box), click the link icon to remove it from between the image thumbnail and the layer mask.
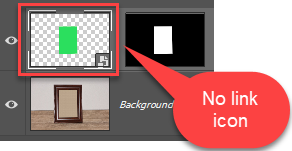
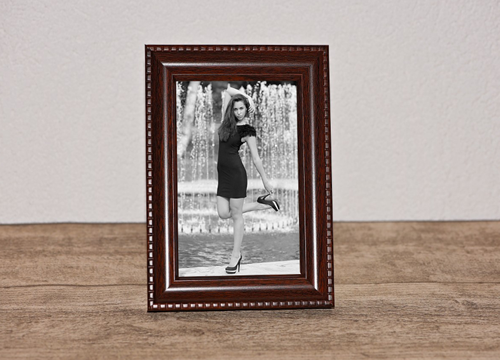
NOTE: This will allow the image that will be used in the next step to transformed and moved independence of the mask. - Right-click or control-click on the layer (not thumbnail) and select Replace Contents... and then navigate to the image you want to use.
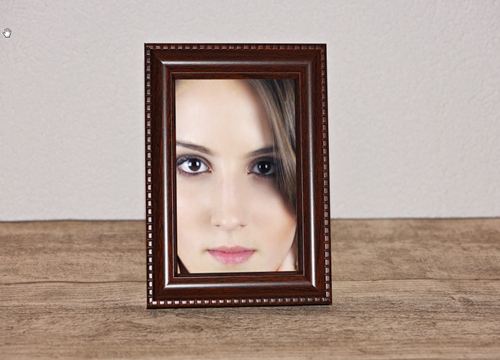
- If the image is too small or too large, press CTRL/CMD+T to invoke the Transformation tool. Press CTRL/CMD+0, if necessary to see the Transformation handles. Scale the image to fit the frame.
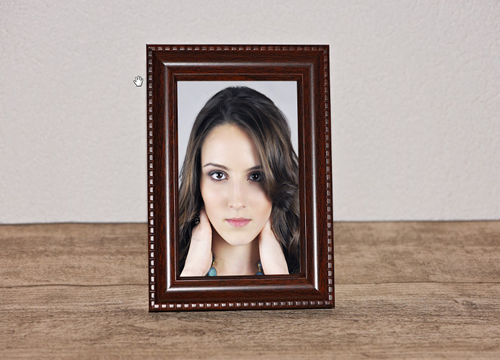
- Repeat the two previous steps but with different images.
NOTE: If the replaced content is larger or smaller than the original content, use the Move and Transformation Tools to make it fix correctly. It is important to note that:
- When you EDIT content, you have to double-click to OPEN a Smart Object file to EDIT its content.
- When you REPLACE content, you don't double-click but RIGHT-CLICK or CONTROL-CLICK and select Replace Contents to REPLACE its content.
What can a Smart Object NOT do? (REVIEW LATER FOR ACCURACY)
You can’t perform any pixel-based (e.g., painting, dodging, burning, or cloning) DIRECTLY on a Smart Object unless it is rasterized. For example, if you select the Smart Object click the Paint Tool, and then hover over the object on the canvas, you will see the "cannot do" icon ( ![]() ).
).
NOTE: Non-pixel-based editing is any type of editing that is non-destructive:
- Applying any type of transformation (e.g., scale, rotate, etc.)
- Applying any type of mask (e.g., Layer, Vector, Clipping, etc.)
- Applying any type of effect (e.g., Blur, Motion, Phote, etc.)
To perform operations that alter pixel data, you can edit the content of the Smart Object itself by double-clicking on it and editing the Smart Object content provided the content is not a Smart Object layer itself.
However, it the content of the Smart Object is a bitmap image (e.g., jpg file), you still will not be able to perform pixel-based alteration. That's because a bitmap file like jpg cannot have layers. So, if you drill down into a Smart Object and get to a bitmap format (*.jpg) and then add some pixel altering effect and try to save it, Photoshop will tell you that you need to need to flatten the file.

To avoid having to flatten the layers and make it a destructive process, do the following:
- Click the OK button to dismiss the dialog box above and then save the file as a *.psd and then close it.
- Return to the file that has the Smart Object and then right-click or control-click and select Replace Contents... and select the newly created *.psd file and then click the Place button.
NOTE: This prevent the *.jpg file with the layer from being the SOURCE file. - Now, you can double-click it and edit the Smart Object with jpg and layers and edit it.
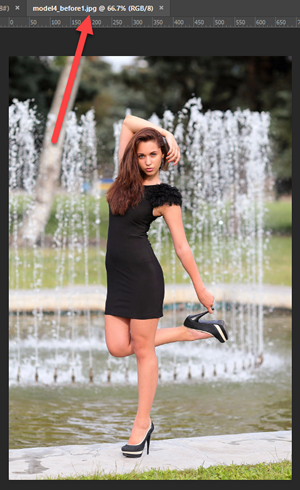
EXAMPLE: UPDATE JPG FILE
- Open a file that has a jpg in its Smart Object. In this case, we will use the picture_frame.psd file that we created earlier.
- Double-click the Smart Object thumbnail and see that it opens a JPG file in the tab at the top of Photoshop:
- Add a Black & White Adjustment Layer.
- Select File > Save. Photoshop displays the following dialog box:
- Click the OK button to dismiss the dialog box above and then save the file as a *.psd and then close it.
- Return to the file that has the Smart Object, right-click or control-click and select Replace Contents... , select the newly created *.psd file and then click the Place button.
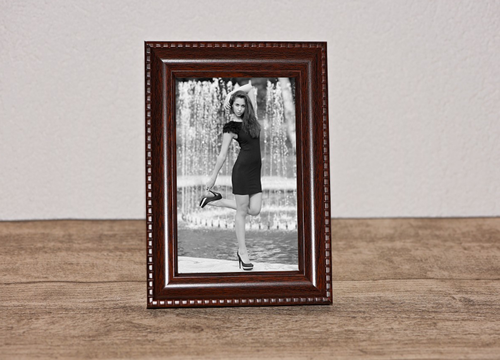
- BONUS: Now that the Smart Object is based on a *.psd file, you can perform any transformation that you want. In this case, we will Flip the image horizontally. Select the Smart Object layer and then select Edit > Transform > Horizontal
There are two ways to implement Smart Objects: Linked and Embedded.
- An Embedded Smart Object as the name implies, “embeds” the image data in the Photoshop file itself.
- A Linked Smart Object content is referenced from external image file. As such, the Smart Object content is updated when the source image get updated. It is useful when the design assets MUST be shared across designs.
Hence, you can use a shared source file across multiple Photoshop files. Hence, you can edit one Smart Object and automatically update all its linked instances. You can also apply a linked or unlinked layer mask to a Smart Object layer.
A Linked Smart Object is NOT the same as a duplicated instance of a Smart Object within a Photoshop file.
NOTES:
- You can also create a Linked Smart Object by dragging and dropping a file while holding down the ALT/OPTION key. To turn off this default, select Preferences > General > Always Create Smart Objects While Placing and turn it off.
- You can convert an Embedded Smart Object to a Linked Smart Object and a Linked Smart Object to an Embedded Smart Object:
- Select the Smart Object Layer
- Open the Properties panel and select either the Embed or Convert to Link...button.
EXAMPLE: Convert To Linked Smart Object
Any embedding Smart Object can be converted to a Linked Smart Object.
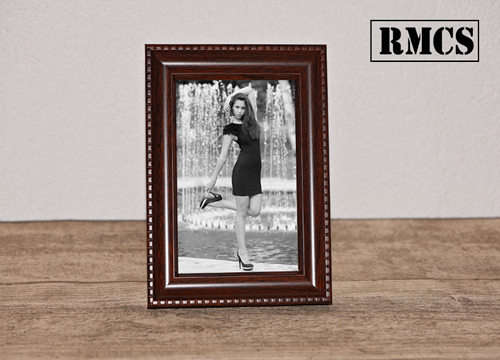
- Open or create a Photoshop document with an embedded Smart Object in it. In this case, the picture_frame.psd file was opened.
- Add a layer with an embedded Smart Object. In this case, a Logo was created and converted to an Embedded Smart Object with a simple Text layer and Rectangle shape that was selected and then converted to an embedded Smart Object.
Text and Shape Layers:
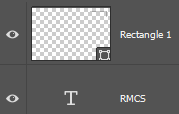
Both layers selected and converted to Smart Object:
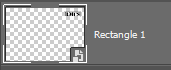
- Right-click/control-click the Smart Object and select Convert to Linked... from the menu and save the *.psb file to a convenient location.
EXAMPLE: Multiple Documents Updated
If two Photoshop files have the same Linked Smart Object, changing any one of them will cause them both to be changed in both files.
- Open or create a file with a linked object. In this case, the previous file was opened.
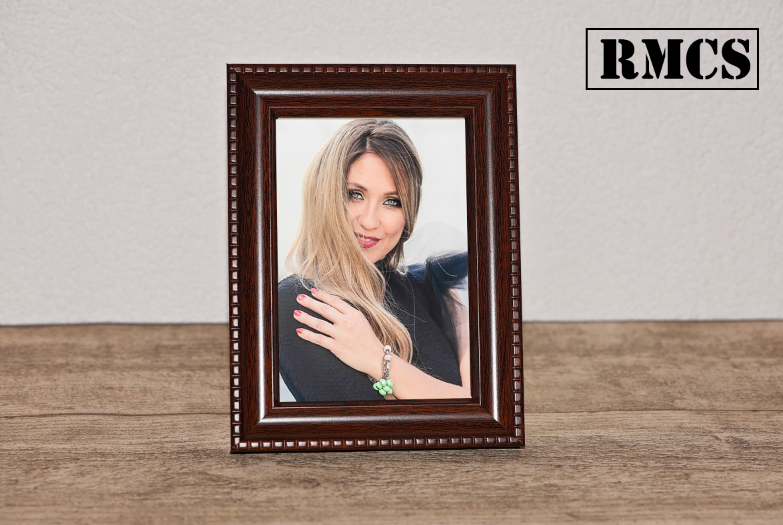
- Open another file with the same Linked Smart Object in it. In this case, we duplicated the previous file then already have a linked Smart Object and Replace the picture with other one and saved it as picture_frame2.psd.
- Right-click/control-click the Smart Object layer and select Replace Contents... and navigate to another image you wish to replace the current image with and then click the Place button. Transform (CTRL/CMD+T) the image to fit the frame and press the ENTER key to commit it.
- Open both files to see that they both have the same Smart Object.
- Double-click either one of the Linked Smart Object and change it to whatever you wish. In this case, the Smart Object was double-clicked, text color changed to red and saved again.
- Switch to the other file to see the the other Linked Smart Object got updated as well.
You should only convert a Smart Object to a regular layer if you no longer need to edit the Smart Object data. Hence, transformation (e.g.,warps) and filters are no longer editable. Converting a Smart Object to a regular layer rasterizes the content at the current size.
- Select the Smart Object that you want to rasterize.
- Right-click/control-click the Layer and select Rasterize Layer or choose Layer > Smart Objects > Rasterize
- Alternatively, you can right-click on the Smart Object layer and select Convert to Regular Layers or press the Convert to Layers in the Properties Panel.
You can export content of an embedded Smart Object in its original format (e.g., jpg, ai, pdf, psd). If the Smart Object was created from layers, it is exported as a *.psb or *.psd file.
EXAMPLE: Export Smart Object Content
- From the Layers panel, select the Smart Object and then choose Layer > Smart Objects > Export Contents. In this case, the image from the picture_frame.psd is used.
- Choose a location for the contents of the Smart Object.
- Click the Save button.
Below is a list of mockup resources from Googles, etc. that you can use to create or get ideas on how to create them:
PSD Freebies
Freebies for Graphic Designers
Blog.SPOON Graphics
25 Free PSD Templates to Mockup Your Print Designs
Free Mockup Tools | Design, Prototype, Experience | adobe.com
Photoshop to prototype all in XD.
Best Free Mockups to Promote Your App | Make a Mockup | Placeit
Create Your Own Mockups in Seconds With Our Customizable Templates. Start Now! Upload Your Design or Use Our Templates. Make Your Mockup in a few Simple Steps! No Design Skills Needed. 50M+ Items Sold. Bring Your Design To Life. Placeit by Envato. Over 7M Customers.
Mockup PSD, +27,000 free PSD files - Freepik
Mockup PSD for free. Download now and use them for personal and commercial use.
All free Mockups | MockupWorld
iPhone, iPad, MacBook, iMac, Apple Watch, Packaging, Billboards & Signs, Fashion & Apparel, Food & Beverages, Magazines & Books. ... A collection of five mockups showing a landscape brochure in various position (the accompanying template is free as well!).
Download Free & Premium Psd Mockups - Graphic Pear
A collection of free & premium photoshop smart object showcase mockups for designers to present their designs; brochures, magazines, books & banners.
Free PSD Mockups Templates - Original Mockups
Free PSD Mockups Templates for: Magazine, Book, Stationery, Apparel, Device, Mobile, Editorial, Packaging, Business Cards, iPad, MacBook, Glassware, Beer, .
mock-up | GraphicBurger
Check out this newly crafted PSD mock-up and use it freely to display your logo ... The free resource of the day is a neat PSD mock-up of a hardcover book with ...
EXAMPLE: A4-Paper-PSD-MockUp-Vol3.zip
Best Free Photoshop Mockups - Blugraphic
Best selection of photoshop smart object mockups that are easy to be customized and used for various presentation purposes.
Mockups – Free Design Resources
Handpicked free mockups to make your presentations stand out. Ranging from print, apparel, packaging, screen, logo, ... Free Polaroid PSD Mockup. Mockups ...
Free PSD Mockups - Freebiesbug
A great place where to find free PSD mockups to better showcase your work.
Premium and Free Mock-Up Templates | Pixeden
Psd mock-up templates to showcase your design directly on the appropriate medium. Each psd mock-up is fully layered with smart object to make the creation of ..
PSD Mockups | Free Template Mockups
Free PSD Mockups Smart Object and Templates to create Magazines, Books, Stationery, Clothing, Mobile, Packaging, Business Cards, Banners, Billboards,