Abode 2020
Photoshop New Features
Cloud documents
Some Adobe Creative Cloud features and services are currently not available on adobe.com in mainland China. As a result, Photoshop on the iPad and cloud documents are not available in this country/region.
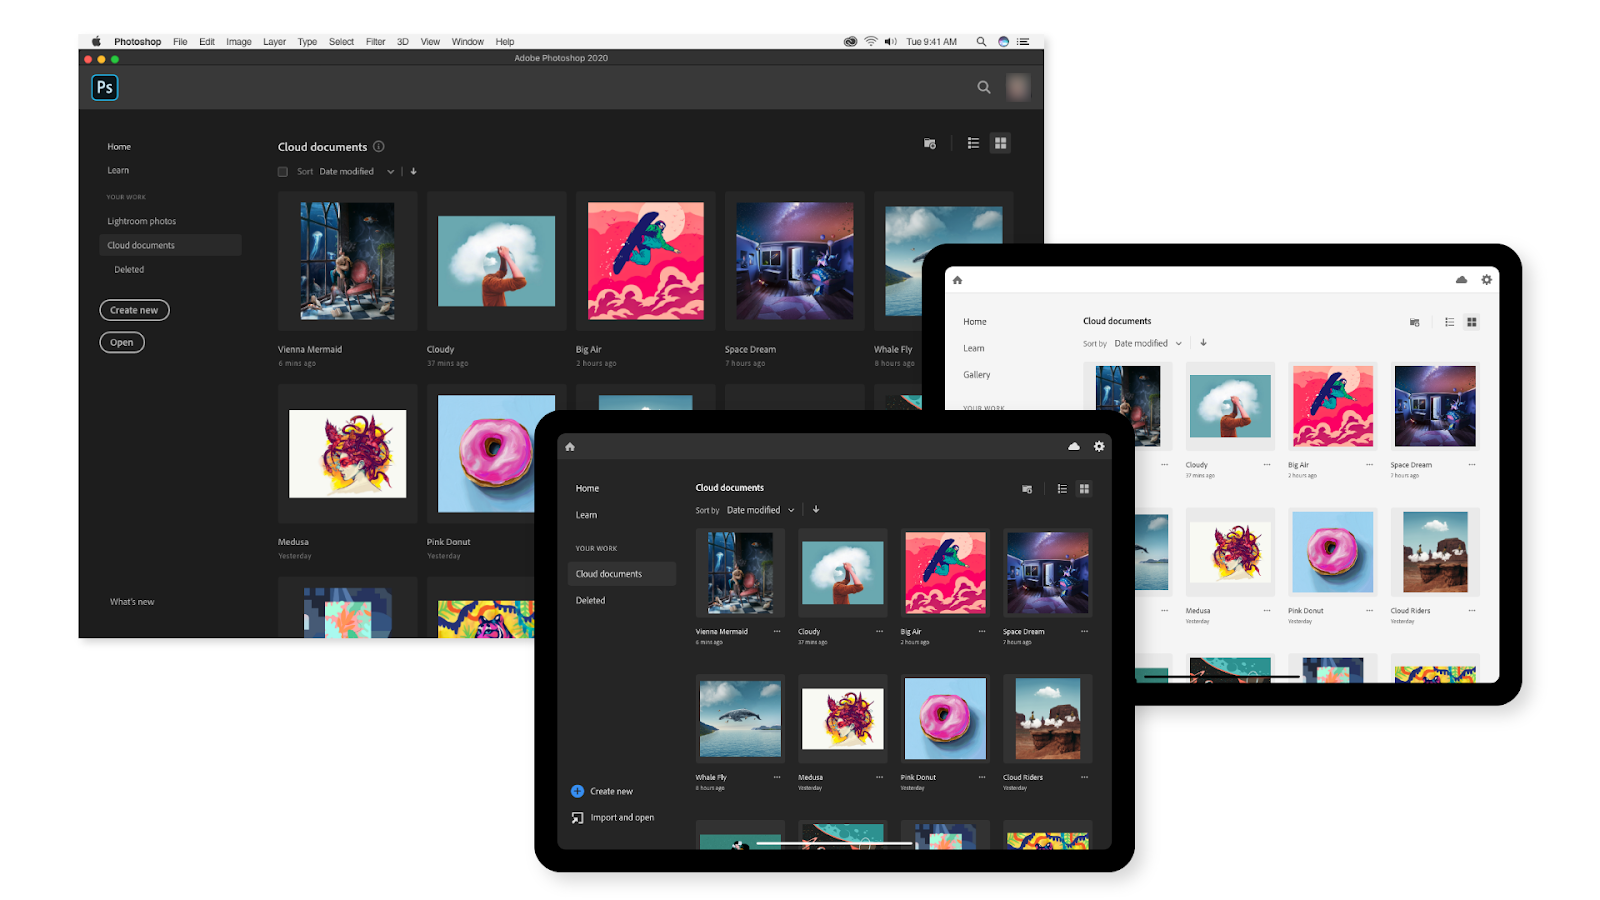
Cloud documents are Adobe's cloud-native files that you can easily open and edit in any of Adobe's compatible apps. Cloud documents enable you to seamlessly access your work across devices. Simply connect to the Internet, open your PSD from the Cloud documents tab in the app home screen and pick where you left off.
Saving your creative work as a cloud document provides you with exclusive benefits:
- Seamlessly access files across devices: Access your work from anywhere—Photoshop on your desktop, on your laptop, Photoshop on the iPad, and Adobe Fresco. Your work is saved safely in the cloud wherever you work.
- Use one file across products: Simply create a cloud document in Photoshop on your desktop and work on it in Adobe Fresco or Photoshop on the iPad. Or vice versa.
- Keep your files up-to-date and safe: Cloud documents automatically save your most recent version. Meaning you can pick up from where you left off across your devices, whether sitting at your desktop or while on the couch.
- Work offline: Your offline version will automatically sync when you reconnect to the Internet. For Photoshop on the desktop, working offline has not changed from previous versions.
Cloud documents, Creative Cloud files, and other synced files are part of the Creative Cloud services included with your membership and count toward your Creative Cloud storage allocation.
To learn more about cloud documents, see:
Improvements to presets
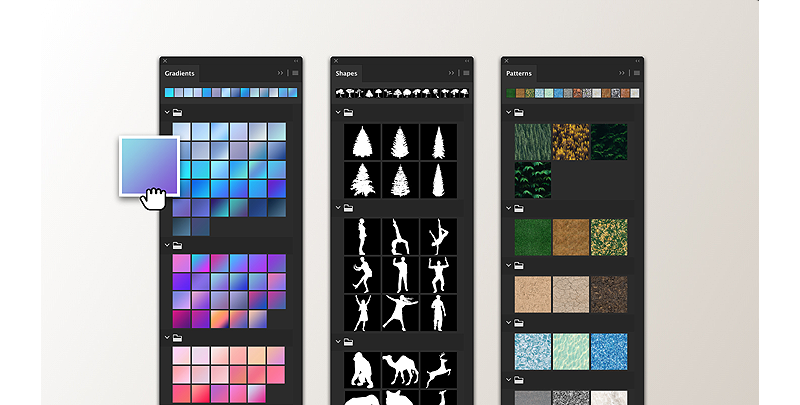
Presets have been reimagined to bring a whole new experience in the latest release of Photoshop.
From the menu bar, go to Window > Swatches, Gradients, Patterns, Shapes, or Styles. You now get:
- New modern default presets like gradients, patterns, shapes and styles.
- Dedicated panels for gradients, patterns, and shapes.
- Ability to manage your presets by organizing them into groups. Simply drag and move the presets to rearrange and reorder within the panels.
- Ability to drag gradients, patterns, swatches, and styles from the presets panel onto the canvas.
- A live preview on the canvas when you click through your presets to try different looks.
You can still access the familiar legacy presets by enabling the Legacy Presets option from the contextual panel menu.
For more information, see the following links:
New Object Selection tool
Powered by Adobe Sensei
Note:
Not seeing the Object Selection tool in your toolbar? See Tools missing from the toolbar.
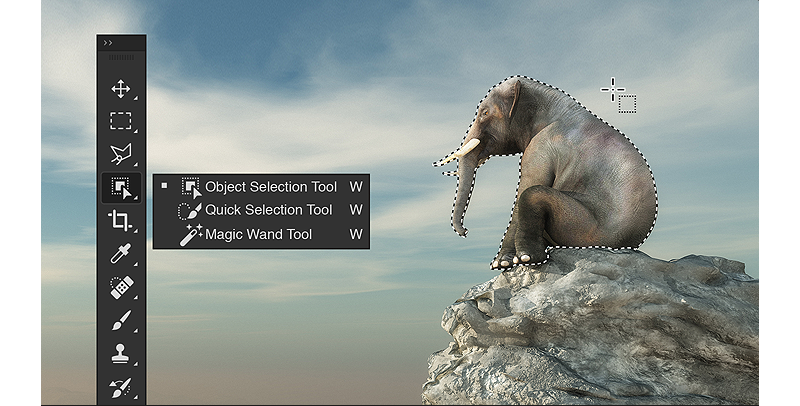
Powered by Adobe Sensei, the new Object Selection tool simplifies the process selecting a single object, multiple objects, or parts of an object in an image—people, cars, furniture, pets, clothes, and more.
Simply draw a rectangular region or lasso around the object and the Object Selection tool will automatically select the object inside the defined region, speeding up even the most complex selections.
You can access the Object Selection tool at the following locations:
- From the main application Tools panel in Photoshop, located in the same group as the Quick Selection and Magic Wand tool.
- From the Tools panel in the Select And Mask workspace.
For detailed information, see Object Selection tool.
Consistent transform behavior
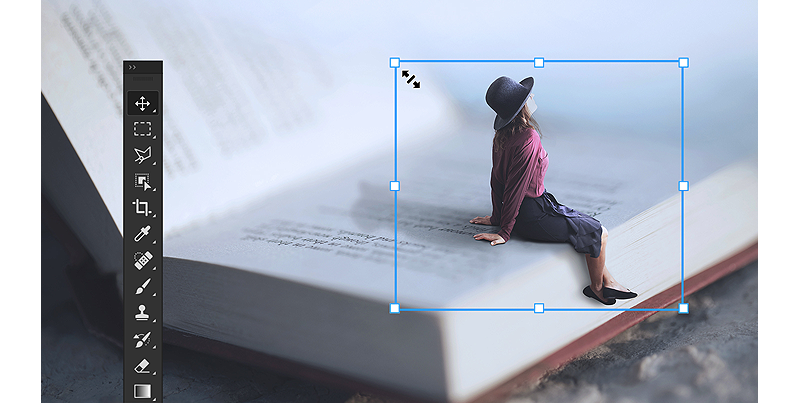
Regardless of the layer type, you can now proportionally transform multiple layers without having to press the Shift key.
In this release of Photoshop, the following changes and improvements have been made to the transform behavior:
- The default transform behavior is now proportional scaling for all layer types and objects, indicated by the Maintain Aspect Ratio button (Link icon) in the ON state in the Options bar.
- To change the default transform behavior to non-proportional scaling, simply click the Maintain Aspect Ratio button to turn it OFF.
- The Shift key, while pressed, now acts as a toggle for the Maintain Aspect Ratio button. If the Maintain Aspect Ratio button is ON, the Shift key toggles it OFF while pressed and vice versa.
- Photoshop now remembers your last transform behavior setting—proportional or non-proportional scaling—it will be your default transform behavior when you start Photoshop the next time.
Want to switch back to the legacy transform behavior?
From the menu bar, choose Edit (Win)/Photoshop (Mac) > Preferences > General, then select Legacy Free Transform.
For related helpful information, see the following links:
Improved Properties panel
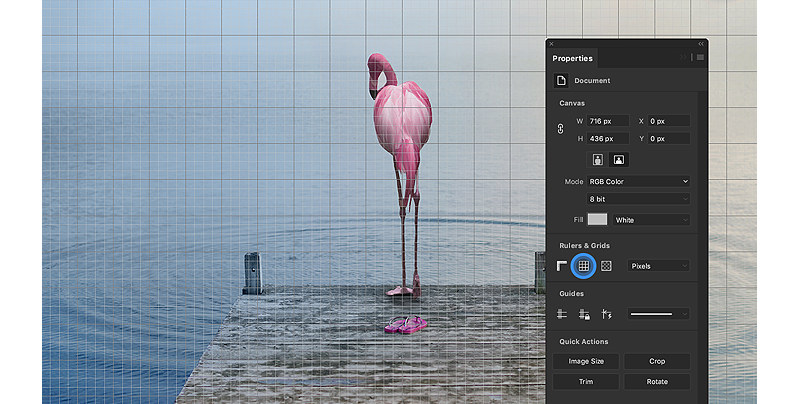
In the Properties panel, you easily discover even more controls for Document, Pixel Layer, and Type Layer properties without navigating through multiple panels and dialogs. The properties are shown contextually for the selected content. New Quick Actions will also accelerate your common tasks. For example, in a single click, you can now remove the background, select a subject while in the pixel layer properties panel, or quickly convert text layers into a frame or shape.
| Properties panel | More properties added under | Quick Actions added |
| Document properties |
|
|
| Pixel Layer properties |
|
|
| Type Layer properties |
|
|
Convert Smart Object to layers
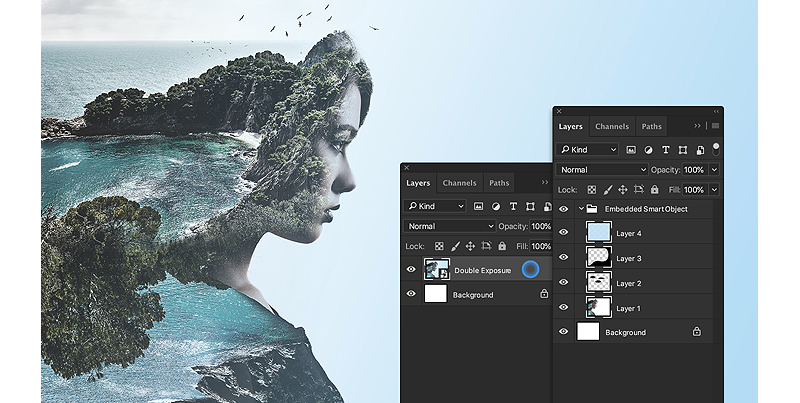
In this release of Photoshop, you can easily convert a Smart Object back into its component layers without all of the extra steps.
Simply select the Smart Object in the Layers panel, then do any of the following:
- Right-click/Control-click the Smart Object, then choose Convert To Layers from the context menu.
- From the menu bar, choose Layers > Smart Objects > Convert To Layers.
For more information, see Convert an embedded or linked Smart Object to layers.
Enhanced Transform Warp

With enhancements made to the Warp tool, you get more control over creative warping in Photoshop. Simply add control points anywhere or divide your image with a customizable grid, then transform by individual nodes or a larger selection. With the Warp tool, you can now:
- Choose new preset grid size options: 3 x 3, 4 x 4, 5 x 5.
- Create your own custom-sized grids.
- Add your own gridlines and anchor points.
- Delete gridlines.
- Select and drag multiple anchor points.
- Undo individual steps of editing a warp.
To try it out, choose Edit > Transform > Warp.
For detailed information see, Warp images, shapes, and paths.