Typically, if you are connecting to a database that is already populated with data, you could create the Master/Detail template pages FIRST. However, since you created a database from scratch, you had to add employee records to the database using the Add Employee (e.g., add_employee.php) page.
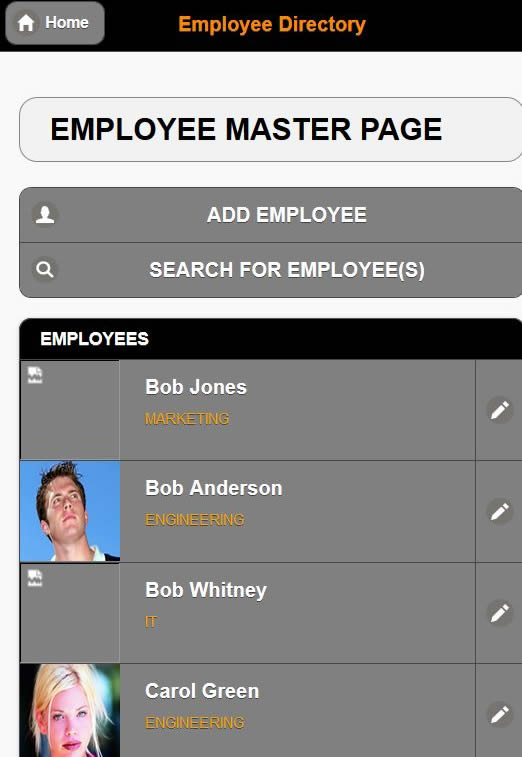
The Employee Master Page (index.php) is used to show a SMALL AMOUNT of information from the database about EACH record. The Employee Detail Page is used to show a LARGE AMOUNT of information from the database about the SELECTED record from the Employee Master Page. Retrieving information from a database is done with the SQL SELECT statement. This statement as the name implies will "select" data from a database based on the criteria it is given and usually returns a set of records which could include only one record in the set.
The Employee Master page will be used to pass a unique ID to the other pages (e.g., Employee Detail, Update Employee and Delete Employee) that we will be editing later to perform the corresponding operations (view, update, and delete, respectively).
The code that will be created will perform the following tasks:
- PART A: CREATE STATIC CONTENT
- Create Static Button
- Create Static Listview
- PART B: ADD DYNAMIC SCRIPTS
- Add SQL SELECT Recordset Script
- PART C: REPLACE STATIC CONTENT WITH DYNAMIC CONTENT
- Make Query String And Tooltip Dynamic
- Make Department Name Dynamic
- Make Image Reference Dynamic
- OPTION 1: Display Total Records
- OPTION 2: Add A Dynamic Time And Date
- OPTION 3: Provide An Avatar
- OPTION 4: Create a Pagination Scheme
- OPTION 5: Display Message If No Record Is Found
You will be creating two pages as part of the Master/Detail page set.
PART A: CREATE STATIC CONTENT
There are two static components that will be created:
- Button
- Listview
Create Static Button
The ADD EMPLOYEE button will be created at the top of this page to go to the ADD EMPLOYEE PAGE that was created earlier.
- Open the index.php page that you created earlier in the SSI section.
- Wrap two anchor tags (e.g.,
<a>
) below the
<h2>
tag in a
<div>
tag with a data-role="controlgroup":
WHY: To convert the two <a> tags to a button group using jQueryMobile.
<h2 class="ui-body ui-body-a ui-corner-all>EMPLOYEE MASTER PAGE</h2> <!-- Button Group -->
<div data-role = "controlgroup"> <a data-role = "button" href = "add_employee.php" data-inline = "true" class = "ui-btn ui-corner-all ui-icon-user ui-btn-icon-left">ADD EMPLOYEE</a>
<a data-role = "button" href="employee_search.php" data-inline = "true" class = "ui-btn ui-corner-all ui-icon-search ui-btn-icon-left">SEARCH FOR EMPLOYEE(S)</a> </div> - CHECKPOINT: Save file and test it by clicking on the ADD EMPLOYEE button. You should be taken to the ADD EMPLOYEE page. This page is where you can add a new employee if you like. Then, click on the SEARCH FOR EMPLOYEE(S) button. You should be taken to this SEARCH FOR EMPLOYEE page, but it has not yet been completed.
Create Static Listview
A jQuery Listview will be created from a simple bullet list to show list of employees.
- Write (or copy) the following unordered bullet list with four jQueryMobile data attributes below the closing </div> tag that is wrapped around the buttons:
WHY: To create a jQuery listview that is styled completed different from a regular bullet list.
<!-- Button Group --> <div data-role="controlgroup"> <a data-role='button' data-inline='true' href='add_employee.php'class='ui-icon-user>ADD EMPLOYEE</a> <a data-role='button' data-inline='true' href='employee_search.php'class='ui-icon-search>SEARCH FOR EMPLOYEE(S)</a> </div> <!-- Listview --> <ul data-role = 'listview' data-inset = 'true' data-split-icon = 'edit'> <li data-role = 'list-divider'>EMPLOYEES</li> <li>
...
</li> <li data-role = 'list-divider'> </li> </ul>
CODE EXPLANATION:
- The data-role = 'listview' is a jQueryMobile data attribute that makes the unordered list behave like a listview.
- The data-inset = 'true' is a jQueryMobile data attribute that indents the listview on both sides.
- The data-role = 'list-divider' creates a "divider" between list items that is not clickable.
- The data-split-icon = 'edit' will create an edit icon later when another anchor tab is added.
- Instead of a listview, you could have just as easily used a table with the following code:
<table>
<tr><td> ... </td></tr>
</table>
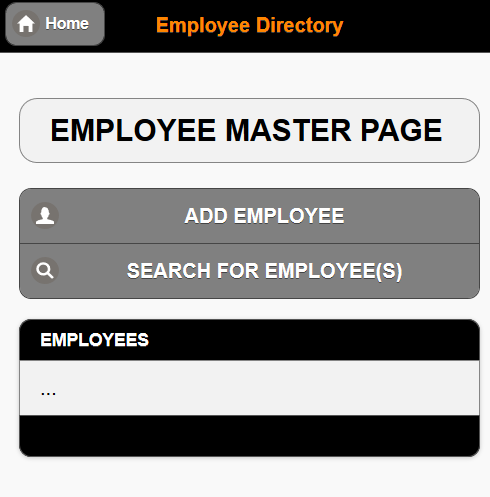
- CHECKPOINT: Save the file and preview it in a browser. You should see the jQuery Listview that was created from the bullet list.
- Add the following
<a>
tags and
<img>
tag within the middle
<li>
tag. Code has been intentionally indented to see the structure (nested tags) better. TIP: Code replaces the three ellipses (...).
WHY: The STATIC TEXT AND IMAGE PLACEHOLDERS are used so that it would be easier to "see"' where to place the DYNAMIC CODE later.
<!-- Button Group --> <div data-role = "controlgroup"> <a data-role = 'button' data-inline = 'true' href = 'add_employee.php'class = 'ui-icon-user>ADD EMPLOYEE</a> <a data-role = 'button' data-inline = 'true' href = 'employee_search.php'class='ui-icon-search>SEARCH FOR EMPLOYEE(S)</a> </div> <!-- Listview --> <ul data-role = 'listview' data-inset = 'true' data-split-icon = 'edit'> <li data-role = 'list-divider'>EMPLOYEES</li> <li> <a href = 'employee_detail.php?recordID=1'>DYNAMIC FULL NAME GOES HERE 1
<img src = 'images/photo_not_available.png' width = '80' height = '80'/>
<p style = 'color:orange; text-transform:uppercase'>DYNAMIC DEPARTMENT NAME GOES HERE</p>
</a>
<a href = 'edit_employee.php?recordID=1'>EDIT DYNAMIC FULL NAME GOES HERE 2</a>
</li> <li data-role = 'list-divider'> </li> </ul>
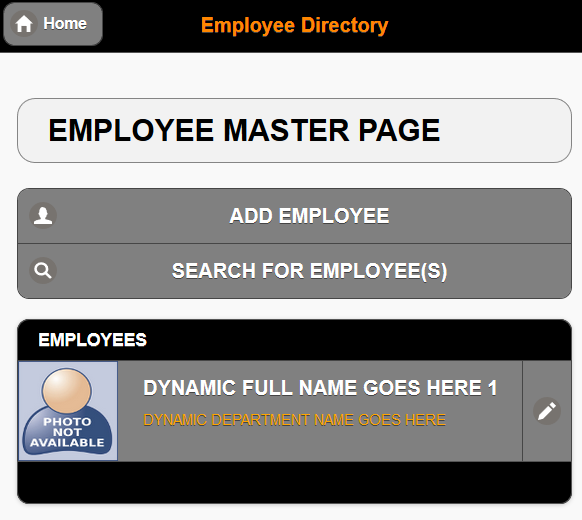
- CHECKPOINT: Save the file and preview it in a browser. You should see the STATIC TEXT AND IMAGE PLACEHOLDERS that will be REPLACED later. Notice also because of the data-split-icon='edit' attribute, you now see a SPLIT list. If you hover over the first part of the list item, the status bar at the bottom of the browser will show you that it will take you to the employee_detail.php page. Whereas, if you hover over the second part of the list it will show you that it will take you to the edit_employee.php page that has not yet been created.
PART B: ADD DYNAMIC SCRIPT
Add A SQL SELECT Recordset
A recordset is needed to retrieve a list of the employees from the database.
- Write (or copy) the following highlighted code below the
<h2>
tag. Comments NOT highlighted because they are optional but are written to explain code. Comments are optional.
WHY: To create a SQL SELECT recordset to populate the LIST for the Employee Master Page.
<h2 class="ui-body ui-body-a ui-corner-all">EMPLOYEE MASTER PAGE</h2>
<!-- SQL SELECT QUERY -->
<?php
// Store reference of SQL statement in a variable
$query_getAllEmployees = "SELECT EmployeeID, CONCAT(FirstName, ' ' , LastName) AS FullName FROM employees ORDER BY FirstName";
// Store a reference of the query in a variable from the SQL variable using the mysql_query method.
$result_getAllEmployees = mysql_query($query_getAllEmployees);
$row_getAllEmployees = mysql_fetch_assoc($result_getAllEmployees);
?>
CODE EXPLANATION:
- While a simpler SQL statement (e.g., "SELECT EmployeeID, FirstName, LastName FROM employees ORDER BY FirstName") could have been used to select the first and last name from the columns in the database, this would require that the first and last names to be concatenated later. Using the "SELECT EmployeeID, CONCAT(FirstName, ' ' , LastName) AS FullName FROM employees ORDER BY FirstName" SQL statement with the CONCAT function allows the first and last name to be concatenated together with a space between them and then given an alias of FullName.
- The EmployeeID is not displayed on the page but will be used later to pass information to another page.
- The ORDER BY clause causes the result to be listed in alphabetically order. If you wanted to order from Z to A you could use: ORDER BY FirstName DESC.(descending). In the code above the order ASC (ascending) is not needed because it is the default option.
- The result of the recordset will be used to populate a jQuery Listview later.
PART C: REPLACE STATIC CONTENT WITH DYNAMIC CONTENT
Make Full Name Dynamic
- Perform two (2) code wraps:
- Wrap the opening and closing list item tags ( <li> ... </li> ) with a PHP code block ( <?php ... ?> ). Comments are optional.
- Wrap a print statement with double quotes around the MIDDLE list item.
WHY: To create a dynamic PHP code block the will be used later to loop through. Lines have been intentionally indented so that you can see the code structure better.
CAUTION: Notice that the print statement using double quotes on both ends. Also, don't forget to include the semicolon at the end of the quote.<!-- Loop through middle list item --> <?php print "<li> <a href = 'employee_detail.php?recordID=1'>DYNAMIC FULL NAME GOES HERE 1
<img src = 'images/photo_not_available.png' width = '80' height = '80'/>
<p style = 'color:orange; text-transform:uppercase'>DYNAMIC DEPARTMENT NAME GOES HERE</p>
</a>
<a href = 'edit_employee.php?recordID=DYNAMIC EMPLOYEE ID GOES HERE'>EDIT DYNAMIC FULL NAME GOES HERE 2</a>
</li>"; ?> <!-- End of middle list item -->
- Replace the static phrase DYNAMIC FULL NAME GOES HERE 1 with its dynamic PHP counterpart ({$row_getAllEmployees['FullName']}) within the first
<a>
tag:
<?php
print "<li>
 <a href = 'employee_detail.php?recordID=1'>{$row_getAllEmployees['FullName']}
   <img src = 'images/photo_not_available.png' width = '80' height = '80'/>
   <p style = 'color:orange; text-transform:uppercase'>DYNAMIC DEPARTMENT NAME GOES HERE</p>
   </a>
   <a href = 'edit_employee.php?recordID=DYNAMIC EMPLOYEE ID GOES HERE'>EDIT DYNAMIC FULL NAME GOES HERE 2</a>
	  </li>";
?>
CODE EXPLANATION:
- Since the code is already wrapped in a PHP code block (<?php .... ?>), you don't have to use another PHP code block to include nested PHP code. You can use the curly braces instead ({PHP code goes here...}).
- The $row_getAllEmployees['FullName'] will only return ONE record from the FullName column of the database. You will see later how to loop through an array to return ALL of the records from the database.
- It is important to note that the array elements (e.g., FullName, City) are case sensitives.
- CHECKPOINT: Save the file and preview it in a browser. You should see one record returned from the database as a full name (e.g., Ann Ricoh) that represents the first alphabetically item from the query because of the ORDER BY clause. If the ORDER BY clause was not used, the first record of the database would have been returned (e.g., Carol Green). Only one record was displayed from database—this will be resolved shortly.
Notice also that the phrase DYNAMIC DEPARTMENT NAME GOES HERE and the image placeholder will be REPLACED later with their dynamic counterpart.

- Wrap a while loop around the print statement.
WHY: To loop through the array ($row_getAllEmployees['FullName']) that is in the <a> tag to retrieve ALL of the records from the recordset that was created earlier:
<?php
while($row_getAllEmployees=mysql_fetch_array($result_getAllEmployees))
 {
  print "<li>
   <a href = 'employee_detail.php?recordID=1'>{$row_getAllEmployees['FullName']}
     <img src = 'images/photo_not_available.png' width='80' height='80'/>
     <p style = 'color:orange; text-transform:uppercase'>DYNAMIC DEPARTMENT NAME GOES HERE</p>
     </a>
   <a href = 'edit_employee.php?recordID=DYNAMIC EMPLOYEE ID GOES HERE'>EDIT DYNAMIC FULL NAME GOES HERE 2</a>
	  </li>";
  }
?>
CODE EXPLANATION:CHECKPOINT: Save the file and preview it in a browser. You should see the jQuery listview displays ALL of the records from the database in alphabetically order by first name. You should also see the phrase "DYNAMIC DEPARTMENT NAME GOES HERE" repeated for EACH list item. That problem will be resolved shortly.
- The while loop is used to iterate through the result's array and print each value of the FullName alias
- The $row_getAllEmployees['FullName'] is the array that the while loop is iterating through.
- The mysql_fetch_array can take one of two arguments. The mysql_assoc will return an associative array; whereas, mysql_num will return a numeric indexed array.

Make Department Name Dynamic
- Replace the static phrase DYNAMIC DEPARTMENT NAME GOES HERE with its dynamic PHP variable counterpart ({$row_getAllEmployees['FullName']}) within the first
<a>
tag:
<?php
while($row_getAllEmployees=mysql_fetch_array($result_getAllEmployees))
 {
  print "<li>
   <a href = 'employee_detail.php?recordID=1'>{$row_getAllEmployees['FullName']}
     <img src = 'images/photo_not_available.png' width = '80' height = '80'/>
     <p style = 'color:orange; text-transform:uppercase'>{$row_getAllEmployees['Department']}</p>
     </a>
   <a href = 'edit_employee.php?recordID=DYNAMIC EMPLOYEE ID GOES HERE'>EDIT DYNAMIC FULL NAME GOES HERE 2</a>
	  </li>";
  }
?>
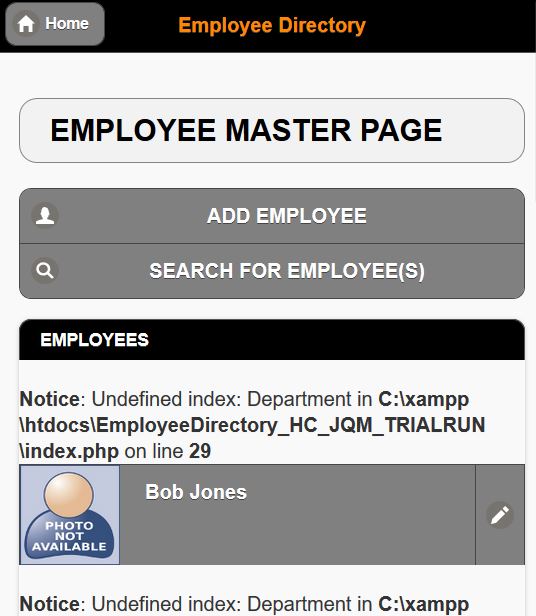
- CHECKPOINT: Save the file and preview it in a browser. You should see that the list displays an error for each list item department name (e.g., NOTICE: UNDEFINED INDEX...) That's because there is NOT a Department column being retrieved from the database even though one exist in the database. This will be corrected in the next step.
- Add Department as a column from the database to the SQL SELECT query. Be sure to include a comma and space in front of the word Department.
$query_getAllEmployees = "SELECT EmployeeID, CONCAT(FirstName, ' ' , LastName) AS FullName, Department FROM employees ORDER BY FirstName";
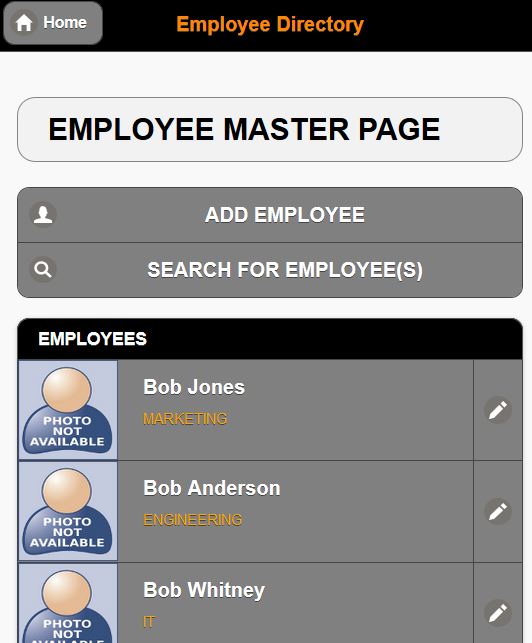
- CHECKPOINT: Save the file and preview it in a browser. You should now see the correct Department for each list item.
Make Image Reference Dynamic
- Replace the hard-wired image name (e.g., photo_not_available.png) with its dynamic PHP counterpart after the forward slash (/) but within the single quote:
<?php
while($row_getAllEmployees = mysql_fetch_array($result_getAllEmployees))
 {
  print "<li>
   <a href = 'employee_detail.php?recordID=1'>{$row_getAllEmployees['FullName']}
     <img src = 'images/{$row_getAllEmployees['Image']}' width = '80' height = '80'/>
     <p style = 'color:orange; text-transform:uppercase'>{$row_getAllEmployees['Department']}</p>
     </a>
   <a href = 'edit_employee.php?recordID=DYNAMIC EMPLOYEE ID GOES HERE'>EDIT DYNAMIC FULL NAME GOES HERE 2</a>
	  </li>";
  }
?>
- Add Image as a column to be retrieved from the database to the SQL SELECT statement. Don't forget to include a comma and space in front of it.
$query_getAllEmployees = "SELECT EmployeeID, CONCAT(FirstName, ' ' , LastName)
AS FullName, Department, Image FROM employees ORDER BY FirstName";
- CHECKPOINT: Save file and preview it in a browser. You should see that the images are displayed from records that have images data in them from the database. Records without image data will either show nothing or a broken image icon depending on the browser.
Make Query Strings and Tooltip Dynamic
-
Replace the static number (1) in recordID = 1 with its dynamic PHP counterpart in BOTH
<a>
tags:
WHY: To set the recordID values dynamically from the recordset. It will be used to pass this value to the employee_detail.php page and the edit_employee.php page as URL variables.
<?php
while($row_getAllEmployees = mysql_fetch_array($result_getAllEmployees))
 {
  print "<li>
   <a href = 'employee_detail.php?recordID={$row_getAllEmployees['EmployeeID']}'>{$row_getAllEmployees['FullName']}
     <img src = 'images/{$row_getAllEmployees['Image']}' width = '80' height = '80'/>
     <p style = 'color:orange; text-transform:uppercase'>{$row_getAllEmployees['Department']}</p>
     </a>
   <a href = 'edit_employee.php?recordID={$row_getAllEmployees['EmployeeID']}'>EDIT DYNAMIC FULL NAME GOES HERE 2</a>
	  </li>";
  }
?>
CODE EXPLANATION:
This statement is called a query string. The first half of the string is STATIC text that represent the start of a query string by using a question mark (?) followed by a CUSTOM PHP variable name (e.g., recordID) with its value set using an equal sign (=) to a DYNAMIC URL variable (e.g., {$row_getAllEmployees['EmployeeID']}) that represents the value of the EmployeeID that was retrieved with the query earlier and that will be passed to another page. - CHECKPOINT: Save the file and test it in a browser by hovering over any link and the edit icon on the right. You should see the URL variable in the status bar at the bottom of the page (e.g., localhost/EmployeeDirectory/employee_detail.php?recordID=1 or localhost/EmployeeDirectory/edit_employee.php?recordID=1).
- Replace the static phrase DYNAMIC FULL NAME GOES HERE 2 with its dynamic PHP counterpart ({$row_getAllEmployees['FullName']}) within the second
<a>
tag:
WHY: To set a tooltip for the employee's full name when the edit link is hovered over (e.g., EDIT <employee_name>).
<?php
while($row_getAllEmployees=mysql_fetch_array($result_getAllEmployees))
 {
  print "<li>
   <a href = 'employee_detail.php?recordID={$row_getAllEmployees['EmployeeID']}'>{$row_getAllEmployees['FullName']}
     <img src = 'images/{$row_getAllEmployees['Image']}' width = '80' height = '80'/>
     <p style = 'color:orange; text-transform:uppercase'>{$row_getAllEmployees['Department']}</p>
     </a>
   <a href = 'edit_employee.php?recordID={$row_getAllEmployees['EmployeeID']}'>EDIT {$row_getAllEmployees['FullName']}</a>
	  </li>";
  }
?>
CODE EXPLANATION:
- The first dynamic variable will pass the SAME EmployeeID to the edit_employee.php page (that will be created later) similar to the previous link that passed the EmployeeID to the employee_detail.php page.
- The second dynamic variable will be used to show the employee's full name as a tooltip on some browsers.
- CHECKPOINT: Save the file and test it in a browser. If you hover over a split link (pencil icon), you may see a tooltip that says "EDIT <employeeName>." depending on the browser. If you click on it, you will get an "Error loading page" because the Edit Employee page has not yet been created.
OPTION 1: Display Total Records
It is common practice to return the total number of records in the database to show the total items in a list, table, etc. See Enhancement tab for details.
OPTION 2: Add A Dynamic Time And Date
Adding a dynamic time and date stamp is a nice feature that you can add to some page. See Enhancement tab for details.
OPTION 3: Provide An Avatar
If there is an image for each record in the database, you would not need to do this enhancement. However, there may be a case where a employee is added to the database but a picture of that person was not available at the time the information was entered. As a result, a broken image icon would be displayed. See Enhancement tab for details.
OPTION 4: Create a Pagination Scheme
If there are a lot of records being returned from the database, you could limit the number of records being returned AND provide a navigation bar to see other pages (e.g., Page 1 of 10). See Enhancement tab for details.
OPTION 5: Display Message If No Record Is Found
While it is highly unlikely that you would have no record in the database, you should still need to account for when the database is empty to show and hide content on a page. It is a common practice to wrap content in an conditional statement that can show or hide content based on the condition. See Enhancement tab for details.