Checking Components
Before creating server-side code and content, it is best practice to ensure that all of the necessary components are working correctly:
- Check Server
- Check Database
- Check PHP
- Turn On Debugging
- Setup Error Reporting
Check Server
- Open the XAMPP control panel (e.g., C:\xampp\xampp-control.exe) and ensure that the Apache and MySQL modules are started. If not, start them by clicking on the Start button for each.
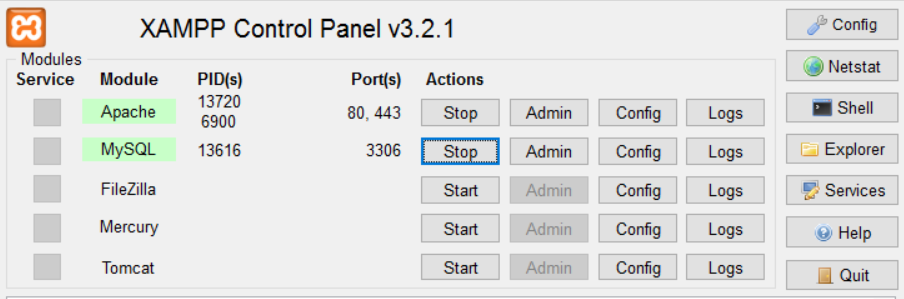
- CHECK POINT: You should see the Apache and MySQL module names highlighted in green.
If the server is not started, you may see the following error in the browser:
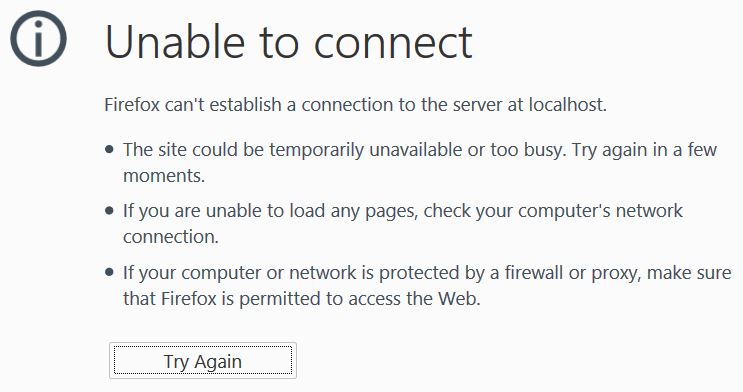
- If the Apache server or MySQL does not start:
- Turn off any other server you may have on. Only one server can use port 80.
- Turn off another program (e.g., SKYPE) may be attempting to share the same port as APACHE. You may be able to resolve it in SKYPE by selecting Actions > Options > Connection and removing the check mark at "use port 80 for an alternate port" and then restart Skype.
- Deactive a firewall or uninstall it.
- Deactive virus scanner.
- Delete the xampp folder and reinstall a fresh copy of XAMPP.
Check Database
- Open a browser and type localhost and click the Enter key to see if the server connects.
- Click on the phpMyAdmin link on the page you just opened or type localhost/phpmysdmin in the browser and click the Enter key.
TIP: You could also have just typed localhost/phpMyAdmin to go directly to this page.
- CHECK POINT: You should see your database listed in the left side panel. If you don't, check the database settings or create a new one and populate it.
Check PHP
- Create a new document and save it as phpinfo.php in the site root directory.
- Write the following code between the
<body>
tags:
<body>
 <?php phpinfo(); ?>
</body>
- CHECK POINT: Save the file and preview it in a browser. You should see a host of tables (e.g., Configuration, Apache Environment, HTTP Header Information). This information is useful to determine the current version of PHP and its features that it supports as well as the settings that it is currently using. If you don't see these tables, there is something wrong with your PHP setup:
- Ensure you added the .php instead of the .html extension to the file name.
- The server-side extension (e.g., php, aspx, .cfm, .jsp) let the server know which server-side technology to PROCESS (e.g., PHP, Active Server Pages, ColdFusion, Java Server Pages). - (OPTIONAL) Add the following PHP script above the PHP script you just wrote:
<body>
<?php print ("Hello, World <br>"); ?>
<?php print ("Goodbye, World"); ?>
<?php phpinfo(); ?>
</body>
- CHECK POINT: Save the file and preview it in a browser again. You should see the phrase "Hello, World and Goodbye,World" appear at the top of the page on separate lines because of the
<br>
tag.
- The print method is used to "print" what is in the parenthesis to the screen at that point on the page. However, the parenthesis are optional. Another method that could have been used to display information on the page is the echo() method.
- (ALTERNATIVE) You could have written both statements within a SINGLE PHP wrapper instead of two like this:
<body>
<?php
  print ("Hello, World <br>");
  print ("Goodbye, World");
  phpinfo();
?>
</body>
Turn On Debugging
In order to "see" PHP errors when the file is loaded, you need to turn on some debugging settings.
- Ensure the display_errors setting is turned on in the php.ini file. You can check it by running the phpinfo.php file created earlier. It is listed in the Core table.
- Otherwise, you may see a blank page when there is an error. For security reasons, it may be turned off.
CAUTION: Don't forget to turn off display_errors on a live site because it may expose to much information leading to a security risk.
- If you need to turn it on, open the php.ini file (e.g., C://xampp/php/php.ini). Select Edit > Find and type display_errors and click the OK button. Change the Default Value from Off to On.
- (ALTERNATIVE) You can temporarily turn on the display_errors per script by writing the following code:
ini_set('display_errors', 1);
- The ini_set method can be used to override certain settings in the php.ini file. The number 1 represents "on" and the number 0 represents "off." It is important to note that the display_errors directive control errors sent to the browser, it does not prevent them from occurring.
Setup Error Reporting
Another PHP function that is good to set is called error_reporting. It is used as the name implies, to set what level of errors PHP reports. You have to pass it some arguments:
- E_NOTHING (Nonfatal error)
- E_WARNING (Nonfatal error)
- E_PARSE (Fatal syntax error)
- E_ERROR (Fatal error)
- E_ALL
- E_STRICT
It is best practice to test PHP scripts using the highest level of error reporting.
- Like display_errors, you can set error_reporting in the php.ini file (e.g., C://xampp/php/php.ini). Select Edit > Find and type in error_reporting and click the OK button. Change the settings to match your preference. In our case, we used the following code that reports all errors using strict reporting:
error_reporting (E_ALL | E_STRICT)
- The pipe symbol ( | ) is used to separate the arguments.