Before creating a real app, you may want to test the development environment on a sample app to see how everything works. As a common practice, a "Hello World" app will be created.
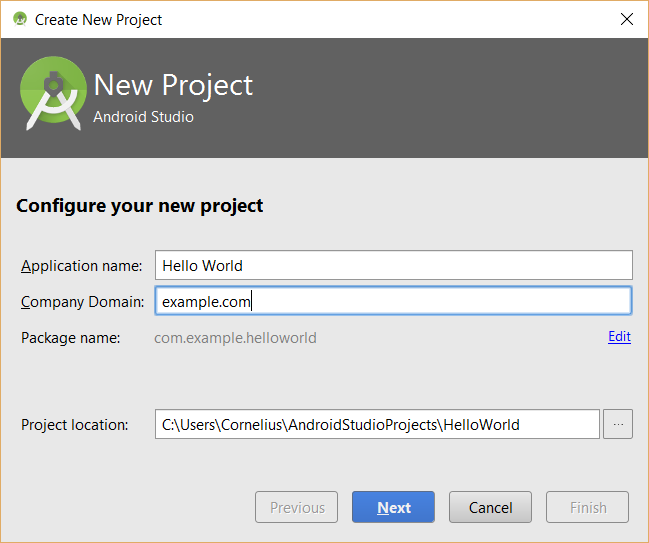
- Open Android Studio and from the Welcome screen, click Start a new Android Studio project and give the app a name (e.g., "Hello World").
TIP: To start Android Studio on the Mac, click on the spotlight icon at the top of the screen (or CMD+SPACEBAR) and type Android Studio.- In the New Project dialog box that appears:
- Type an Application name (e.g., Hello World) in the text field.
NOTE: The application name is used in several places:- on the app's home page
- as part of the app's icon name
- as part of the package name
- Type the Company Domain (e.g., example.com) in the text field.
NOTE: Company Domain does not need to be a actual domain. - CHECKPOINT: The Company Domain is used to convert to the MAIN package name that is dimmed out in the next field. It is updated to reflect a reverse domain notation and the application (ID) name. However, you can edit this name by clicking on the Edit link to the right of the screen. It is a unique name that is used to identify the app in the app store.
TIP: By using the same package name for all of your sample apps, you will be able to replace any existing apps on your testing devices each time you install a new one and you will not have a host of apps that you will have to find and delete.
- Accept the default project location for this app.
NOTE: By default, Android Studio creates a project sub-folder under the home folder called AndroidStudioProjects but you can place the project anywhere you want. You could, for example, click on the browser button and create an new folder (e.g., myAndroidApps) on the Desktop and save your project there for convenience. By default, configurations are global to the entire Android Studio installation. Notice also the project is AUTOMATICALLY named the SAME as the Application name but WITHOUT spaces (e.g., ...AndroidStudioProjects\HelloWorld).
- Click the Next button.
NOTE: The package name is important because no two apps in the Google Play store can have the same name.
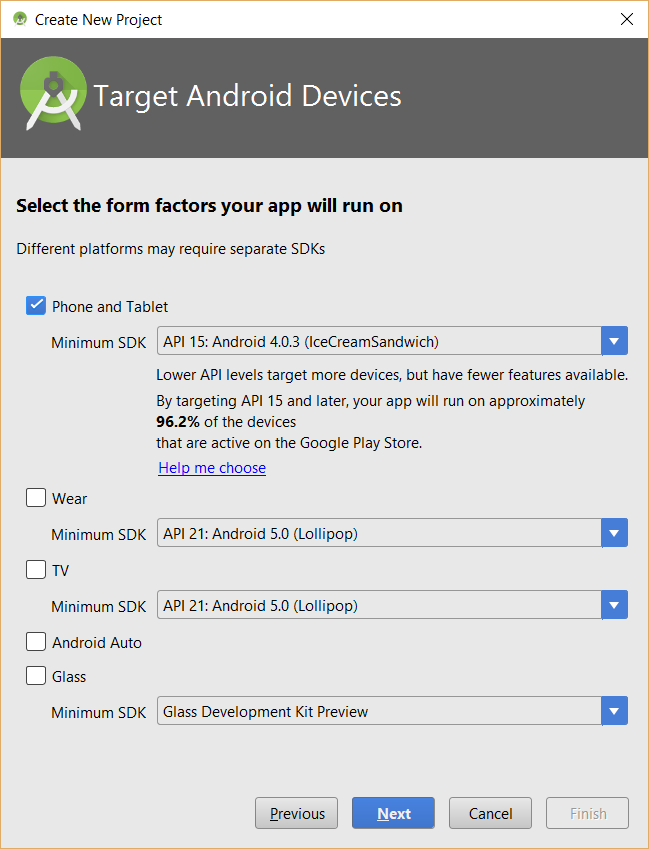
- In the Target Android Devices dialog box that appears, select a form factor(s) you want to use. By default, Phones and Tablets are selected. Keep the default.
- Choose a Minimum SDK that will be required for your app to run. Keep the default.
NOTE: If you're not sure, click the Help me choose link to see a listing of all the currently-active versions of Android. Click a link to learn about each. You can also click on the link at the bottom of the screen or go to https://developer.android.com/about/dashboards/.
- Click the Next button.
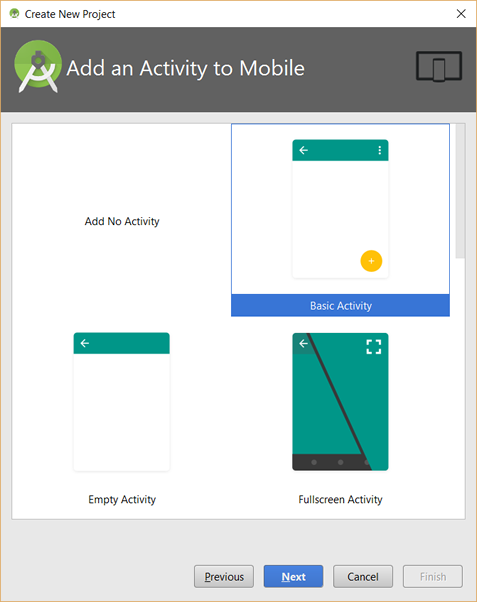
- In the Add an activity to Mobile dialog box that appears, select an Activity (e.g., Basic Activity). Keep the default.
NOTE: An activity is the app's primary screen. The blank activity is a very simple template that will display a text on the screen (Hello, World) and has a menu and a Floating Action Bar (FAB). Another example, the Master Detail Flow template creates a master and detail activities and uses the Fragments API so that the app will look different on various devices. An activity is similar to a View control in iOS app development.
- Click the Next button.
- In the Customize the Activity dialog box that appears, accept the default options for this app.
- Click the Finish button to create the project.
NOTE: If only a single screen is being used, leave the values at their defaults.
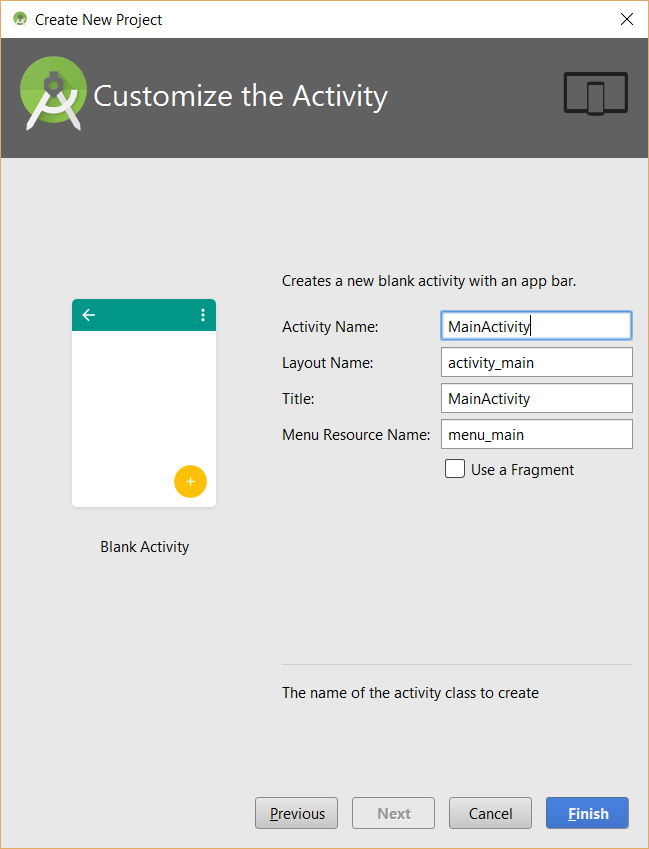
NOTE: For every activity (akin to a page) that is created as a *.java file, there is a corresponding xml file. The *.java file has a method called setContentView (e.g., setContentView(R.layout.activity_main;) which is used as the name implies to set the content view for that page. The following describes the inputs above:- Activity Name is the Java file that will be created for the project's code and is not seen by any user
- Layout Name and Menu Resource are an XML files that will be created for the project's layout and menu, respectively.
- Title is as the name implies the app's title.
- Menu Resource Name is an XML file that will be created for the project's menu.
TIP: Remember these values (e.g., MainActivity, activity_main, and menu_main) as you will see how they are connected in Java code and the XML files later.
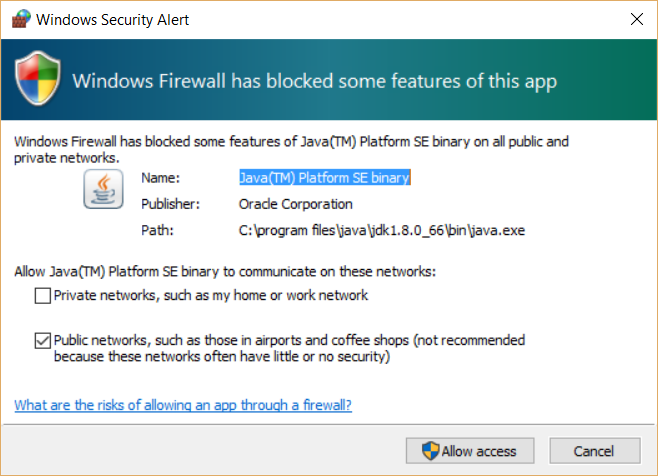
- If the Windows Security Alert dialog box appears, unselect Public and select Private and then click the Allow access button.
NOTE: The first time an Android Studio project is created, it takes a while to complete because it has to download components locally. However, when you create other projects, it should go quickly. If you see the Tip of the Day dialog box, you can click the Next Tip button to learn more about Android Studio or simply close the dialog box.
- CHECK POINT: Pay attention to the message (e.g., indexing) at the bottom of the screen. When the message goes away, you are ready to develop an app. Android took the information you provided it in the previous dialog box to create your app.
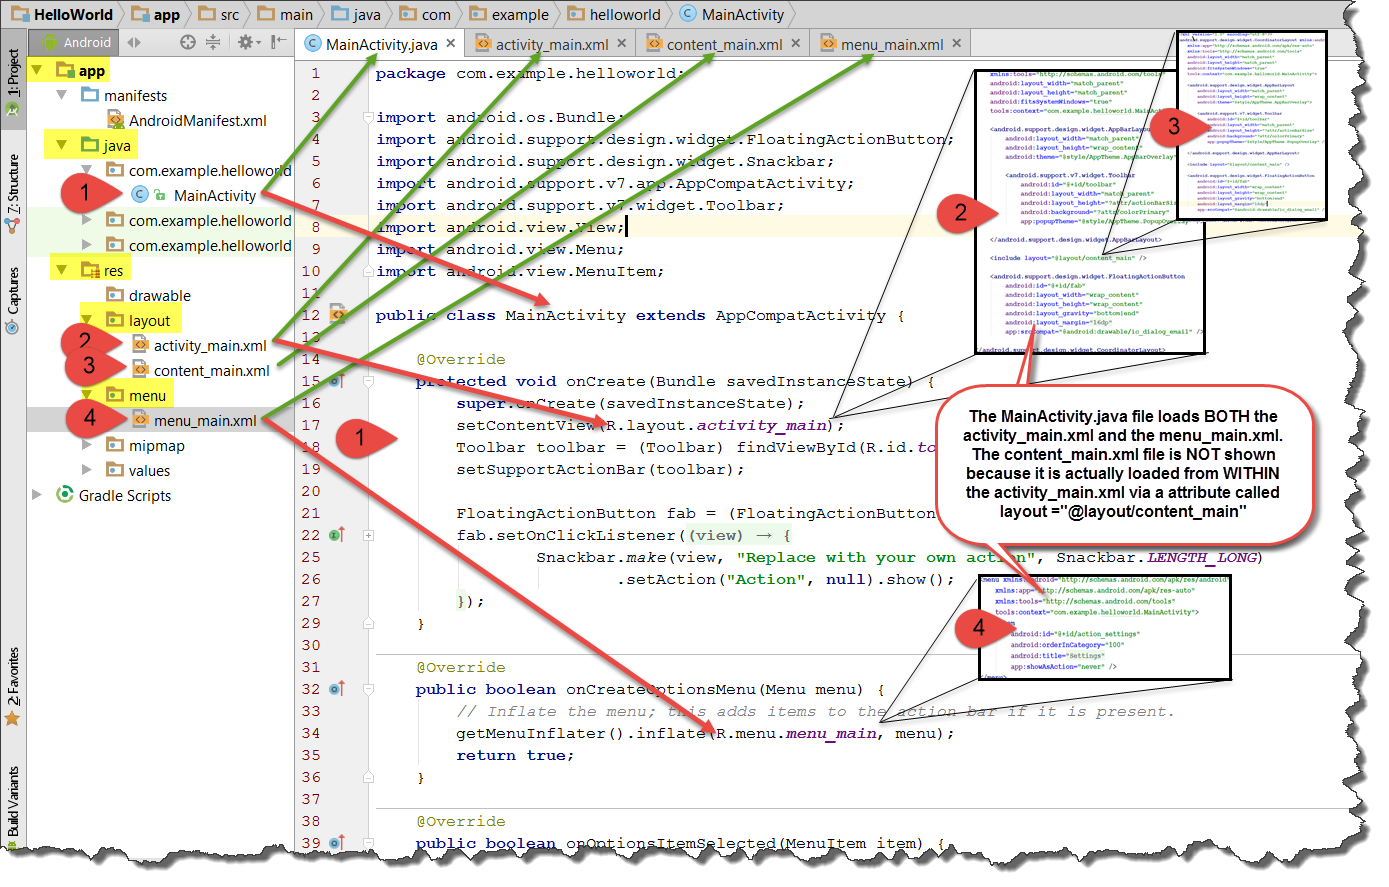
- CHECK POINT: By default, there will two tabs that are opened for each project you create. The Java class (MainActivity.java ) which is code used to LOAD the XML layout file (activity_main.xml) that defines the layout. Also, the menu_main.xml is used for the menu. Follow the steps below so that you can better understand the following screenshot.
- If not already selected, click the Android view.
- Click the triangle next to the app folder to expand the app's content.
- Click the triangle next to the java folder and then the package folder (com.example.helloworld) to expand the content to show the Java file (MainActivity) and double-click to open it.
- Click the triangle next to the res folder (res is short for resources) and then the layout folder to expand the content to show the layout files (activity_main.xml and content_main.xml) and double-click on both to open them.
- Click the triangle next to the menu folder to expand the content to show the menu file (menu_main.xml) and double-click to open it.
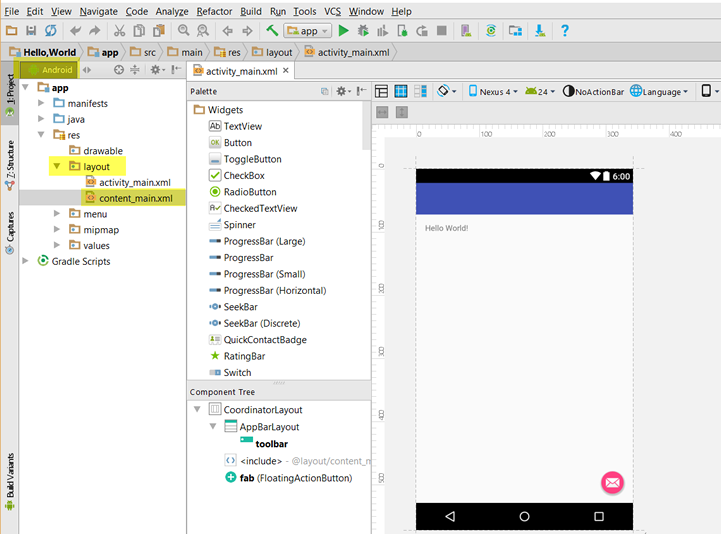
- Android Studio takes the data you provided in the dialog boxes and build the necessary Java and XML file from them. See the screenshot below to see how the are connected:
- CHECK POINT: Click on the highlighted Android view in the screen shot below and click on the res folder, then the layout folder OR the content_main.xml file to see a preview of the app. Then, click on the Text tab at the bottom of the screen and the Preview tab on the right side of the screen to see the app displayed in a phone or tablet.
- Click on the green Run icon
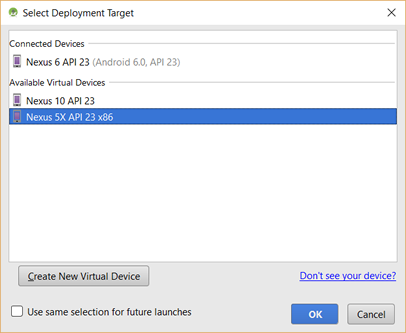
 at the top of the screen. In the Select Deployment Target dialog box that appears, select an virtual device (e.g., Nexus 5) and then click the OK button.
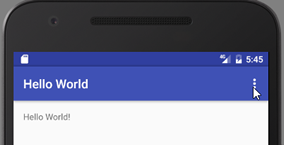
- CHECK POINT: Click on the emulator icon in your system tray. After a while you should see the app displayed. Check the following:
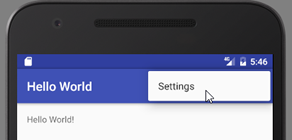
- Click on the menu and you should see the Setting panel fly out; however, nothing else happens. This will be changed later.
 >>>>
>>>> 
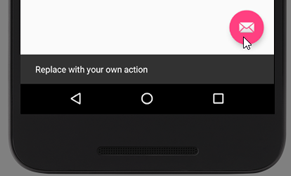
- Click the Floating Action Button (FAB), you should see a Toast message displayed with the text, "Replace with your own action."
Create Interactive Button (Optional)
A button will be added and given an interactive behavior.
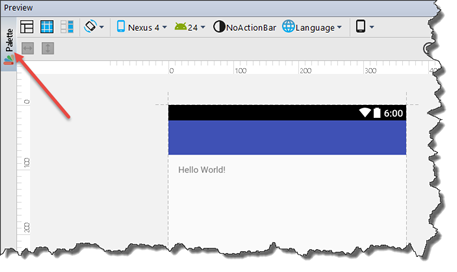
- With the Preview panel open, click on the Palette icon to open the Palette panel:
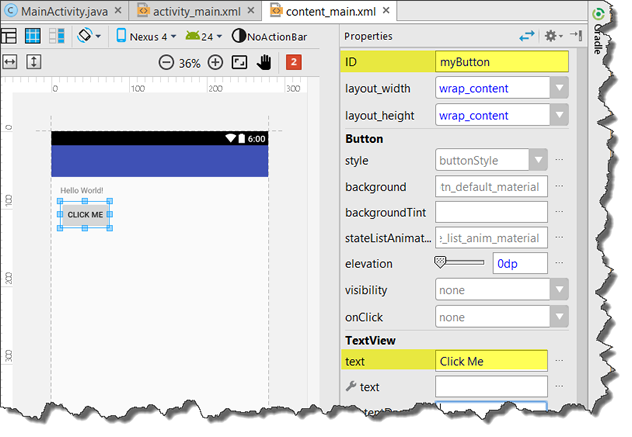
- From the Palette panel, drag-and-drop a Button component below the "Hello World" text and then click the Design tab at the bottom of the screen. Click the Button on the screen and then in the Properties panel change the ID property to myButton AND the text property to Click Me.
NOTE: The ID property will be used later to reference this button in code.
- Click the MainActivity.java tab to open it and add the following highlighted code:
public class MainActivity extends AppCompatActivity {
private Button myButton;
CODE EXPLANATION: This will create a variable to reference the button in the activity_main.xml file.
- Write the following highlighted code BELOW the setContentView() menthod:
protected void onCreate(Bundle savedInstanceState) {
	super.onCreate(savedInstanceState);
	setContentView(R.layout.activity_main);
	myButton = findViewById(R.id.myButton);
CODE EXPLANATION: This line of code actually ASSOCIATE the button within the activity_main.xml file by finding the view (Button) by its ID (Remember, it was given an ID of myButton in the activity_main.xml file earlier). The findViewById is similiar to findElementByID in JavaScript. It is important to note that the code is placed AFTER the setContentView() method so that the view is set BEFORE it is referred to in code; otherwise, you would get an error.
- With the cursor in the line (myButton = findViewById(R.id.myButton);), click ALT+ENTER (or OPTION+RETURN on the Mac) and from the menu, select 'Cast to android.widget.Button' to add (Button) to the code.
myButton = (Button) findViewById(R.id.myButton);
CODE EXPLANATION: This will cast the value to a Button instead of a normal View. You could just as easy had typed this in initially when the code was written. Because every visible component is a View, you have to be more specific as to the TYPE of view it is—in this case, a Button view. This process is called CASTING where you "cast" an "object" to a different or more specific type.
- CHECK POINT: BELOW the previous code, type OnClick and select the first option from the menu to write the following highlighted code and then complete the line with the following highlighted code. The onClick() method stub is AUTOMATICALLY added to the code:
myButton = (Button) findViewById(R.id.myButton);
View.OnClickListener myListener = new View.OnClickListener() {
	@Override
	public void onClick(View v) {

	}
}
CODE EXPLANATION: The first line of code create an event listener object with a method called onClick that get executed when the button is clicked. However, there is no code in it to execute. This will be resolved in the next step.
- Add a semicolon (;) to the end of the previous code block and then on the blank line within the onClick method type Toast and press the Tab key. The complete Toast code will be AUTOMATICALLY added. Then, tab to the empty quotes and add the message "You clicked on the button."
View.OnClickListener myListener = new View.OnClickListener() {
   @Override
   public void onClick(View v) {
   Toast.makeText(MainActivity.this, "You clicked on the button", Toast.LENGTH_SHORT).show();
   }
};
CODE EXPLANATION: The Toast() object allows you to show a message for a brief period of time on the user screen. The makeText() method of the Toast object allows you to set a text message ("You clicked on the button." for a given context (MainActivity.this). The show() method of the Toast object is responsible for "showing" the message once the Toast is made. While either way is correct, you may see is sometimes placed on a separate line like this:
Toast.makeText(MainActivity.this, "You clicked on the button", Toast.LENGTH_SHORT)
Toast.show();
TIME SAVING TIP: When you typed Toast and press the Tab key, you were using what is called a Live Template. There are a host of Live Teplates that comes with Android Studio that can save you time by automatically expanding a pharse like Toast to a complete code block after you click the Tab button. You can also create your own Live Templates. Learning some of the vital few Live Templates can save you a ton of time AND avoid you from making "stupid" mistakes when coding. See Live Templates for more details.
- Add the following highlighted line of code OUTSIDE of the previous code block:
View.OnClickListener myListener = new View.OnClickListener() {
	@Override
	public void onClick(View v) {
	Toast.makeText(MainActivity.this, "You cliced on the button", Toast.LENGTH_SHORT).show();
	}
};
myButton.setOnClickListener(myListener);
CODE EXPLANATION: Now that the button is referenced and the event listener object is created you have to TIE the two together by ASSIGNING the setOnClickListener() method to the button and pass it the event listener object (myListener).
- CHECK POINT: Click the Run icon and then in the Select Deployment Target dialog box that appears, click an emulator and then click the OK button. You should see the app load in the emulator. Click the Click Me button and you should see the Toast message "You clicked on the button."
[ADD SCREEN SHOT HERE]