Prep for Google Play
You cannot use the debugged version of the app's APK to submit to Google Play. You have to create a released version of the app's APK.
- Use the keystore that was created earlier and then go back to PhoneGap Build
- This time select the key and create a released version of the app's APK to use on Google Play.
Register As A Google Play Developer
To distribute apps through the Google Play, you'll need a Google Play Developer Account.
- Go to developer.android.com.
- Click the Distribute link at the top of the page and then click the the Developer Console link.
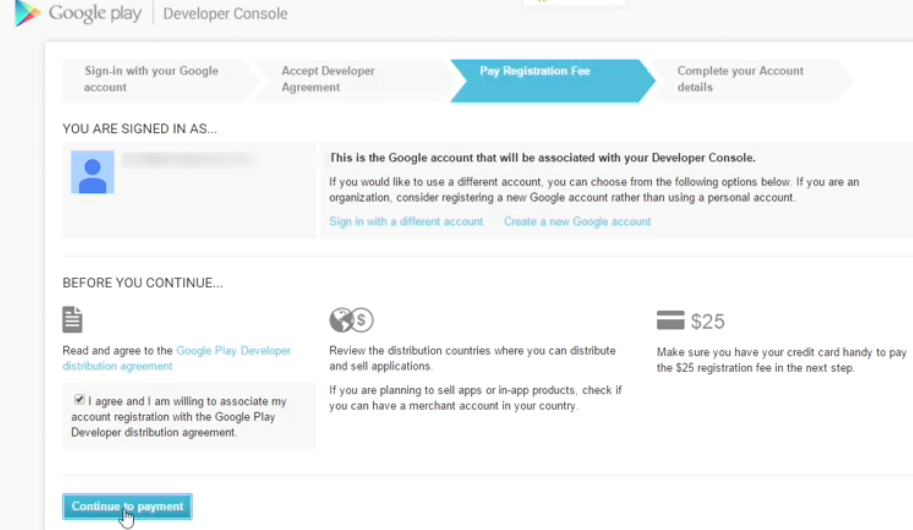
NOTE: If you're not logged in with a Google account ID, you'll need to create one and then come back to this page. On this page, you can read the Google play developer distribution agreement, by clicking the link. Read through it thoroughly and make sure that its terms are acceptable to you.
- Go back to the Developer Console page and select the agree to the terms checkbox.
- Click the Continue to payment button and then follow the prompts on this screen to complete your purchase through Google Wallet.
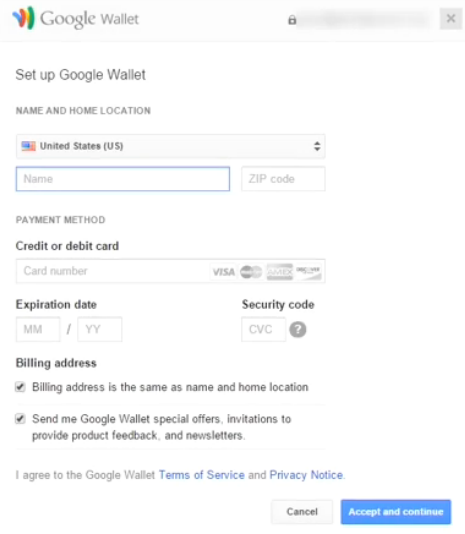
NOTE: Once your payment has been accepted, you'll see a dialog box and you can continue the registration process. You will need to pay a one tine $25 registration fee to become a Google Play developer.
- Fill out the information in the Google wallet and then click the Accept and continue button.
- On the Continue your Account detail section, enter:
- a unique developer name (e.g., Rich Media Creative Services)
- email address (e.g., cornelius@richmediacs.com)
- website (e.g., http://www.richmediacs.com/)
- phone number (e.g., 512-731-1234)
- (Optional) Select I'd the like to receive occasional emails about development and opportunities checkbox.
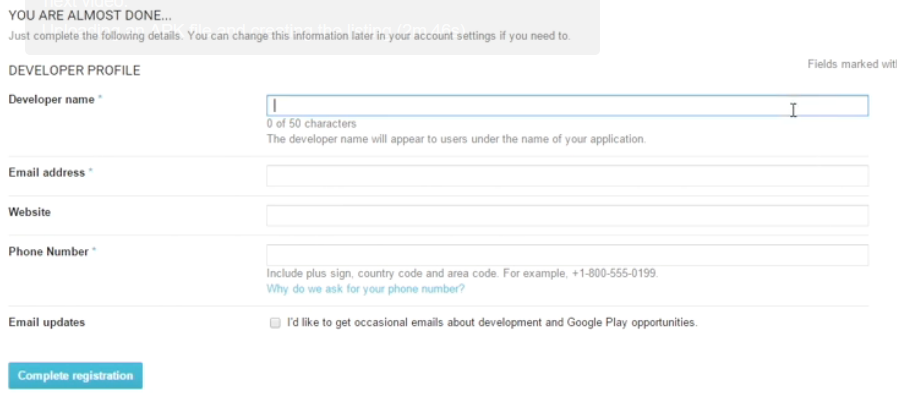
- Click the Complete Registration button.
- If you see the message, "Your payment is still processing...", click the "x" button to dismiss it.
Publish App
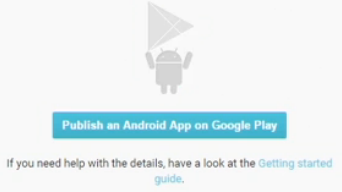
If your registration is accepted, another screen will appear and you'll be ready to publish an app.

- Click the Publish an Android App on Google Play button.
- In the ADD NEW APP dialog box that appears, select the following:
- Default language (e.g., English (United State) - en-US)
- Title (e.g., Chopinisms)
- Click the Upload APK button
NOTE: Later you will be coming back to this page to select the Prepare Store Listing button.

- On the Developer Console page that appears review the details about your uploaded app (e.g., version, upload date, status). Notice also in the left panel there is a list of steps that are needed to be completed.
Create Listing
Once you've created a new app record in the Developer Console, you don't have to do it all in one session, simply come back to this page.
APK
- To edit the record, click it and you'll go the Store Listing screen. If you haven't uploaded the APK yet, do it now.
- Click the APK link and click the button to Upload your APK to Production.
- Either browse for the APK or drag and drop it.
- You don't need to be concerned about the long name of the APK. The user will never see it. - Click the Open button to upload the APK.
- Your app will be analyzed by the Google and will show:- how many devices will be supported based on the Android version and the different permissions that have been registered
- a list of excluded devices.
- You can click that link and add different devices that you know your app won't run on.
- If you review the menu on the left, you will see checkboxes appear as you complete each step.
Store Listing
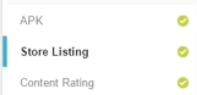
Once you upload your app, you should see in the Developer Console page, a checkmark next APK and Content Rating. The next step is to specify the Store Listing.
- Click the Store Listing link and enter required values that are indicated by an asterisk:
- Title (Up to 30 characters)
- Short Description
- Full Description
- Provide Graphic assets (See Create Graphics for details on how to create images).
- You have to provide at least two app screenshots but you can have up to eight. There are other promotional graphics that you have to add. The ones with an asterisks are required.
- Title (Up to 30 characters)
- Click the Plus icon and browse to the images you created in the section on Create Graphic or drag and drop the image into the gray area.
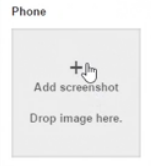
- CHECK POINT: You should see the screenshot in the placeholder area.
- Repeat the previous step for the other graphics that you need. The ones with an asterisks are required.
- Provide high-resolution icon and feature graphic.
- Click the Plus icon and browse to the images you created in the section on Create Graphic or drag and drop the image into the gray area.
- Repeat the previous step for the feature graphic NOTE: It can be a JPG or a 24 bit PNG image without alpha and is 1024x500 pixels that you can create manually.
- (Optional) You can also add a promo graphic and a TV banner. You can also create a promotional video that is hosted on Youtube by entering the URL.
- Under the CATEROGIZATION section, choose:
- Application type ((e.g., Application or Game)
- Category (e.g., Education, Productivity)
- Content Rating (e.g., High Maturity, Everyone) If you're not sure what content rating to select, check the documentation for some tips.
- New Content rating:
- Click on the Content Rating link to fill out a questionnaire.
- Read the questionnaire and then press the Continue button.
- Add an email when prompted.
- Choose a type of app from the list (See screenshot below).
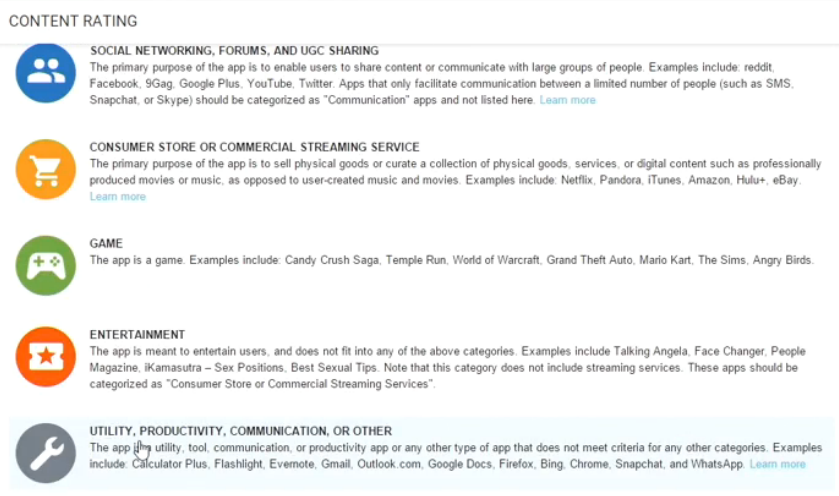
- Answer all of the questions.

- Click Save Questionnaire.
- Click Calculate rating.
- CHECK POINT: You will be shown your ratings.
- Click Apply rating button.
- Click again on the Store Listing link.
WHY: To refresh the screen and then scroll down so that you can see your content ratings.
- Under CONTENT DETAILS section, enter:
- Enter website, Email and phone. (Only the email is required). promo text if you want. This promo text will be displayed in some environments, but isn't required.
- Under PRIVACY POLICY section:
- Either enter a privacy policy URL or select the "Not submitting a privacy policy at this time." checkbox.
- Scroll back to top of page and then click the Save Draft button.
- CHECK POINT: You should see that there is a check next to the Store Listing link in the left side panel.
Set Pricing and Distribution
After creating your store listing, the next step is to set the pricing and distribution options.
- Click on the Pricing and Distribution link in the left panel.
- Decide whether your app will be paid or free.
- To create a paid app, you have to satisfy two conditions.- Click on the set up a merchant account link and on the screen that appears fill out your business information with Google Wallet that lets you accept credit card payments. All payments for apps will be processed though Google Play and you'll receive payments from Google.
- mark the app as paid and select the price or select free.
CAUTION: It's very important to know that if you set an app initially as free, you can't reset it to paid later.
- Indicate what countries you want to distribute your app in. If there aren't any restrictions, you can just check the option to Select All Countries checkbox even if you have not localized the app by adding language translations.
- You'll see how many countries are currently available for distribution. - The next three options are for different Android platforms:
- ANDROID WEAR: If you built-in feature for an Android watch, you want to select this option.
- ANDROID TV: If you built in features for an Android TV, you want to select this option.
- ANDROID AUTO: If you built in features for an Android watch, you want to select this option. However, you will have to accept the terms before uploading.
- The next two options are for Marketing:
- DESIGNED FOR FAMILIES: Tell kids and families audience about your app.
- GOOGLE PLAY FOR EDUCATION: Select this option if you think you app can be useful to schools.
- The next three options are for Consent (Marketing opt-out is optional and the others are required)
- Marketing opt-out: It is best to leave this UNSELECTED so that others can promote your app.
- Content guidelines: You need to read through the guidelines and check this option.
- US export laws: You need to check this option to acknowledge export laws.
- Select whether you want to include the application In the Google Play for Education channel. This is a specific marketing channel through the Google Play store. You don't have to do anything special in your app.
- Set consent options: Indicate whether you want your app promoted on Google Play.
- Check the option that indicates that the app meets Android content guidelines.
- If you don't know what those guidelines are, read through them thoroughly. It's very important that you satisfy these guidelines, and failure to do so can result in the app being pulled from the store later. - US export laws.
- Once again, there is a link where you can learn about export compliance. What sorts of restrictions there might be that would prevent your app from being eligible for selling overseas. Read through that information thoroughly, then come back and check the option that indicates that your software app is subject to export laws. - Scroll back to the top of the page and click the Save Draft button.
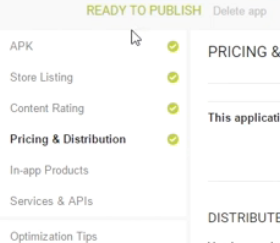
- CHECK POINT:
You should see the check mark appear on the Pricing and Distribution link in the left side panel. You should also see that you have meet the minimum requirement to publish your app by seeing the phrase "READY TO PUBLISH."
(Optional) Add In-app Products
Once you've unloaded your APK, filled in your store listing, set your pricing and distribution options, your app is ready to publish. But there are some additional features you want to implement (e.g., App Billing).
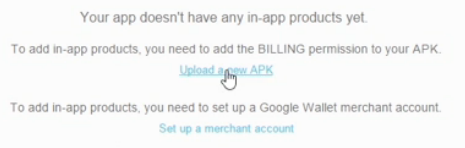
- Click on the In-app Products link in the left side panel.
NOTE: In order to implement in-app billing, you need to do two things:
- Add billing permission to your APK. Click on the Upload a new APK link.
- Set up a Google Wallet Merchant account. Click on the Set up a merchant account link.
NOTE: There are two basic kinds of in-app products:
1. Consumable might be extra features in a game (e.g., extra strength that the use can purchase repeatably).
2. Non-consumable is a one-time purchase (featured app).
NOTE: Learn more about in-app billing at DEVELOPER.ANDROID.COM/GOOGLE/PLAY/BILLING. Remember, you will need to repackage the APK to the App Store.
(Optional) Services and APIs
The Google Play Store supports a variety of other services and APIs.
- Click on the Services and APIs link in the left side panel.
- Select link from the list of services below for more details:
- Google Cloud Messaging System allows you to send data from a server to your apps. You will need a sender ID.
- To prevent unauthorized use of your app, you can implement the license key that is automatically assigned to it. This is a Base64 encoded public key. You have to copy and paste it into your app manifest. To learn more, go to: developer.android.com/google/play/licensing.
- Google Play Game Services allows you to keep track of scores, achievements, and other game features across devices and implement multi-user playing.
- If you want to internationalize your app, you can use the APK Translation Service. This service assumes that you've used string resources for all of the strings that are presented to the user in your app. This is a paid service lets you have your strings SNL file translated into as many different languages as you need.
- App indexing for Google Search lets you deep link into your app. The idea is that when a user searches for some search string, your app can provide results. And when they click on a link, that's supported by the app, instead of just going to the app's homepage, you can deep link, taking the user to the particular bit of content that they're interested in. This is a service that you need to implement. It's not automatic. But once implemented, it can increase engagement with you user base.
Publish and Unpublish App
If you've completed the minimum amount of information, you are ready to publish your app.
- Click on Publish App link at the top of the screen.
NOTE: It can take a couple of hours for the app to show up on the Google Play store and up to 24 hours before it is fully searchable.
- If you want to stop publishing your app, click the APK link in the left side panel.
- Click on Switch to Advanced Mode button and then click on the Deactivate button.
NOTE: You'll see the message that says "This configuration cannot be published for the following reason(s)..." You can then upload a new version of the APK to production. You might have to update the version to make that happen. And then you can continue the publication process. And again, once the app has been published, you should see an Unpublish button under the package ID.
Track App
Once your app has been in the Google Play Store for a while, you can go back to see how many people have installed, uninstalled, and used your app.
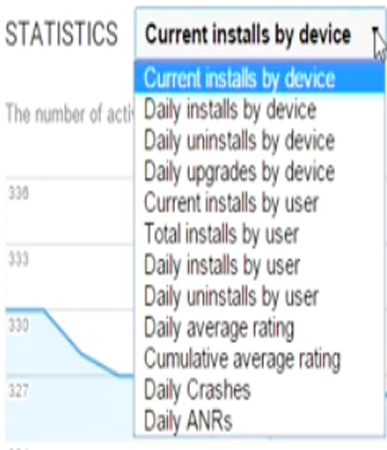
- Click on the Statistics link in the left side panel to see the default screen (Current installs by device).

- Click on drop-down list next to the word STATISTICS to see a host of options (See screenshot below):
NOTE: You can change the time span by clicking on one of the Show options on the top right side of the screen (See large screenshot above).
TIP: If you change the time span to ALL and then select Current installs by device, you can see the growth over time of your install base.
- In next set of charts, you can break out installations by the following (See example in screenshot below):
- Android Version
- Device
- Tablets (7" and 10+")
- Country
- Language
- App Version (if you have more than one version)
- Carrier
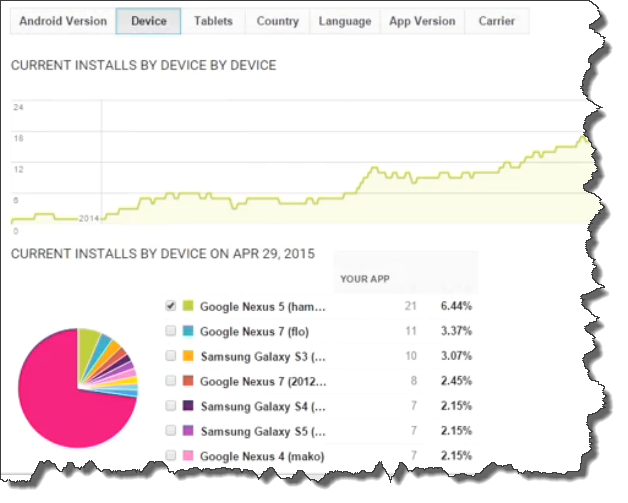
NOTE: These charts show how fragmented the Android market is because of the multitude of versions and OS's. There may be a warning reminding you that if I want to support tablet usage, you should upload screenshots. There may be a large percentages under the Other category. These are devices with one or two installations.
- You can also break down usage by user but you need Google Analytics for Mobile Apps. To learn more click the links at the bottom of the page.
App Reports
There are more information that allow you to track the performance of your app:
- Finance (sales for app and in-app products)
- Overview
- Revenue
- Buyer
- Conversion (track spending/buyer and conversion rate)
- Rating and Review (user evaluations)
- Crashes and ANRS (ANR stands for APP NOT REPONDING)
- Optimization Tips (recommendations on how to improve your app distribution and performance.
You can download these reports as CSV files and then open them in a spreadsheet application (e.g., Microsoft Excel) for further analysis.