The Detail Page is part two of the Master/Detail page set. The code that will be created will perform the following tasks:
- PART A: CREATE STATIC CONTENT
- Create Static Table
- Create Static Button
- PART B: ADD DYNAMIC SCRIPTS
- Add SQL SELECT Recordset Script
- PART C: REPLACE STATIC CONTENT WITH DYNAMIC CONTENT
- Make Table Dynamic
- Make Button Dynamic
- Make Confirmation Dialog Box Dynamic
- OPTION 1: Add Dynamic Image
- OPTION 2: Provide An Avatar For Missing Image
- OPTION 3: Add Non User Data
- OPTION 4: Create Alternating Row Colors
- OPTION 5: Create A Personalize Delete Dialog Box
- OPTION 6: Create A Custom Delete Dialog Box
PART A: CREATE STATIC CONTENT
There are two static components (table and button) that will be created for the EMPLOYEE DETAIL page.
Create Static Table
- Open the Employee Detail page (detail_page.php) and add the following highlighted code BELOW the
<h2>
tag.
WHY: To create a static table below the title.
<h2 class="ui-body ui-body-a ui-corner-all">EMPLOYEE DETAIL</h2> <table border = "1" style="float:left; border-collapse:collapse; width:309px;">
<tr>
<th colspan = "2" align="center"> </th>
</tr>
<tr>
<th width = "95" align="right">City:</th>
<td width = "169"> </td>
</tr>
<tr>
<th align = "right">State:</th>
<td> </td>
</tr>
<tr>
<th align = "right">Start Date:</th>
<td> </td>
</tr>
<tr>
<th align = "right">Department:</th>
<td> </td>
</tr>
<tr>
<th colspan="2" align="left">Note: </th>
</tr> <tr>
<td colspan = "2" align="center"> </td>
</tr>
</table>
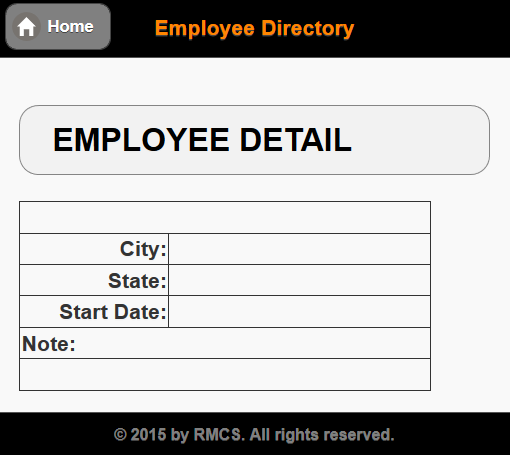
- CHECK POINT: Save the file and preview it in a browser. You should see a blank table displayed. Notice also that the first and last two rows SPAN two columns because of the colspan = "2" attributes.
Create Static Button
The DELETE EMPLOYEE button will be created now but will be used later with the delete_page.php file.
- Replace the non-breaking space ( ) with the following highlighted
<a>
tag in the LAST
<tr>
and
<td>
tag of the table:
<tr>
<td colspan = "2" align="center">
<a data-role = "button" data-inline = "true" href = "#">DELETE EMPLOYEE</a></td>
</tr>
</table>
- Replace the pound sign (#) in the href attribute with a static link to the delete_page.php file with a ?recordID=1 query string:
<tr>
<td colspan = "2" align = "center">
<a data-role = "button" data-inline = "true" href = "delete_page.php?recordID=1">DELETE EMPLOYEE</a></td>
</tr>
</table>
- CHECK POINT: Save the file and preview it in a browser. You should see the DELETE EMPLOYEE button at the bottom of the table.
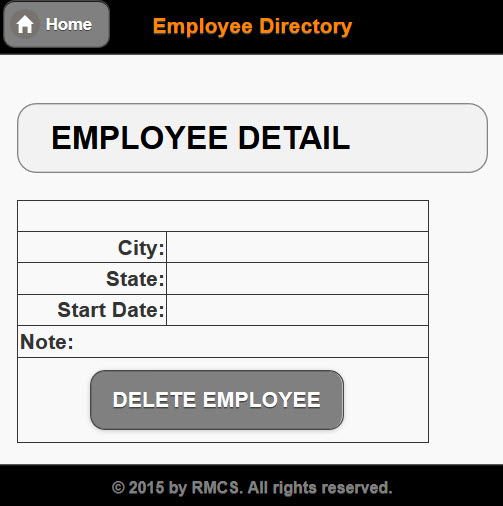
If you hover over it, you will see the recordID=1 that it will pass to the Delete Employee Page in the status bar at the bottom of the browser window.
localhost/EmployeeDirectory_JQM_PDO/delete_page.php?recordID=1
If you click the DELETE EMPLOYEE button, you will be taken to the DELETE EMPLOYEE page which has not been programmed yet.
PART B: ADD DYNAMIC SCRIPT
Add SQL SELECT Recordset Script
A recordset will be created using the SQL SELECT clause to retrieve a SINGLE record from the database based on the URL variable pass FROM the Employee Master Page (master_page.php) when a link in the ListView is clicked.
- Add the following highlighted PHP connection script ABOVE the
<!doctype html>
statement at the top of the page.
<?php
require ("db.php");
?>
<!doctype html>
<html>
- Add the following highlighted code block BELOW the the require statement. Comments are are optional but are written to explain code.
WHY: To create a recordset that will be used to create a dynamic image and to populate the table.
<?php
require ("db.php");
// SQL SELECT QUERY -------------------------------------------
$pdo_statement = $pdo_conn->prepare("SELECT * FROM employees WHERE ID=" . $_GET[recordID]);
$pdo_statement->execute();
$result = $pdo_statement->fetchAll();
?>
CODE EXPLANATION:
- Since most of the columns are needed for the detail page, the wildcard asterisk (*) is used to return ALL COLUMNS from the database. However, because the wildcard asterisk is used, we will have to MANUALLY concatenate the FirstName and LastName with a space or a non-breaking space ( ) between the two fields to create an employee's full name. This is unlike what was done on the EMPLOYEE MASTER PAGE where the CONCAT function was used to create an alias column named FullName.
- The WHERE clause is used as a FILTER to return a SINGLE ROW from the database based on the ID that is passed from the EMPLOYEE MASTER PAGE (e.g., master_page.php).
- The $_GET[recordID] is a dynamic URL variable that get resolved to the ID value that was passed from the Employee Master Page (master_page.php) when a list item is clicked.
PART C: REPLACE STATIC CONTENT WITH DYNAMIC CONTENT
Make Table Dynamic
- Replace the static references of the non-breaking spaces (e.g., ) in the table with the following highlighted code in the
<th>
tags.
WHY: To make the table data dynamic instead of static.
<table border = "1" style="float:left; border-collapse:collapse; width:309px;">
<tr>
<th colspan = "2" align="center"><?php echo $result[0]["FirstName"];?> <?php echo $result[0]["LastName"];?></th>
</tr>
<tr>
<th width = "95" align="right">City:</th>
<td width = "169"><?php echo $result[0]["City"];?></td>
</tr>
<tr>
<th align = "right">State:</th>
<td><?php echo $result[0]["State"];?></td>
</tr>
<tr>
<th align = "right">Start Date:</th>
<td><?php echo $result[0]["StartDate"];?></td>
</tr>
<tr>
<th colspan="2" align="left">Note: <?php echo $result[0]["Note"];?></th>
</tr>
<tr>
<td colspan = "2" align="center"><a data-role = "button" data-inline = "true"
href = "delete_employee.php?recordID=1">DELETE EMPLOYEE</a></td>
</tr>
</table>
- CHECK POINT: Save the file and preview it in a browser. Initially, you will see a set of Notices (e.g.,Notice: Use of undefined constant recordID - assumed 'recordID' in C:\xampp\htdocs\EmployeeDirectory_JQM_PDO\detail_page.php on line 4.) . That's because the recordID is not yet defined. To test the page, do one of the two steps below:
- Type a path to the file in a browser: http://localhost/EmployeeDirectory/detail_page.php?recordID=3. Repeat this step several times with a different recordID number. You may need to go to phpMyAdmin to look at the database to see what the ID numbers are.
NOTE: Notice the ?recordID=3 at the end of the URL which represent an ID value. This is a query string that simulate the ID value that will be used in the next example.
- Go to the Employee Master Page (e.g., master_page.php) and click any one of the LIstView item (not the Edit icon). Repeat this step several times to see different images being displayed.
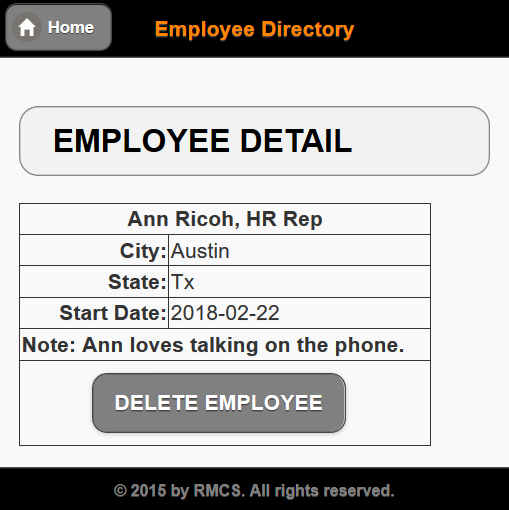
You should see the table POPULATED with data from the database displayed.
- Type a path to the file in a browser: http://localhost/EmployeeDirectory/detail_page.php?recordID=3. Repeat this step several times with a different recordID number. You may need to go to phpMyAdmin to look at the database to see what the ID numbers are.
Make Button Dynamic
The DELETE EMPLOYEE button will be created now but will be used later when the delete_page.php page is created.
- Replace the static number (1) in the Delete Button code with its dynamic counterpart:
<tr>
<td colspan = "2" align = "center"><a data-role = "button" data-inline = "true"
href = "delete_page.php?recordID=<?php echo $result[0]["ID"];?>">DELETE EMPLOYEE</a></td>
</tr>
</table>
- CHECKPOINT: Save the file and open the EMPLOYEE MASTER PAGE, and then click any one of the ListView item. You should see DELETE EMPLOYEE button at the bottom of the table. If you click it, you will be taken to the Delete Employee Page. However, the employee record will NOT be deleted because the code for is has not been written for it yet. Repeat several times to see a different ID is being passed for each LIstView item.
Make Confirmation Dialog Box Dynamic
It is best practice to give the user a confirmation notice that the record will be deleted and the option to cancel the process if the wrong record is selected or the user changes his or her mind on deleting the record.
- Add the following highlighted code to the end of the opening
<a>
tag of the DELETE EMPLOYEE button:
CAUTION: Pay attention to the single and double quotes.<tr>
<td colspan = "2" align = "center"><a data-role = "button" data-inline = "true" href = "delete_page.php?recordID=<?php echo $result[0]["Note"];?>" onclick = "return confirm('Are you sure you want to delete this employee?')">DELETE EMPLOYEE</a> </td>
</tr>
</table>
CODE EXPLANATION:
- The onclick event handler "listen" for a click of the DELETE EMPLOYEE button.
- The return keyword is used to "return" a value. If it is true it will process the require.
- CHECKPOINT: Save the file and open the EMPLOYEE MASTER PAGE (master_page.php) and click one of the ListView item. Then, in the EMPLOYEE DETAIL page, click the DELETE EMPLOYEE button. You should see an Alert dialog appear. First, click the Cancel button. Nothing should happen except the dialog box will close. Now, try again and click the OK button. You will automatically be redirected back to the DELETE EMPLOYEE PAGE (delete_page.php) which has not be completed yet.
Enhancements
You can come back later after you have finished the "MUST HAVE" features of this app with these "NICE TO HAVE" features for this page. See Enhancement tab for details.
OPTION 1: Add Dynamic Image
While the EMPLOYEE MASTER PAGE can have thumbnail images displayed for each employee, the EMPLOYEE DETAIL page can have a larger view of the image for a selected ListView item.
OPTION 2: Provide An Avatar For Missing Image
Like the MASTER EMPLOYEE PAGE, if there is an image for each record in the database, you would not need to do this enhancement. However, there may be a case where a employee is added to the database but a picture of that person was not available at the time the information was entered. As a result, a broken image icon would be displayed.
OPTION 3: Add Non User Data
Sometimes it is useful to display non user data (e.g., date entered) that is not saved to the database by a user. Instead, the data is created automatically with a date/time method (e.g., TimeDate()).
OPTION 4: Create Alternating Row Colors
It is best practice to creating alternating row colors for a large table to make it easier to read each row. It also help low vision users that use a screen magnifier like ZoomText to easily scan the rows better. To pull off this feat, we can use the new CSS3 nth-child selector.
OPTION 5: Create A Personalize Delete Dialog Box
Currently, the Delete dialog box displays a static message (Are you sure you want to delete this employee?). However, we could write some code the personalize the question to read: Are you sure you want to delete <employee full name>? where <employee full name> is a dynamic text field that will displays the current employee full name.
OPTION 6: Create A Custom Delete Dialog Box
Currently, the Delete Dialog Box uses the default JavaScript format. Here, we will create a custom dialog box using jQueryMobile.