It is important to authenticate users especially as it relates to ensuring only authorized users have access to administrative pages (e.g., add, update, or delete) as well as having only registered users view specific pages. This is done by creating pages that allow users to log in through an authentication framework in order to access pages that requires authentication. Other pages are accessible to the public or what is often termed "public facing."
Good demo and tutorial on Login with Session using PDO: http://www.webslesson.info/2016/06/php-login-script-using-pdo-with-session.html
CAUTION: It is best NOT to provide a link to administrative pages to prevent hackers from attempting to hack your site.
Instead, provide a link that the administrative users have to enter manually. This also prevent search engines from
indexing that link. However, you should provide links (login and logout) to other users (members, client login, guests, etc.
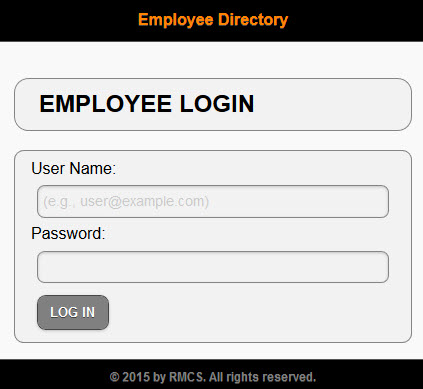
The Login page allows a user to enter a username and password that will be checked against a username and password in the database. If there is a match, the user is relocated to the appropriate page. If there is not a match, the user is presented with a message on the same page that states that the username or password was missing or invalid.
The submit button in a form has to be clicked FIRST in order for a form to be processed. So to determine if a form has been submitted, you can check to see if a variable is set in the form. Fortunately, PHP has a method for checking to see if ANY variable is set called isset(). Guess what it does?
if (isset($_POST["aVariable"])
A session variable will be created to pass data from one page to another page AND to restrict access to another page depending if the login is successful or not. If not successful, the user will be redirected to another page. Later, the user be allowed to log out to close the session variable.
The code that will be created will perform the following tasks:
- PART A: CREATE STATIC CONTENT
- Create Static Login Form
- PART B: ADD DYNAMIC SCRIPTS
- Add link to PHP Script and add session_start() method
- Create Login Script
- Restrict Page Access Script
- OPTION 1: Forgot Password
- OPTION 2: Remember Me Checkbox
- OPTION 3: Registration Link
PART A: CREATE STATIC CONTENT
Create Static Login Form
- Open the index.php page that you created earlier and delete the Home button code:
WHY: Since this will be the first page that will be seen, no home button is needed.
<div data-role="header">
  <h1>Employee Directory</h1>
  <a href="master_page.php" class="ui-btn ui-icon-home ui-corner-all ui-btn-icon-left">Home</a>
</div>
- Add the following highlighted code BELOW the
<h2>
tag.
WHY: To create a static form for the EMPLOYEE LOGIN page.
<div data-role="content">
<h2 class="ui-body ui-body-a ui-corner-all">EMPLOYEE LOGIN</h2><form action="" method="post" data-ajax="false">
<div class="ui-body ui-body-a ui-corner-all">
  <label for="username">User Name:</label>
  <input type="text" name="username" size="20" placeholder="(e.g., user@example.com)" data-mini="true"/>
  <label for="password">Password:</label>
  <input type="password" name="password" size="20" data-mini="true"/>
  <input type="submit" name="login" value="LOG IN" data-inline="true" data-mini="true"/>
</div>
</form></div>
CODE EXPLANATION:
- It is important to note that the data-ajax="false" attribute is needed in order for the login script to work. AJAX has to be turned off.
- CHECK POINT: Save the file and preview it in a browser. You should see the static EMPLOYEE LOGIN form.
PART B: ADD DYNAMIC SCRIPTS
Now, it is time to add the some scripts to make the login panel work.
IMPORTANT NOTE: If you are pushed for time, you can just add the required statement at the top of the document and use the PHP login script from the resource folder.
Add Link To Scripts
- Add the following highlighted statements above the
<!doctype html>
tag at the top of the page:
WHY: To create a link to the database connection and the login script that will be written shortly.
<?php
session_start();
require ('db.php');
require ('loginScript.php');
?>
<!doctype html>
<html lang="en">
CODE EXPLANATION:
- The session_start() method is used to start a session variable and it must be the first statement written.
- You may see a PHP script written several different ways. There are three basic ways to include PHP script on a page:
  1. Use an include directive (e.g., require() or require_only() , include()) to link the PHP script to the page.
  2. Write the PHP script DIRECTLY on the page (e.g., <?PHP Script goes here.. ?>).
  3. Link to the PHP script via the form's action attribute (e.g., <form action = "myPHPScript.php" method = "POST">).
- All of the above three approaches invoke the PHP Script via a submit button (<input type = "submit"....>).
- Add the following highlighted script ABOVE the opening
<form>
tag:
WHY: This script will be used later to display a variety of messages between the heading and the form.
<div data-role="content">
<h2 class="ui-body ui-body-a ui-corner-all">EMPLOYEE LOGIN</h2>
<?php
if(isset($message))
{
   echo $message;
}
?>
<form action="" method="post">
CODE EXPLANATION:
- The isset() method is used to CHECK if the message "is set" and if so display a custom message based on the
$message variable if it exists.
Create Login Script
Now, let's create the loginScript.php file that is needed.
TIME SAVER: If you are pushed for time, you can skip the following steps. Simply use the finish loginScript.php file
in the project's resource folder.
- Create a new PHP script file, name it loginScript.php and then add the following highlighted code including blank lines:
NOTE: Delete any HTML tag in the new PHP file if necessary.
<?php
 if(isset($_POST["login"]))
{


}


// End of login script
?>
CODE EXPLANATION:
- There will be three "if" statements included in the try code block. This FIRST "if" statement is used to CHECK
  to see if the LOG IN button was clicked. If so, execute the code between that curly braces that will be created
  in the next step.
- The isset() method is used to check if a variable has a value or not have a value so it will return either true or false.
- The $_POST["login"] global variable is based on the submit's button name attribute of the same name:
  (e.g., <input type="submit" name="login" value="LOG IN" data-inline="true" data-mini="true"/>).
- Add the following highlighted SECOND "if" statement INSIDE of the FIRST "if" statement curly braces:
if(isset($_POST["login"]))
{
        if(empty($_POST["username"]) || empty($_POST["password"]))
         {
              $message = '<p class= "error">Both User Name and Password are required.</p>';
         }
}
CODE EXPLANATION:
- If the first "if" statement is true (meaning that the LOG IN button was clicked) than execute this SECOND nested "if"
  statement which CHECKS to see if either one or both of the login fields (e.g., username and password) were left
  EMPTY. If so, display the message "Both username and password are required."
- Below the SECOND "If" statement code block, add the following highlighted "else" statement as part of the SECOND "if" statement.
if(isset($_POST["login"]))
      {
         if(empty($_POST["UserName"]) || empty($_POST["Password"]))
           {
             $message = '<p class= "error">Both User Name and Password are required</p>';
           }
                    else
                    {
                        $query = "SELECT * FROM passwords WHERE Email = :UserName AND Password = :Password";
                        $statement = $connect->prepare($query);
                        $statement->execute( array(  'UserName'  =>  $_POST["username"],  'Password'  =>  $_POST["password"]  ) );
                }
      }

 }
CODE EXPLANATION:
- If both the username and password are entered even though they may be invalid, the "else" portion of the SECOND "if"
  statement is executed instead which runs the SQL query to retrieve both the username and password from the database.
- The :UserName and :Password are placeholders for the SQL query to avoid SQL Injection. They are replaced with their actual values from an array
  (e.g., array(  'UserName'  =>  $_POST["username"],  'Password'  =>  $_POST["password"]  )).
- The $statement variable is used to hold a reference to the SQL prepared statement that has the query as an argument (e.g., prepare($query)) that was just created.
- The prepared statement is then executed with values from the array used to populate the SQL placeholders (:username and :password) with their actual values from
  the User Name and Password input fields.
- Add the following highlighted code within the SECOND "if" statement AND WITHIN its "else" code block add the following "if/else" statement:
COMPLETE CODE:
<?php
// IMPORTANT NOTE: The UserName is mapped to the Email column in the database instead of the UserName column.
if ( isset( $_POST[ "login" ] ) )
  {
     if ( empty( $_POST[ "username" ] ) || empty( $_POST[ "password" ] ) )
         {
         $message = '<p class= "error">Both User Name and Password are required</p>';
         }
         else
        {
         $query = "SELECT * FROM passwords WHERE Email = :UserName AND Password = :Password";
         $statement = $pdo_conn->prepare( $query );
         $statement->execute( array( 'UserName' => $_POST[ "username" ], 'Password' => $_POST[ "password" ] ) );

         $count = $statement->rowCount();
               if ( $count > 0 )
               {
                 $_SESSION["username"] = $_POST['username'];
                 header( "location:master_page.php" );
              }
               else
              {
                 $message = '<p class="error">Invalid User Name or Password</p>';
              }
    }
 }
?>
CODE EXPLANATION:
- If the query is executed, a count variable is assigned to the $statement->rowCount(); statement to ascertain its value.
- In this THIRD nested "if/else" statement, CHECK to see if the count is greater than zero (which means that a result was returned from the database
  because the username and password were correct.), create a SESSION variable and then redirect to another page. If the count is not greater than zero
  (because of an invalid username or password), display the message, "Invalid User Name or Password."
- The rowCount() method will return the number of rows affected by this query.
- Save the loginScript.php page.
- CHECK POINT: Open the EMPLOYEE LOGIN page (index.php) again, if necessary. Perform the following three tests:
- Without entering anything in the User Name and Password fields, click the LOG IN button:
You should see the message, "Both username and password are required." - Enter two invalid values in the User Name and Password fields and then click the LOG IN button:
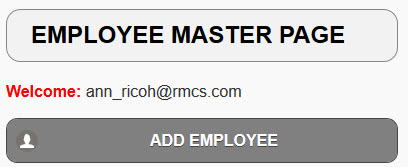
You should see the message, "Invalid User Name or Password." - Enter the two valid values (ann_ricoh@rmcs.com, admin) in the User Name and Password fields and then click the LOG IN button:
You should see that you are REDIRECTED to the EMPLOYEE MASTER PAGE.
- Without entering anything in the User Name and Password fields, click the LOG IN button:
Restrict Page Access Script
To prevent a page from being accessed, you have to write code on the page to redirect a user the login page if he or she does not have credential (e.g., login) for that page.
- Open the EMPLOYEE MASTER PAGE (master_page.php) and add the following highlighted attribute in the
<div>
tag BELOW the opening
<body>
tag:
<body>
<div data-role="page" id="home_page" data-ajax="false">
- Add the following highlighted session_start() method ABOVE the require statement:
<?php
session_start();
require ("db.php");
- Add the following highlighted PHP script BELOW the <h2> tag:
<h2 class="ui-body ui-body-a ui-corner-all">EMPLOYEE MASTER PAGE</h2>
<?php
if(isset($_SESSION["username"]))
{
    echo '<p><span class="error">Welcome: </span>'.$_SESSION["username"].'</p>';
}
else
{
    header("location:index.php");
}
?>
- Save the file (master_page.php).
- CHECK POINT: Open the Login Page (index.php), add a valid username and password and then click the LOG IN button. You should be taken to the EMPLOYEE MASTER PAGE and you should see the custom message (e.g., " Welcome: ann_ricoh@rmcs.com") based on the session variable in the index.php file.
- CHECK POINT: Type a path to the EMPLOYEE MASTER PAGE DIRECTLY in the browser (e.g., http://localhost/EmployeeDirectory_JQM_PDO/master_page.php) and press the ENTER key. You should see that you are immediately redirected to the login page instead of the EMPLOYEE MASTER PAGE because of the Restrict Page Access script.