Detail Page (Employee Detail Page)
- Add Dynamic Image to Page
- Provide an Avatar for a Missing Image
- Add Non-User Data
- Create Alternating Row Colors
- Create Personalize Delete Dialog Box
- Create Custom Delete Dialog Box (NOT COMPLETE)
Add Dynamic Image to Page
Like the EMPLOYEE MASTER PAGE that uses a series of multiple THUMBNAIL images if that enhancement was added, the EMPLOYEE DETAIL page will use a LARGER version of this SAME image for each employee.
- Add the following static
<img>
tag ABOVE the opening
<table>
tag:
<img style='float:left; margin-right:20px; border:1px solid black;' src='images/photo_not_available.png' width='307' height='240' alt='photo not available' />
<table>
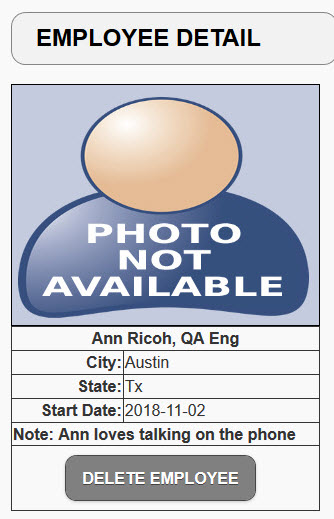
- CHECK POINT: Save the file, open the index.php file, log into the app, and navigate to the EMPLOYEE DETAIL PAGE. You should see a larger static version of the image (PHOTO NOT AVAILABLE) displayed above the table in a mobile view and on side of the table in a non-mobile view.
- Replace the static image with its dynamic counterpart with an "if/else" statement:
FROM:
<img style='float:left; margin-right:20px; border:1px solid black;'
src='images/photo_not_available.png' width='307' height='240' alt='photo not available' />
TO:
<img style='float:left; margin-right:20px; border:1px solid black;'
src='images/<?php echo $result[0]["Image"]?>' width='307' height='240' alt='photo not available' />
- CHECK POINT: Save the file, open the index.php file, log into the app, and navigate to the EMPLOYEE DETAIL PAGE. You should see a larger version of the thumbnail displayed. Repeat this steps several times to see different images displayed.
Provide an Avatar for a Missing Image
Again, like the EMPLOYEE MASTER PAGE that uses avatar images if that enhancement was added, the EMPLOYEE DETAIL page will use a LARGER version of this SAME avatar image for each employee if the image file is missing:
- Replace the static
<img>
tag with the following highlighted "if/else" conditional statement:
FROM:
<img style='float:left; margin-right:20px; border:1px solid black;'
src='images/<?php echo $result[0]["Image"]?>' width='307' height='240' alt='photo not available' />
TO:
<?php
$source_img = $result[0]['Image'];
if($source_img == "") {
  print "<img style='float:left; margin-right:20px; border:1px solid black;'
  src='images/photo_not_available.png' width='307' height='240' alt='photo not available' />";
}
else {
 print "<img style='float:left; margin-right:20px; border:1px solid black;'
 src='images/$source_img' width='307' height='240' alt='$source_img' />";
}
?>
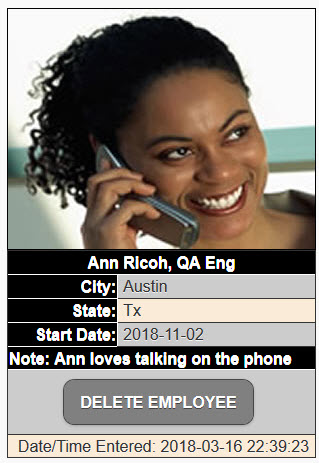
- CHECK POINT: Save the file, open the index.php file, log into the app, and navigate to the EMPLOYEE DETAIL PAGE. Click an image with an avatar. You should see a larger version of the AVATAR displayed. Repeat this step for any other image that has an avatar associated with it.
Add Non-User Data
There are times when you want to "capture" non-user data (e.g., date/time) from the database system, etc.
- Add the following highlighted
<tr>
tag ABOVE the closing
</table>
tag with static text:
<tr>
<td colspan="2" align="center">Date/Time Entered:  </td>
</tr>
</table>
- Add the following highlighted PHP script AFTER the semicolon and space:
WHY: To display some database generated data from the DateEntered column in the database.
<tr>
<td colspan="2" align="center">Date/Time Entered: <?php echo $result[0]["DateEntered"];?></td>
</tr>
</table>
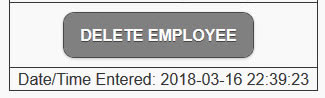
- CHECK POINT: Save the file, open the index.php file, log into the app, and navigate to the EMPLOYEE DETAIL PAGE. You should see the dynamic date and time values in the last row of the table.
Create Alternating Row Colors
While not necessary, creating alternating row colors for a table can be a very aesthetic design especially if the table expands a long width. Moreover, it makes is easily for users with low vision to easily zoom and navigate each row easier.
- Open the custom_styles.css file and add the following highlighted CSS to the bottom of the file:
/* Alternating Row Colors -----------------*/
div table tr:nth-child(even)
{
    background-color: #CCC;
}
div table tr:nth-child(odd)
{
    background-color: antiquewhite
}
div table th
{
    background-color: black;
    color: white;
}
table td
{
    padding-left: 5px;
}
- CHECK POINT: Save the file, open the index.php file, log into the app, and navigate to the EMPLOYEE DETAIL PAGE. You should see the table now styled with alternating row colors as well as the table headers styled with a black background with white text.
Create Personalize Delete Dialog Box
Currently, the Delete Dialog Box uses a generic button (DELETE EMPLOYEE and a generic question (Are you sure you want to delete this employee?)). We want to make both the button and the question more "personalized" for each employee.
- Modify the complete <tr> tag within the DELETE EMPLOYEE button with the following three highlighted PHP script:
FROM:
<tr>
<td colspan = "2" align="center">
<a data-role = "button" data-inline = "true" href = "delete_page.php?recordID=<?php echo $result[0]["ID"];?>"
onclick = "return confirm('Are you sure you want to delete this employee?')">DELETE EMPLOYEE</a>
</td>
</tr>
TO:
<tr>
<?php $selectedName = $result[0]['FirstName'].' '.$result[0]['LastName'].'?';?>
<td colspan = "2" align="center">
<a data-role = "button" data-inline = "true" href = "delete_page.php?recordID=<?php echo $result[0]["ID"];?>"
onclick = "return confirm('Are you sure you want to delete <?php echo $selectedName ?>')">DELETE <?php echo $selectedName ?></a>
</td>
</tr>
CODE EXPLANATION:
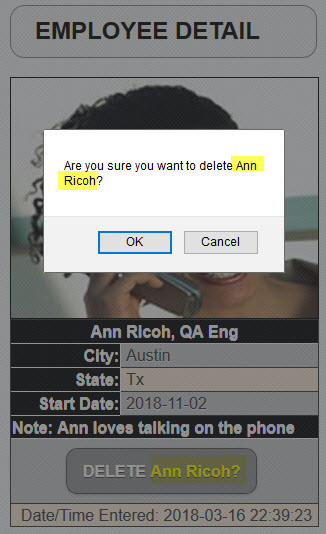
- Notice that the FIRST PHP script does NOT have an echo statement. That's because it is used only to set the value of the $selectedName variable not display it. - CHECK POINT: Save the file, open the index.php file, log into the app, navigate to the EMPLOYEE DETAIL PAGE, and then click the DELETE <EMPLOYEE FULL NAME> button. You should see when the dialog box opens it displays a more personalize question (e.g., Are you sure you want to delete Ann Ricoh?).
Create Custom Delete Dialog Box
Currently, the Delete Dialog Box uses the default JavaScript format. Here, we will create a custom dialog box using jQueryMobile.
ADD LATER...