Add Content To Master
The Master template is where you add content that is COMMON TO ALL PAGES. This typically includes content in the header with a menu and the footer. If you don’t use a Master template, you would have to copy and paste the common content over to each page. Moreover, whenever there is a change you would have to update each page separately. Hence, a template makes a web site consistent AND easier to maintain.
Like many other programs that use templates (e.g., Dreamweaver, InDesign, PowerPoint), it is important to note that when you edit an individual page, you will NOT be able to EDIT any content that is part of the template because that content is locked down. If you want to make changes to that content, you would have to do it in the template.
Most web pages typically have three regions in common (e.g., Header, Content, and Footer). Muse make this process easy by per-defining these areas with special guides. Notice in the screenshot below that two guides are slightly dimmed. These are guides that are part of a template. Hence to adjust the size of the header or footer, you must go to the Master template.

Instruction
- In the Plan View, double-click on the A-Master template thumbnail to open it in the Design View.
- Select the Rectangle Tool (M) and draw a rectangular box in the Header area that is 100% of the browser and a height of 62px and click on the Fill drop-down and select the color swatch (e.g., #000000)
TIP: You should see a tool-tip on the right side of the screen that says 100% to let you know the rectangle is responsive based on its size. A 100% Width icon is also located in the Transform Panel (Stretch to Browser Width) and in the Option Panel. If you wrap less than 100% it will be the width you specified; otherwise, it will be the width of the browser.
- Repeat the previous step for the Footer area.
- Add a small logo or text to the top/left of the header: In this example, we use text with some styles applied.

- Add a copyright notice on the left side of the footer and change the text to white (e.g., Copyrighted 2016 by Cornelius Chopin. All rights reserved.).
- From the Widgets Library panel, click the Menus folder and drag-and-drop the Horizontal menu to the top/right corner of the header.
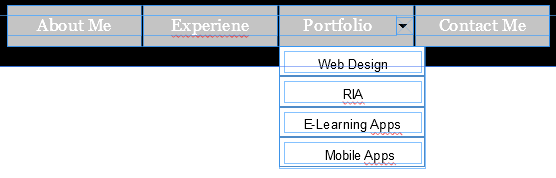
- CHECK POINT: You should see that the menu AUTOMATICALLY populates with all of the top-level pages (SIBLING PAGES). However, the sub-menu is not shown.
- Click on the small blue icon (
 ) to open the Options dialog box. Select All Pages from the Menu Type drop-down box.
 - CHECK POINT: You should see that the sub-menu AUTOMATICALLY populates with all of the children menu.
- Click on the Preview button at the top of the screen and then click on each menu item to see that it will take you to those pages.
- Go back to the Plan View and right-click on Private thumbnail page, then select Menu Options > Exclude Page From Menus.
- CHECK POINT: Double click on ANY of page thumbnail to return to the Design View. This time, you should see that the Private Page has been removed from the menu.
NOTE: The Private Page is only hidden when you preview it. However, when you upload the site to a server, it will be uploaded along with the rest of the files and a search engine like Google may still index it. To prevent a page from being uploaded to a server, do the following step.
- Go back to the Plan View and right-click on Private thumbnail page, then deselect the Export Page option.
- Press and hold down the ALT key and click on the plus sign (+) on the right of A-Master template to duplicate it.
- (Optional) Rename the A-Master copy to B-Master just to have a consistent naming convention.
- Double-click on the A-Master copy to open it in Design View.
- Click on the header and footer rectangle and change the Fill color (e.g., #0000FF).
NOTE: This template will be used later.