Captions and Voice Narration
Once you have finished editing your project, you can lastly add captions for accessibility and usability reasons. Captions can be used by
- people that are deaf or hard of hearing
- when volume has to be turned down (e.g., office environment)
- when audio cannot be heard clearly (e.g., restaurant bar)
- non-native speaking audience
- required to have to met the American with Disabilities Act (ADA) requirements
Another advantage of using captions is that they can may a video searchable. There are two type of captions that you can create with Camtasia:
- Open captions - "etched" into the video stream and cannot be turned off.
- Closed captions - is a separate stream and can be turned on or off by user.
Camtasia can EXPORT *.srt caption file that can be used by most hosting services (e.g, YouTube, Vimeo, Facebook, etc.) that can import these files
As a general rule of thumb, each caption should be:
- 1-3 lines of text
- 2-7 seconds
- have every new sentence on a new line.
There are several ways to add captions: (VERIFY ALL WAYS LATER)
The first way to add captions is to add them MANUALLY (Window):
- Move the audio clip to the top of the tracks and increase the height to see the audio waveform better.
- Move the CTI to the beginning of the narration and use the audio waveform as a guide to determine the length of the caption.
- Click the More option and select Captions or press the C key.
- Click the Add Caption button, import or drag-and-drop a caption file into the project
- CHECK POINT: If you click the Add Caption button, a caption bar will appear that will add 4 sec audio caption segments to the entire bar that allow you to type in a text transcript for each segment.
NOTE: To comply, each segment needs to be between 2 and 7 seconds long and be no more than two lines. - Click the first segment and then click the Play button or press the spacebar and listen to the narration. The narration will loop so that you can repeatedly hear the audio until you complete the caption.
- CHECK POINT: The segment will play and then reset to the start of the segment.
- If necessary, drag the Duration slider while looking at the audio wave form to see where you can extend the segment to no more than seven seconds.
- Type the text into the text field and check it again by playing the segment. If necessary, click the playback button to listen to the audio as many times as you need to write the transcript.
- Clip the play button again to stop.
- Press the Tab key and repeat the previous steps for the remaining segments in your project.
- To check for timing compliance, click on the gear icon and select Show Non-Compliant Duration from the menu.
- CHECK POINT: If you have a segment that is shorter than two second or longer than seven seconds, you will see the area highlighted in red.
- Right-click on the non-compliant segment and select Split Caption.
- CHECK POINT: The caption will be split into two half segments with the same text transcript in both.
- Adjust the timing duration if necessary, and then select the first segment and delete the appropriate text of the text transcript. (mostly the second half of text)
- Select the second segment and delete the appropriate text of the text transcript. (mostly the first half of text).
- In the Caption menu, select Set Caption Language and set the language (English).
- Click the plus button to add another caption or press the TAB key.
- To adjust the length of a caption to align with the audio waveform, drag the edge of the caption inward or drag the Duration slider.
- When you click the Timeline, the caption window will disappear. To bring it back, double-click on a caption or select a caption in the Captions panel.
- If you have a sentence that is split between two captions and you would like to make it one, right-click and select Merge with Previous Caption.
- To split a caption, move the CTI to where you want to split the caption and right-click and select Split caption.
- Each series of captions is within a single clip. To add another series of captions, click the Add Caption button again.
- If the default duration for the caption is too short or too long, select change the duration in Preference in the Timing tab.
Another way to manually add captions (Mac):
Mac differs in how you add captions to your project.
- Under Audio Effects, click Captions.
- Ensure that the caption's length is no more than seven seconds and no more than three lines of text based on the Americans with Disabilities Act (ADA).
- Viewers can see their results or Score Quiz.
- See YouTube Video on how to sync captions with script (Windows)
- In Camtasia, select Share > YouTube from the menu and then in the YouTube dialog box sign in and given the project a descriptive name, set the Privacy to Private, and then press the Share button.
- CHECK POINT: Camtasia will upload a copy to YouTube.
- Click the Visit button to go to your YouTube video.
- Click the Video Manager button to see a listing of your videos.
- On the video you like to use, click the Edit button and then select Subtitles and CC.
- In the dialog box that appears, click the Select Language drop down and select a language your language.
- On the next screen that appear wait for the Publish (Automatic) button to show which may take a while and then click on it.
- CHECK POINT: You should see the captions with time codes that got created automatically.
- Click the Action drop down and select .srt from the menu.
- If the browser does not download the file for you automatically, right-click on the file and select Save As…, give the file a name with a .srt extension and then click the Save button. NOTE: After you get this transcript into Camtasia, you can delete it from your YouTube account.
- In Camtasia, right-click or Control-click in Media Bin and select Import Media and then selected the srt file you created earlier.
- CHECK POINT: You should be able to see the Caption track that was added to the timeline.
- Select View > Caption Track from the menu and edit the segments as needed.
- Open your script and select all of it and copy it to the clipboard
- Load a copy of your video to YouTube as explained earlier.
- Select Subtitles & CC from the from the Edit drop down.
- Click the Add New Subtitles or CC and select your target language.
- Click the Transcribe and auto sync button.
- In the Text field paste the text from the clipboard.
- Click the Set Timing
- In the My Draft section, select the option.
- Click the Publish button.
- Click on the newly created file in the Publish page.
- Click the Action drop down and select .srt from the menu.
- If the browser does not download the file for you automatically, right-click on the file and select Save As…, give the file a name with a .srt extension and then click the Save button. NOTE: After you get this transcript into Camtasia, you can delete it from your YouTube account.
- First, ensure that you have narration tracks on the timeline in order for this process to work.
- Click the gear icon at the top of the Caption window and select Speech-to-Text.
- OPTIONAL: Click the links for the three options if you need to
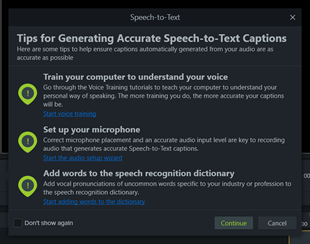
- Click the Continue button in the Speech-to-Text dialog box.
- CHECK POINT: You should see another Speech-to-Text dialog box showing Camtasia preparing audio for transcription and then transcribing the audio to text. NOTE: This method is not perfect. You will have to edit the captions where necessary and add punctuation and capitalization.
- Right-click on audio track and select Insert Track > Above to create a blank track ABOVE the audio track.
- Click the Voice Narration button and select all of the text (CTRL+A), copy it (CTRL+C) and then click back the Captions button, press the Add Caption button and then paste the voice narration (CTRL+V) into the Captions window.
- Click the gear icon at the top of the Captions panel and select Sync captions...
- Follow the instructions in the How to sync your captions dialog box.
- Click the Continue button to play the video and then click on a word that represent the next caption (Most of the time, this will be he start of a new sentence if possible).
- Repeat the process for each caption.
- Select Share > Local File...
- In the Production Wizard dialog box that appears, select Custom Production Settings and then click the Next button.
- In the next window that appears, select MP4 - Smart Player (HTML5) radio button option and then click the Next button.
- In the next window that appears, click the Options tab and then select the Captions checkbox. In the capture type combo, you have three options:
1. Burn in captions.
2. Under video - will make the video larger to accommodate the additional captions.
3. Closed captions - use the most. NOTE: You have to produce the video with a controller under the Controller tab. - On the Mac, you have to select Export as Web Page checked in order to select the Closed Captions.
- To export the caption file so that it can be import in a host service, select the Captions button and then click the gear icon and select Export captions... to save the caption as
1. SubRip Caption File (*.srt) - widely supported
2. SAMI Caption File (*.smi) - Click the Save button
- Import the caption file in a host service (e.g., YouTube)
- On the Mac, select Share... > Export Captions... from the main menu select a output type and then click the Export button.
The second way to add captions (Mac):
You can also let YouTube transcribe your video for you. While this is not perfect, it will give you a excellent starting point:
Another way of creating a srt file is to use a script file and YouTube:
Yet another way to add CC is to use the Speech to Text option. Modify > Caption > Apply Speech to Talk to add CC to an already published YouTube video or a video with that already has voice narration.
Another way is to use your narration script and sync your caption to it.
How to export caption to be used by hosting services (e.g., YouTube) or burn-in caption: