TechSmith Camtasia
Create and edit high-quality videos with a simplified editor, drag-and-drop effects, and helpful video assets.
What's New
Major changes to Camtasia:
Camtasia 2021:
- 75+ New Transitions
- Emphasize
- Audio Effect
- Motion Blur Effect
- Corner Rounding Effect
- Media Matte Effect
- Proxy Media Editing
- Quick Property Editor
- Standalone Projects
Camtasia 2020:
- Pre-Built Video
- Templates
- Create/Share Video Templates
- Magnetic Tracks
- Favorites
- Presets
- Camtasia Packages
- Track Mattes
- Improved Recorder Settings
- New Library – Save frequently used assets, effects, and media.
- Theming – Create themes with colors and fonts and apply to assets and effects.
- Additional customizable and stock video assets.
- 60 fps video import, editing, and production.
- Editor performance improvements for preview playback and timeline edits.
- Production engine improvements for faster export.
- New Behaviors (Explode and Fly In).
Camtasia 9 (PC) and Camtasia 3 (Mac):
- Behaviors
- Cinematic transitions
- Voice Narration
- New UI
- Ability to share files between Mac and PC
- 64-bit engine
- Automatically add easing to animations
- Zoom and Pan made easy
- Audio editing control by right-clicking on timeline
- Group multiple clips
- Detached canvas
- Add Interactive Quiz to timeline or media clip
Installation
Follow the steps below to install Camtasia:
Mac:
- Go to https://www.techsmith.com/ and download Camtasia to your desktop.
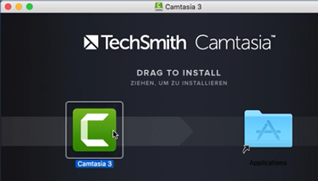
- Double-click on the disk image (Camtasia_2.dmg) to open the installer.
- Read the License agreement and then press the Agree button.
- Drag-and-drop the green Camtasia icon upon the Application folder alias to copy it to the Application folder.
- Double-click on the Application folder alias to go to that folder and then drag-and-drop the Camtasia icon to the dock for easy access and then close all open windows.
- Back in the dock, click the Camtasia icon to launch Camtasia.
- In the dialog box that appears, click the Open button.
- In the registration screen, enter the Activation key if you have one or click the Continue Trial button if you don’t.
PC:
- Go to https://www.techsmith.com/ and download Camtasia to your desktop.
- Double-click to open the installer.
- Read the License agreement and then press the Agree button.
- In the dialog box that appears, click the Open button.
- In the registration screen, enter the Activation key if you have one or click the Continue Trial button if you don’t.
Process Steps
Steps in creating a great training video:
- Create Brief Outline
WHY: To determine the WHO, WHAT, WHY of your project. (e.g., duration) - Create Script.
TIP: Spent a lot of time creating a great script. The more effective the script the easier the rest of the production will be. Once you have DEFINED a script, do a trial run through the script and then REFINE it as needed. You don't need a script for non-public informal content.
WHY: To avoid rambling. It will also help you to figure out what assets you need and streamline the process. - Create Storyboard
WHY: Well, to tell a story. It could simply be an outline of what you want to convey.
TIP: You can use PowerPoint or Word to create your storyboard complete with images and text narration - Gather or create assets (images, audio, B-rolls), if necessary.
WHY: This will help you create the correct size of assets needed for video. - Perform several trial runs of script with application (e.g., Photoshop).
WHY: This will help you to not fumble around when you create the video. - Create audio narration (voice over)
WHY: To give “voice” to your video. - (Optional) Edit voice over in another app (e.g., Audition), if necessary.
WHY: To remove mistakes, excessive silence, normalized volume level, etc. - Capture videos with Camtasia or Import Footage
WHY: To record screen or import existing video and audio files (e.g., mp4, avi, mov, or wmv, etc.) - Edit video
WHY: This is used to remove mistakes, etc. - Sync voice over with videos.
WHY: To align voice over with video. - (Optional) Add Special Effects
- Annotations (e.g., callouts, etc.)
- Transitions between topic
- Create and add B-rolls where appropriate
- Add Smart Zoom for dialog boxes, etc.
- Add Cursor and keystrokes, if necessary
WHY: To enhance video to make is easier to understand and show transitions between sections.
- (Optional) Add intro and/or outro to video.
WHY: To add a nice opening and closing to your video. - (Optional) Add Closed Captions
WHY: To add Closed Captions (CC) for the hearing-impaired users. - (Optional) Add Quiz questions, if appropriate.
WHY: To make your video interactive to engage users - Publish a local copy of video or upload to Youtube, Vimeo, Facebook, GoogleDrive, or Screencast.com. Or, create single-frame screenshots, animated gifs, or audio only version of project.
WHY: To showcase your beautiful video.